
Hello all!
My, how the world has changed since I last posted…
What with one thing and another, this post has taken rather longer to finish than I had originally planned for. It was originally scheduled for release in March, but as world events continued to escalate, it was hard to know exactly how to word things- it seemed as though no sooner had I edited through my writing, the situation had changed once more!
Now, though, as we live through another week of lockdown, as everyone continues to take every measure they can to protect those around them in their own way, as non-essential travel is still very much off the table… I’ve found a new way to write this post, about a project so exciting I could barely contain myself when I was told about it. Here it is:
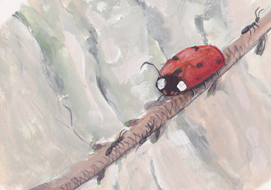
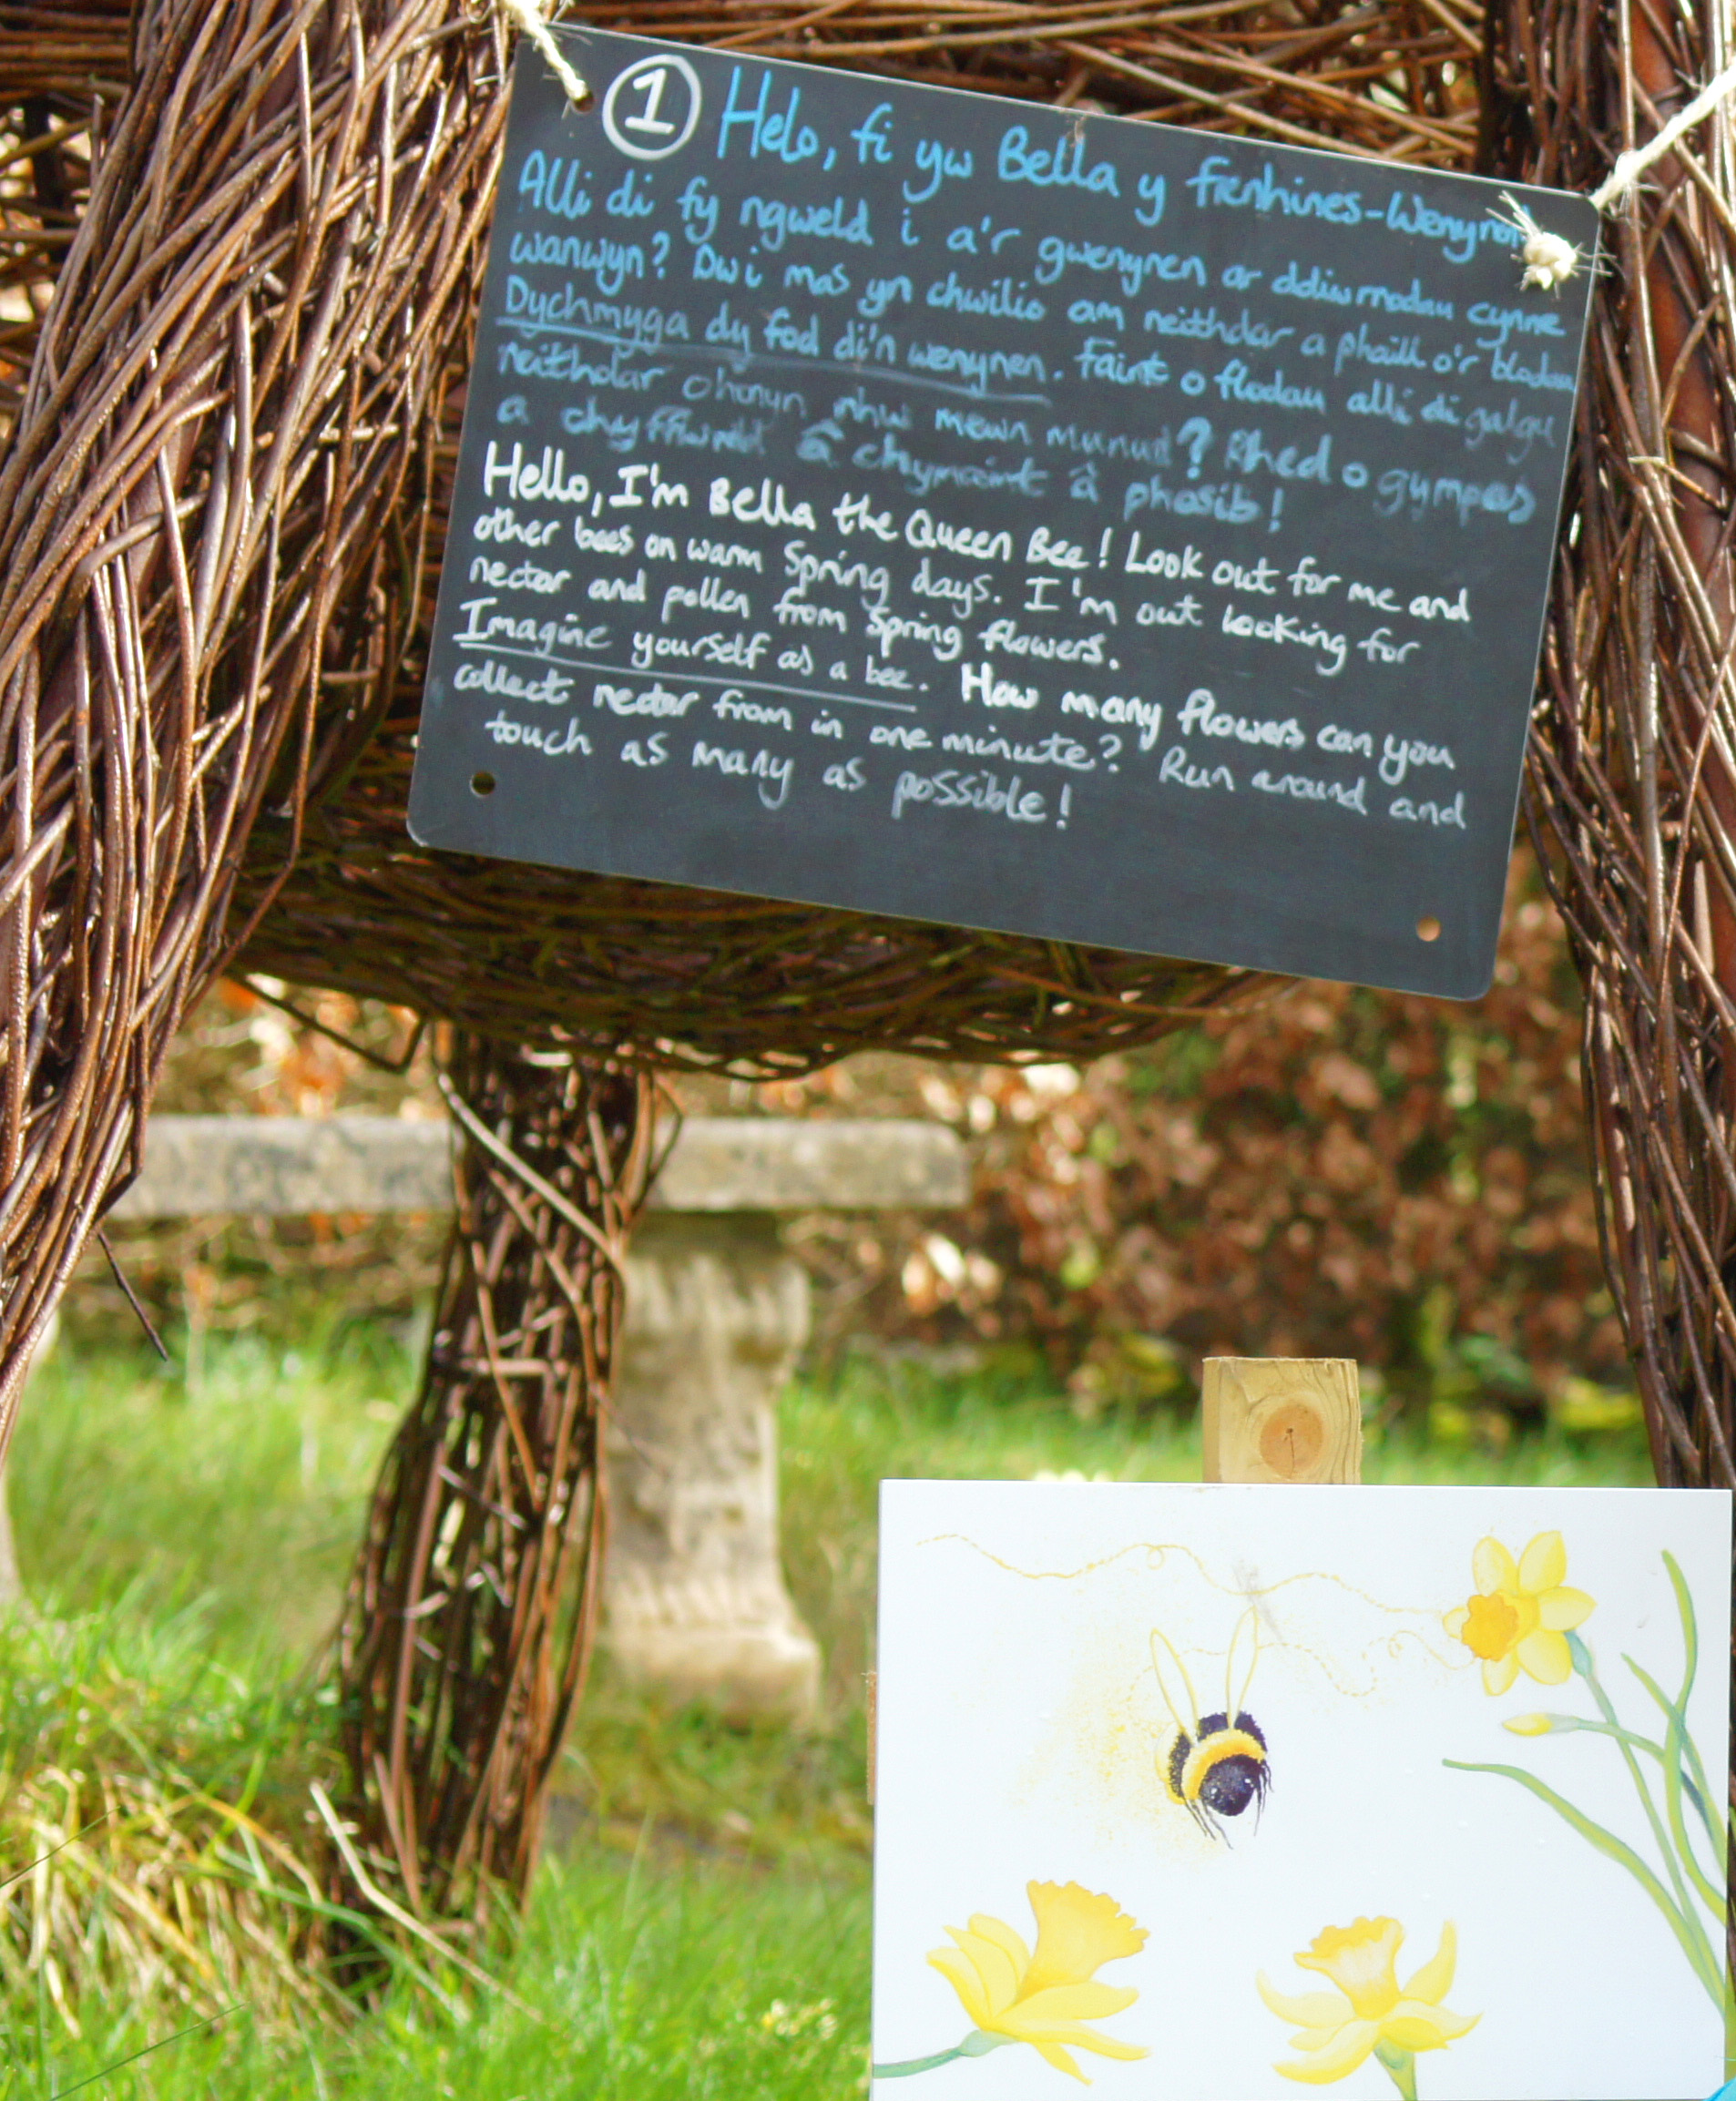
Back in mid January, I was approached by a friend of mine, Kate, who works for the National Trust. She is the Membership and Visitor Welcome Supervisor for Colby Woodland Garden in Pembrokeshire, and she was writing a visitor trail. It was all about the wildlife that can be found around the site as the Spring season begins to flourish, and she asked if I might be interested in creating the artwork for it; five animal character designs, to be printed onto foam boards and put up around the site, ready and awaiting discovery by the public walking the trail.
“YES!!!!!!!” I replied.
Delivery of artwork in early February, with the trail going up soon after. More perfect than perfect- an ideal commission, and for a dream client! Along with the artwork, I started some early plans for this blog post, to encourage every single person who has ever shown interest in the National Trust or my artwork, to go to Colby Woodland Garden- to support them, to support me, to celebrate beautiful green spaces and Spring in all its glory- and to VISIT THE TRAIL AND ENJOY IT AS MUCH AS I ENJOYED CREATING THE ARTWORK FOR IT!!
But as we’ve all experienced recently, there are some things just a bit bigger than us that come along sometimes, and slightly gobble up our plans with a satisfied burp of “Nope, I don’t think so!” None of us can go and visit at the moment, and it’s a huge, huge shame. BUT.
The trail will be going up again next Spring (dates tbc) – and I thought that as well as writing all about the process of creation behind the project as I had originally planned to, I could also include a mini “trail” of the artworks to be enjoyed from the comfort of your own home- using some of the photos which I took when I was lucky enough to go and visit before the social distancing and lockdown measures had been brought into effect. Not spoiling too much, of course- you’ll still have to go looking for them when you go next year!
So, in the spirit of positivity and generosity, and in the name of Spring- here is a complete writeup of my work on the “Step Into Spring” trail and a sneaky peek of what to look forward to next year!
First: Initial sketches and composition ideas!
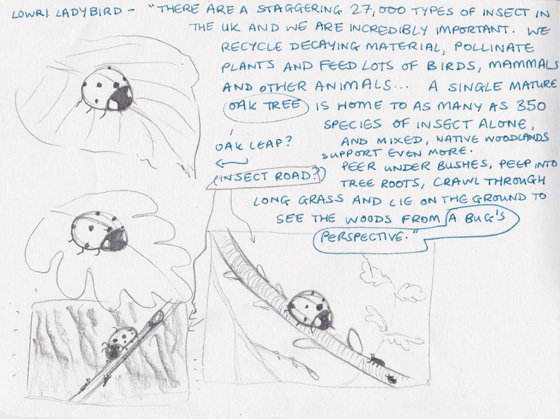
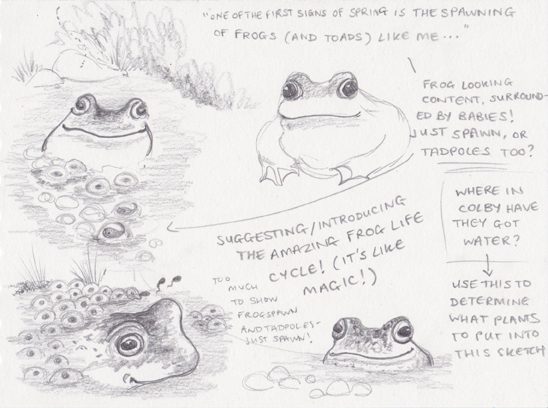
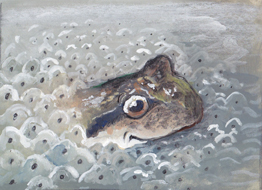
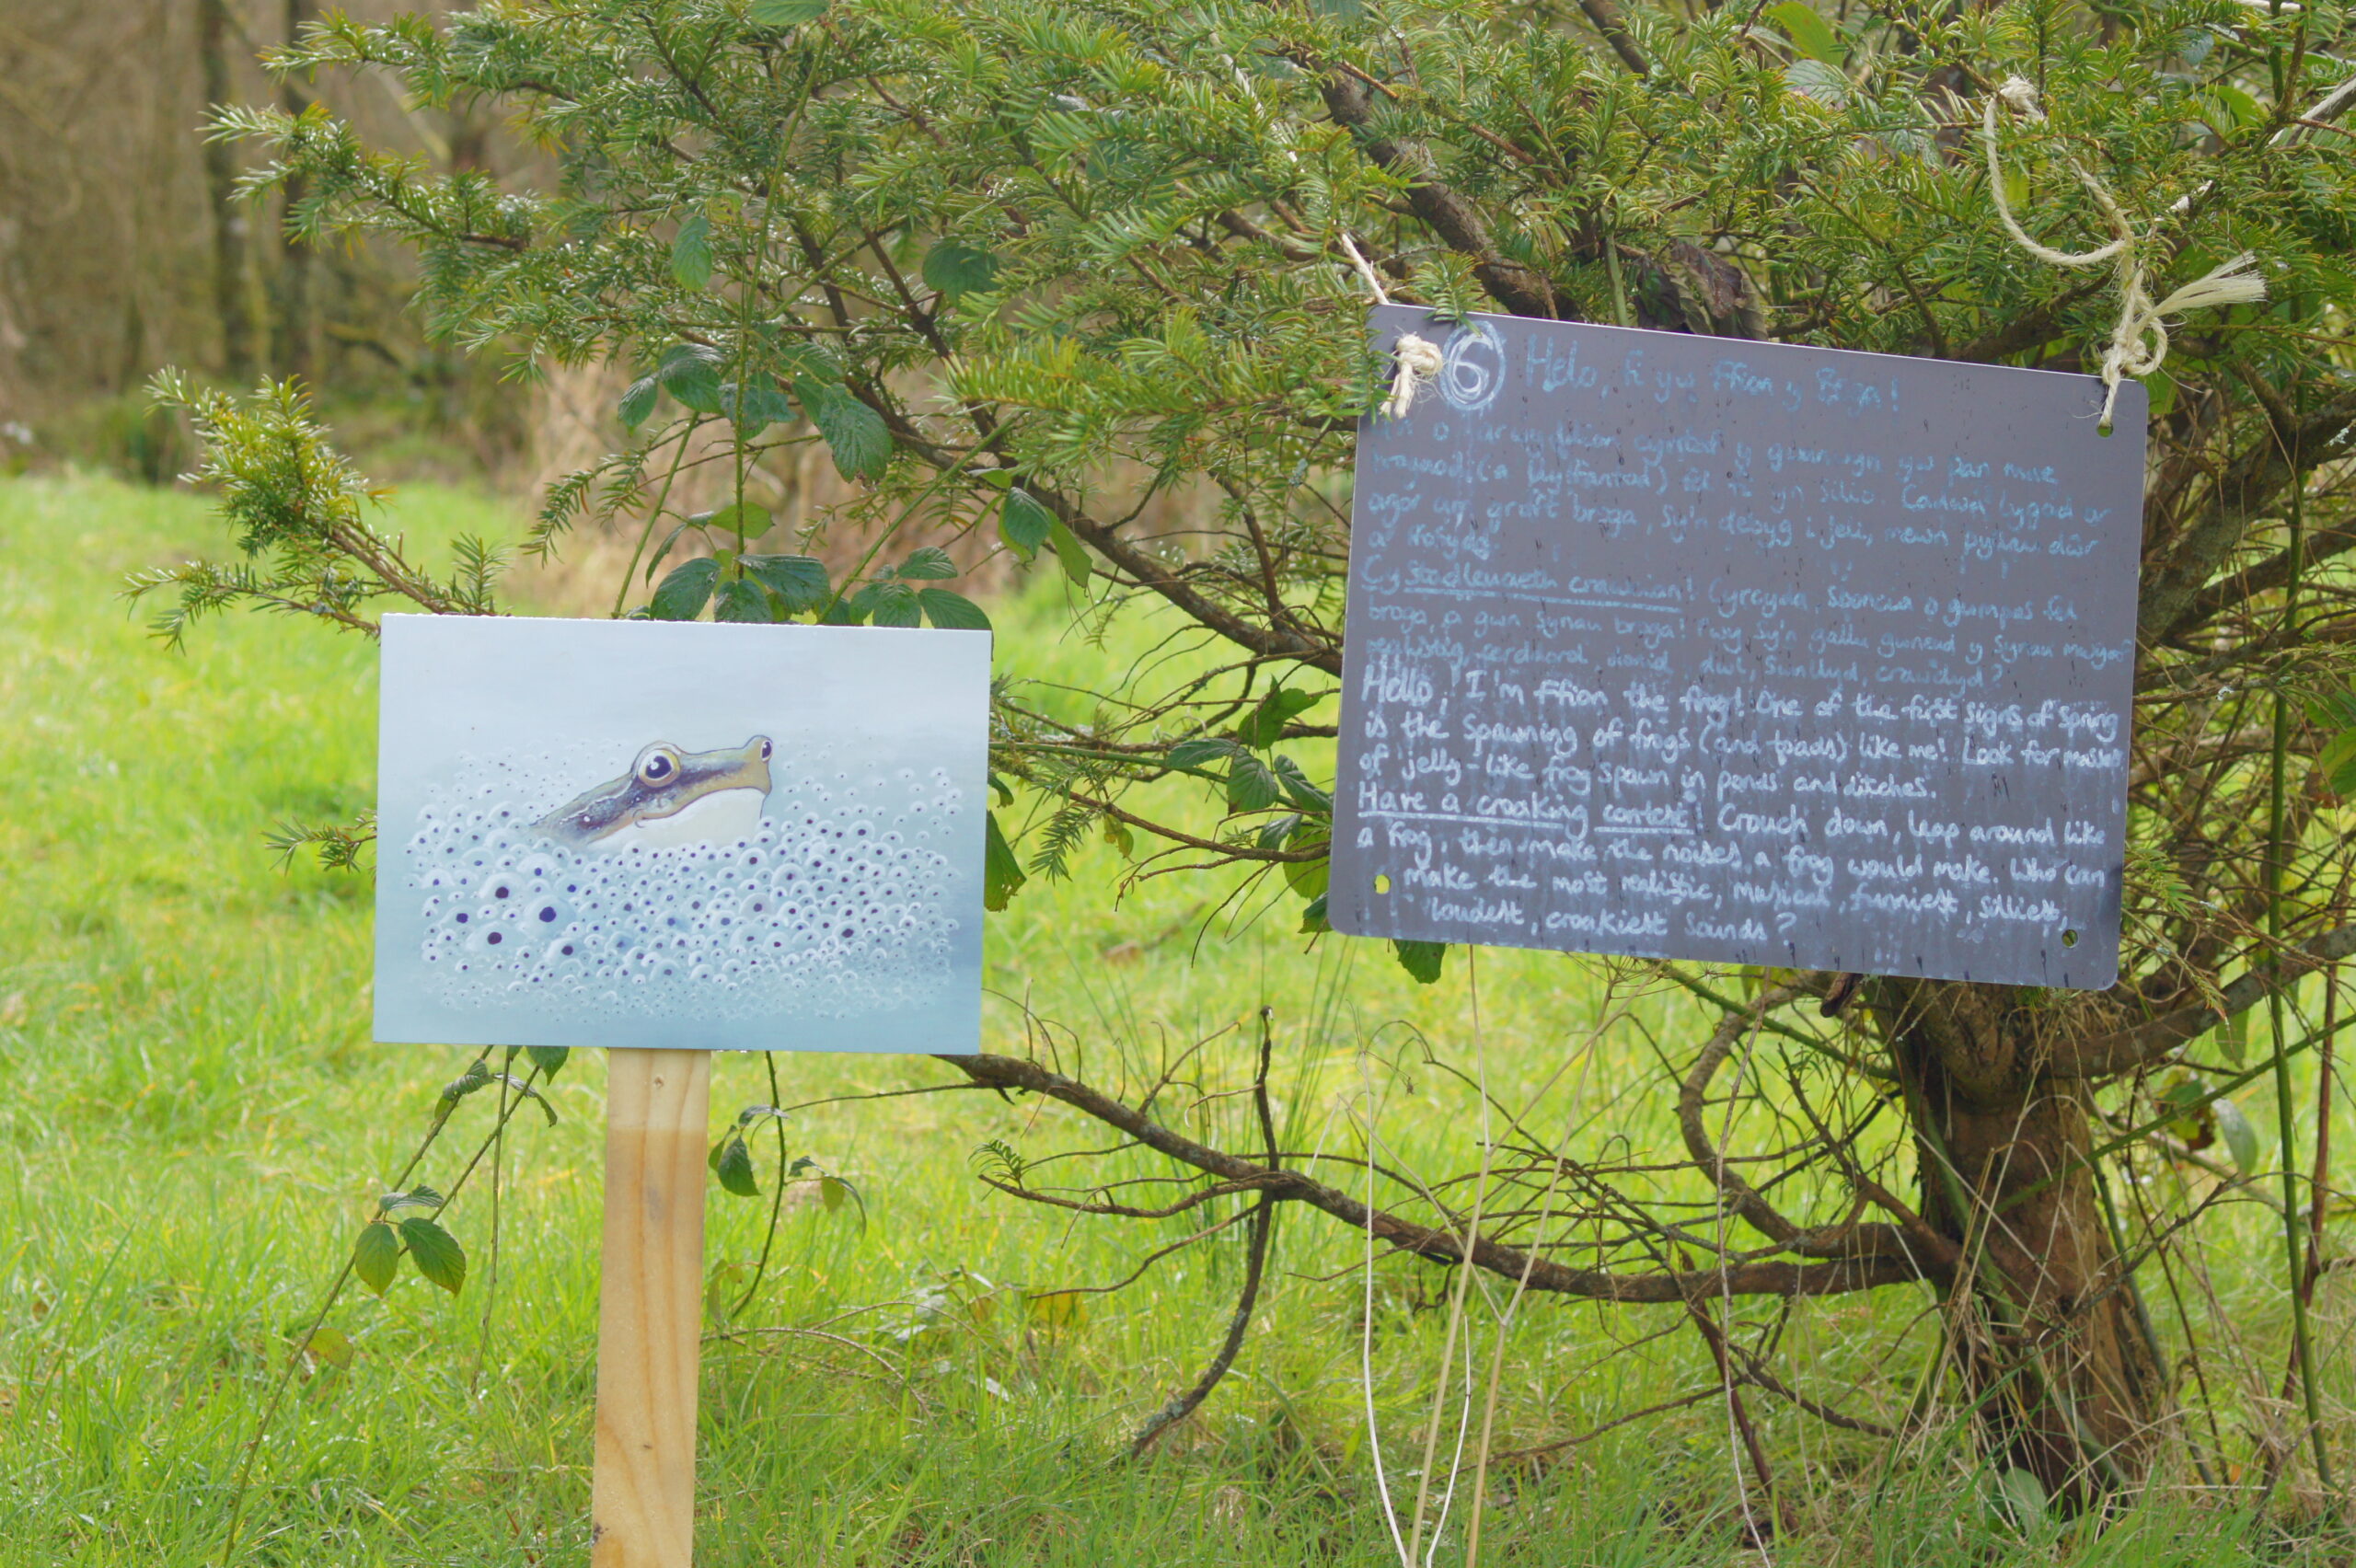
When I had the first draft of the trail arrive in my inbox, I couldn’t wait to get started! The first thing to launch into was lots of research into and plenty of drawing of the stars of the show- the animals which call Colby home! I was very lucky really- some of the signs of Spring were already beginning to unfold as I was beginning this project, so I was lucky enough to get plenty of real life observations to go alongside my research from books and the web! (Including a sighting of some early frogspawn: more on that later!!)
In this first draft, I received some information about which five animals would be featured- some facts about them, and an idea about an activity for each spot relating to the animal itself. As text and image should always work in harmony with each other, I started marking off sections of Kate’s writing which I wanted to focus on in the development of these characters in the very first sketches I made. How could I include a little bit of each animal’s magic, what makes each so special?
I should mention at this point- before all of this, we had also talked money. I had an idea of the budgets we were working with, and an idea of how long I had to complete the project, which was needed to work out a price estimate. It’s always good practice to be able to have an open conversation about the financial side of things before starting anything else, it just allows both client and artist to be on the same page and know a bit more about what to expect! It’s handy to be able to keep each step of this in writing too- signed documents of each stage of the process (quotations, agreements/contracts) can again be very helpful ways to ensure both parties are completely happy with what they’ll be receiving/giving away!!
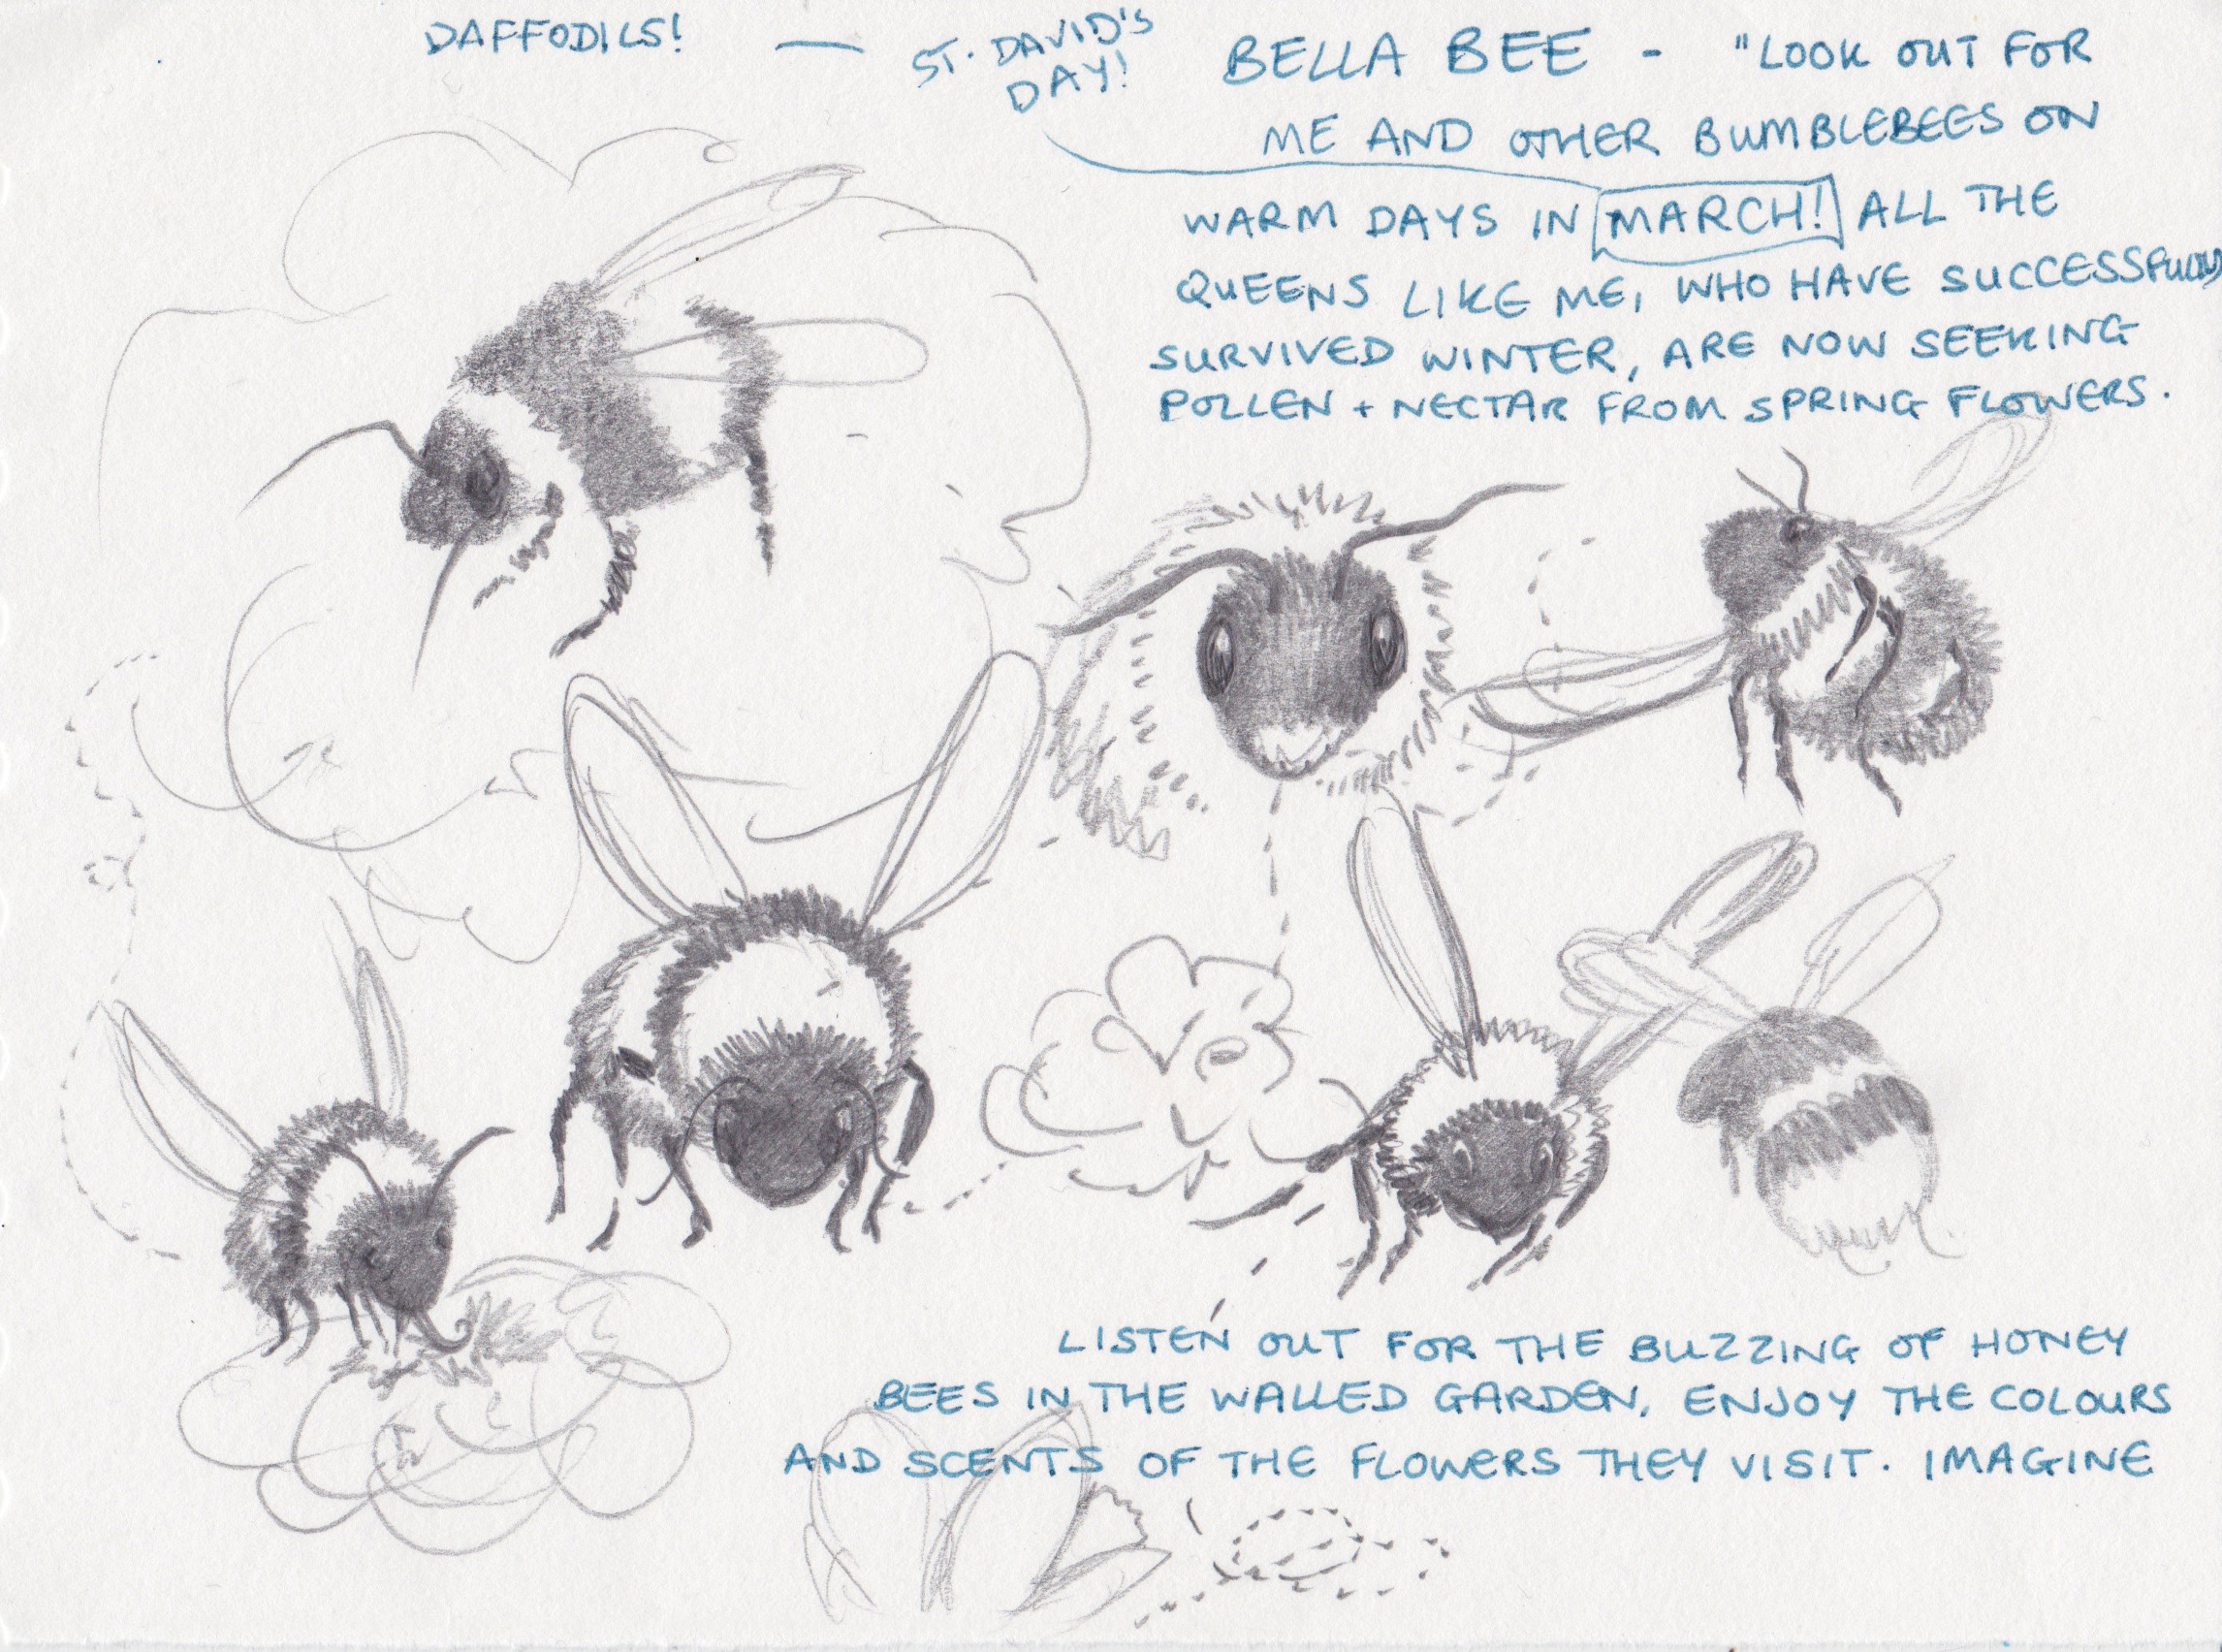
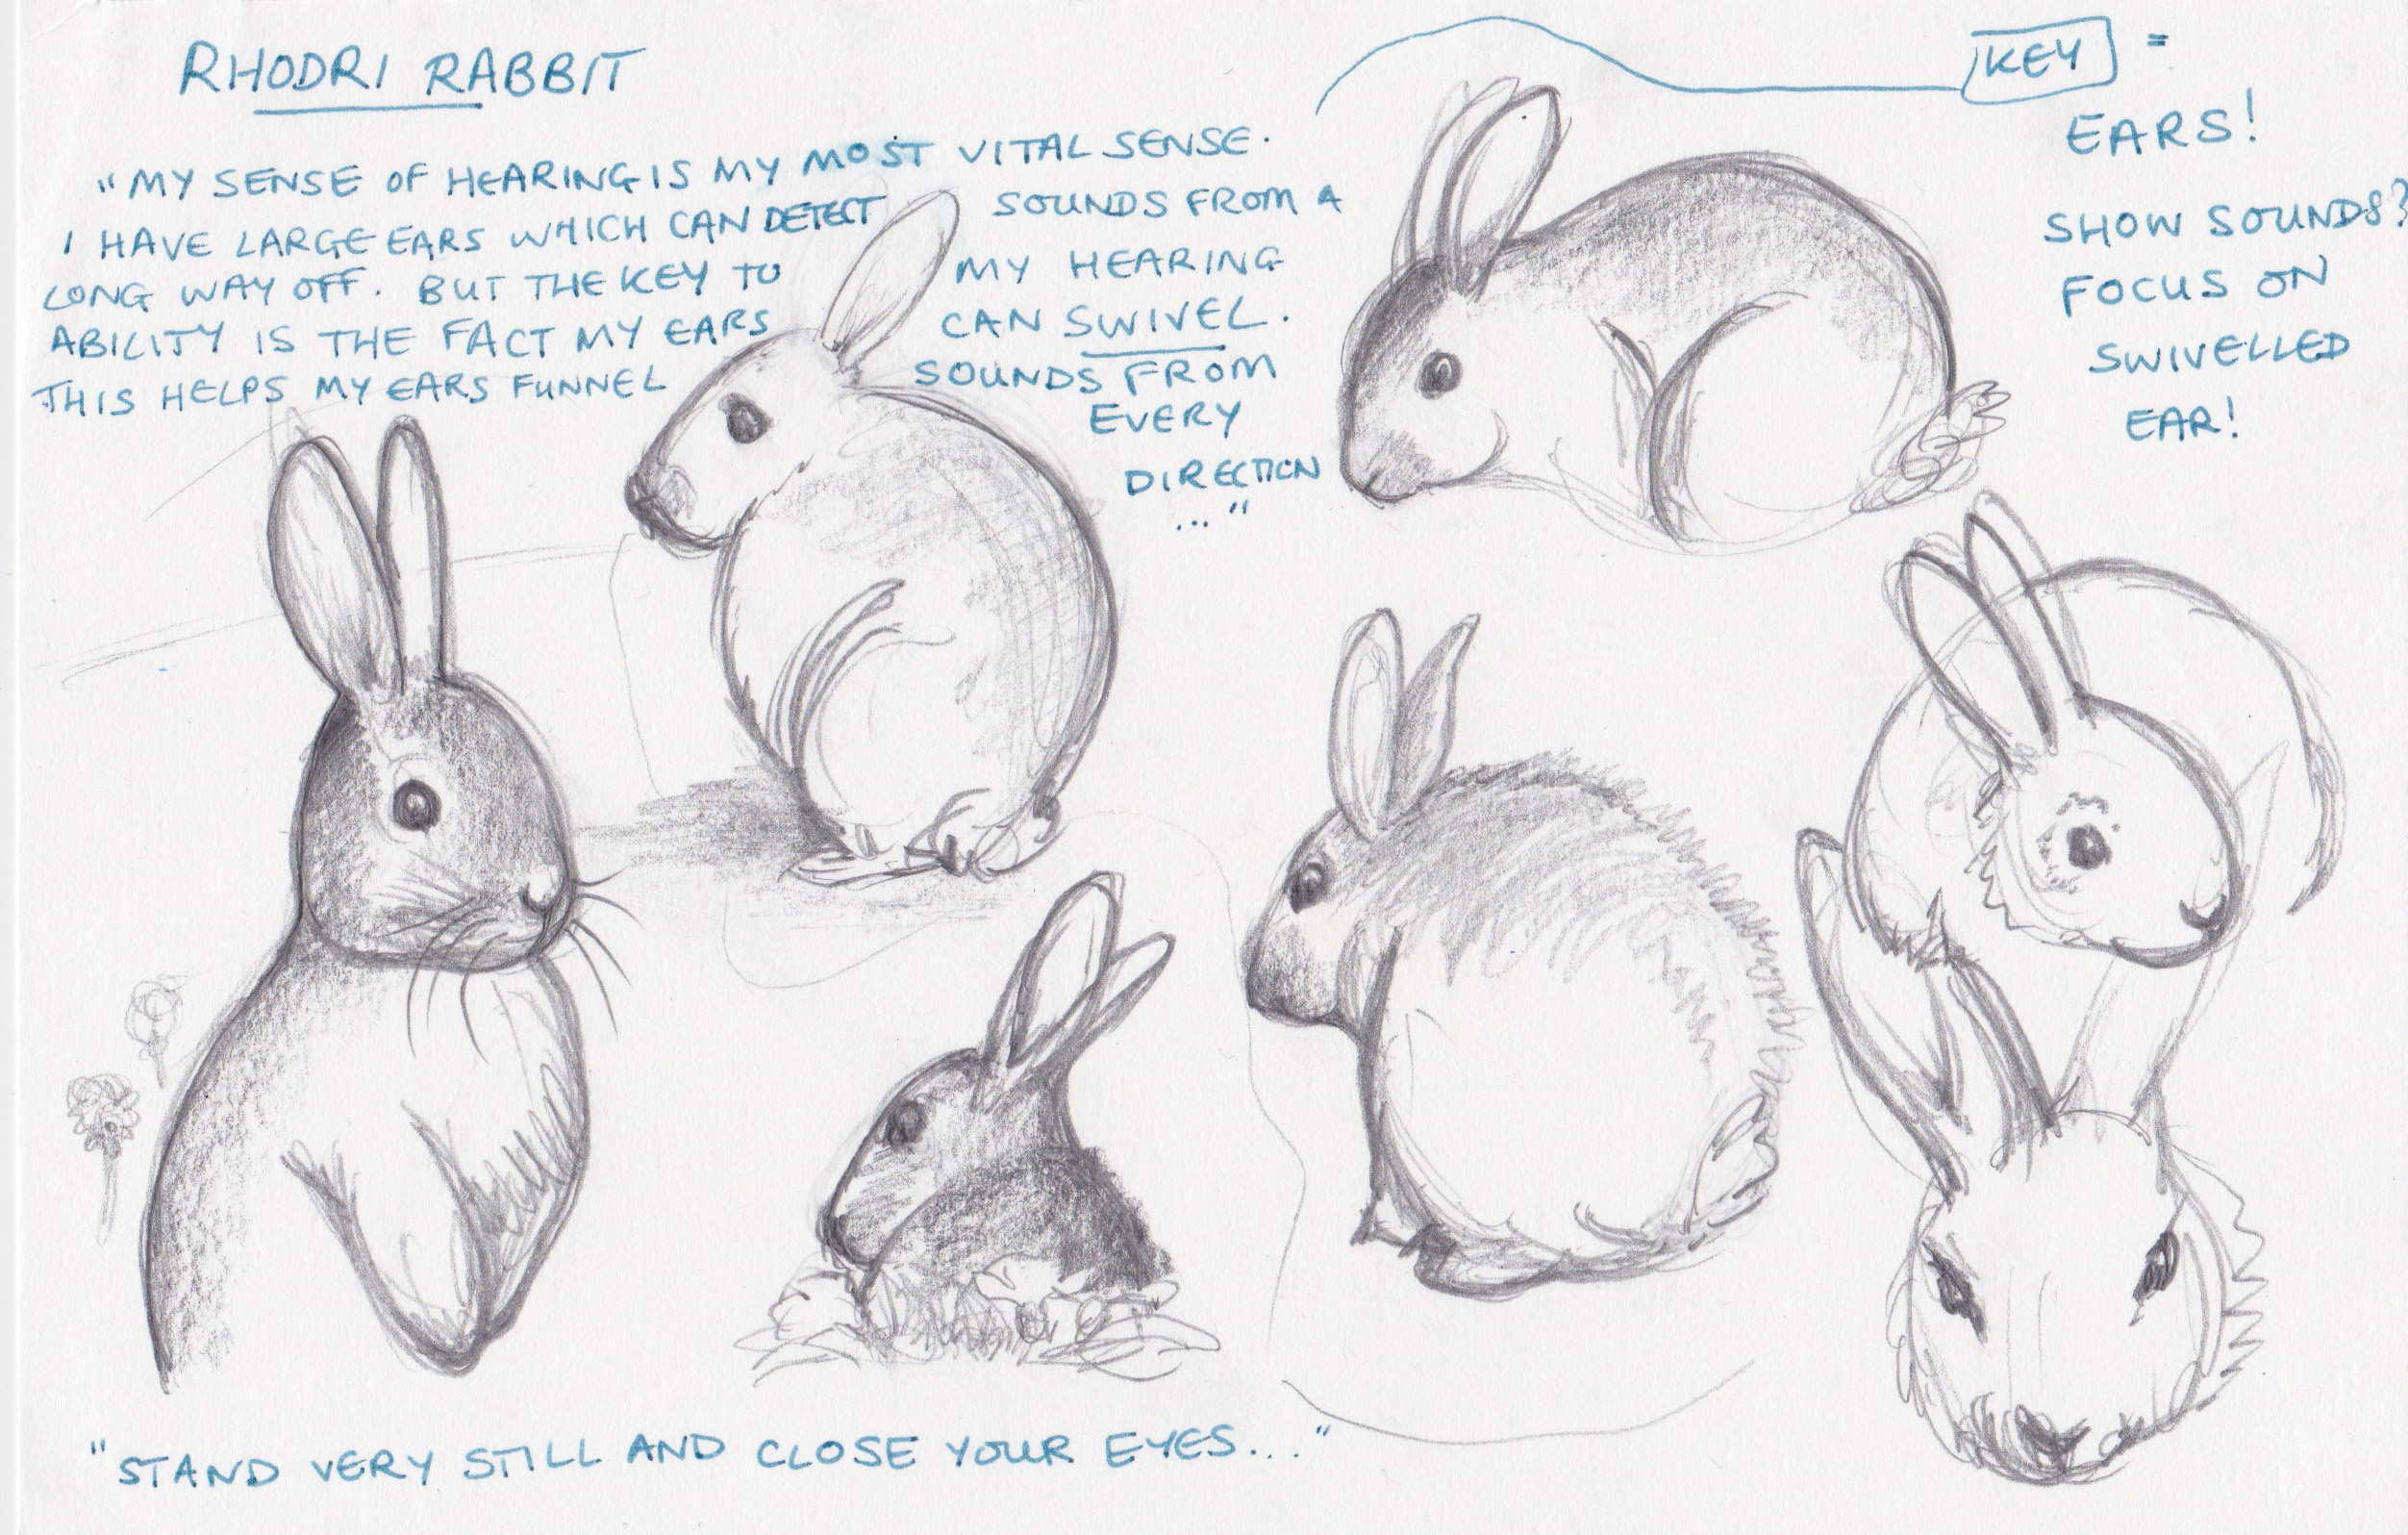
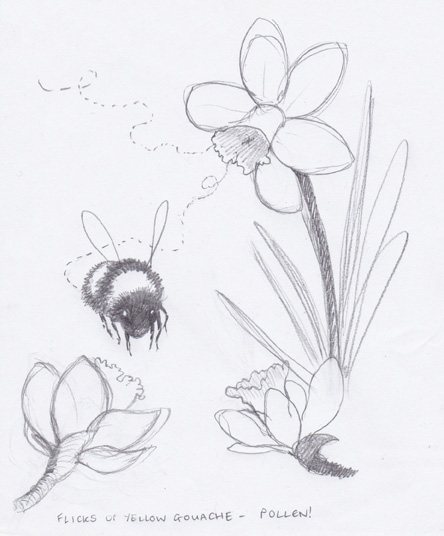
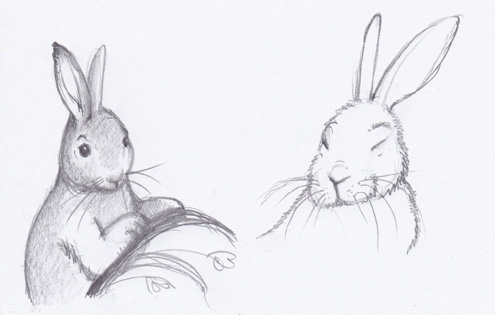
Initial sketches- searching through photos, books and anything I could get my hands on that could tell me a little about the animals in question. Angles, ideas for background/middle/foreground – where would the characters be placed, and what would they be surrounded by/sitting on/interacting with?
After a few days of furious scribbling, I scanned and sent off these pages of initial sketches ready for us to discuss, along with some first thoughts about composition. What to include in terms of background and foreground elements and objects (what flowers, grasses, trees can actually be found at the site?) and positioning of the animals in the final artworks. Are they busy? Still? A bit chaotic? Where would they be displayed in the final trail?
Early compositional ideas, also sent along with the initial sketches.
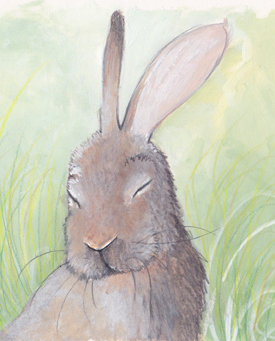
^ I chose these two contrasting examples to describe what I mean about composition here. In the initial sketches, when I was marking out key language that could help me illustrate what makes these five animals so special, I really stuck on the “buzzing” of bees, and the ability of a rabbit to swivel its ears to optimise its excellent hearing. When you watch a bee, it never stops- it’s either bumbling through the air on a mission, or wriggling about in a flower on a gathering expedition. When you watch a wild rabbit on the other hand, how often have you seen it freeze, focusing its every attention on something you feel like you can’t perceive yourself? The never-ending list of jobs a bee has to get through before the day is out; the crystal-clear hearing that a rabbit focuses every attention on as time seems to stop- those are two of the details that I chose to focus on for these characters.
Next: Mockups, and exploring colour!
After a brief discussion about the initial sketches and composition ideas, I made some notes about both of our comments to pop next to each set of sketches, for easy reference at the next stage of development: roughs! (Post-its come in really handy for this!)
I started exploring colour as early I could, using a series of mini paintings- trying to be as realistic as I could, while also having a bit of an experiment with which colours I could make more vivid- to stand out among the leaves, grass and trees along the trail! As I mixed colours, I surrounded each mini painting with little swatch samples as reference for later.
I must pay a little homage here- a wonderful artist called Hilary Kington I had the pleasure of doing an art show with a couple of years ago inspired me to start including colours next to my work like this. She painted the colours she had used in beautiful little pristine blocks around the edge of her paintings (much, much neater than I do!) – one of her projects I absolutely fell in love with, and bought a book of, can be found here! Thankyou, Hilary, for inspiring me so much!
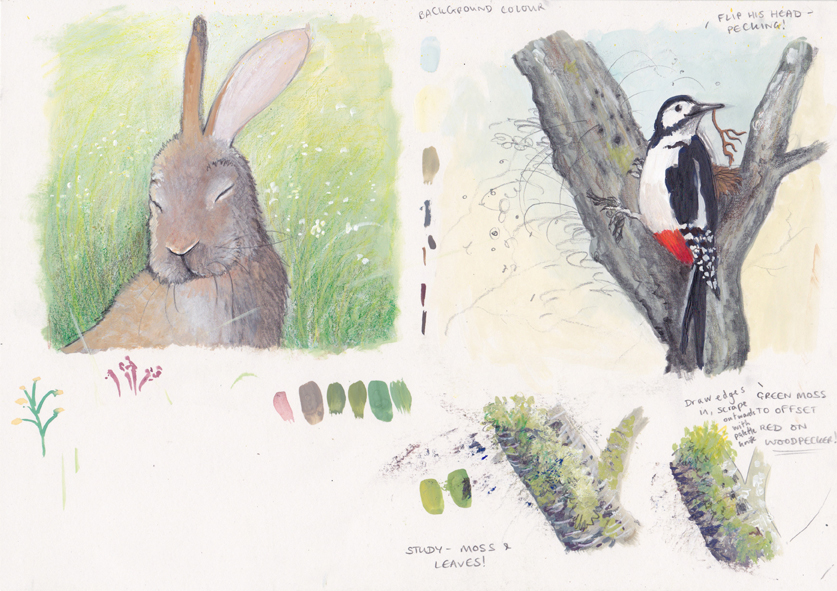
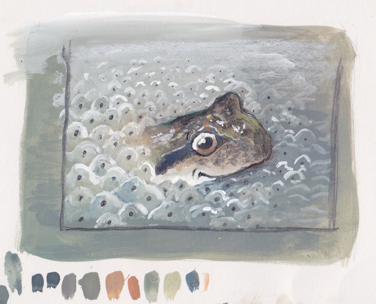
Some colour and experiments. What plants and flowers to include, and of which colours? Bark and moss exploration with a palette knife and coloured pencil, the jelly-like shine of frogspawn!
This was also the time to start playing about with some of the other details- texture, (like in the tree bark and moss studies above) highlights and shadows- how they can put focus on one thing and draw it away from another. This is where I really started to have a bit of fun with my frogspawn photos I previously mentioned!
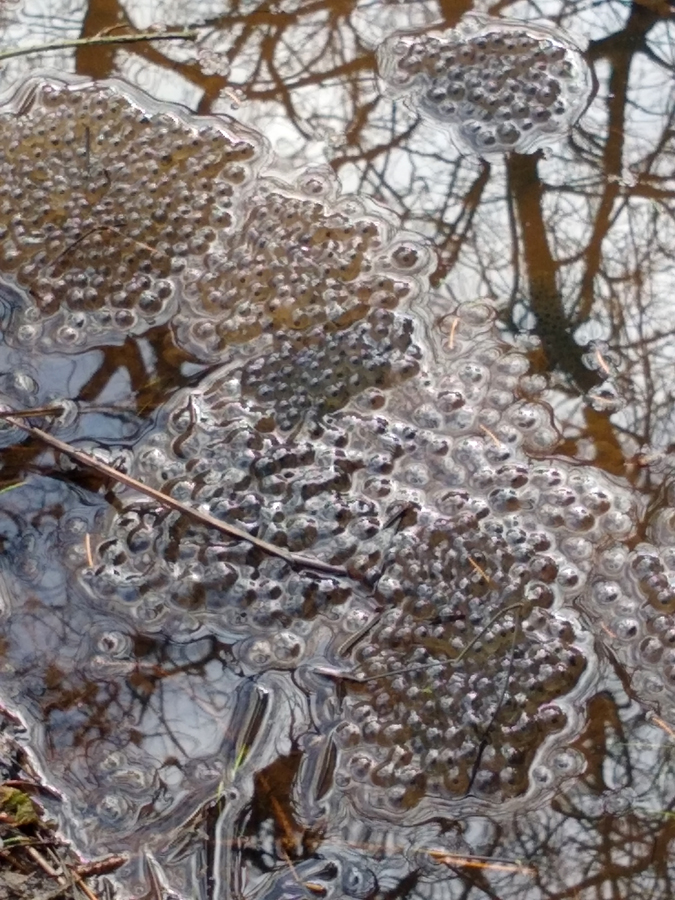
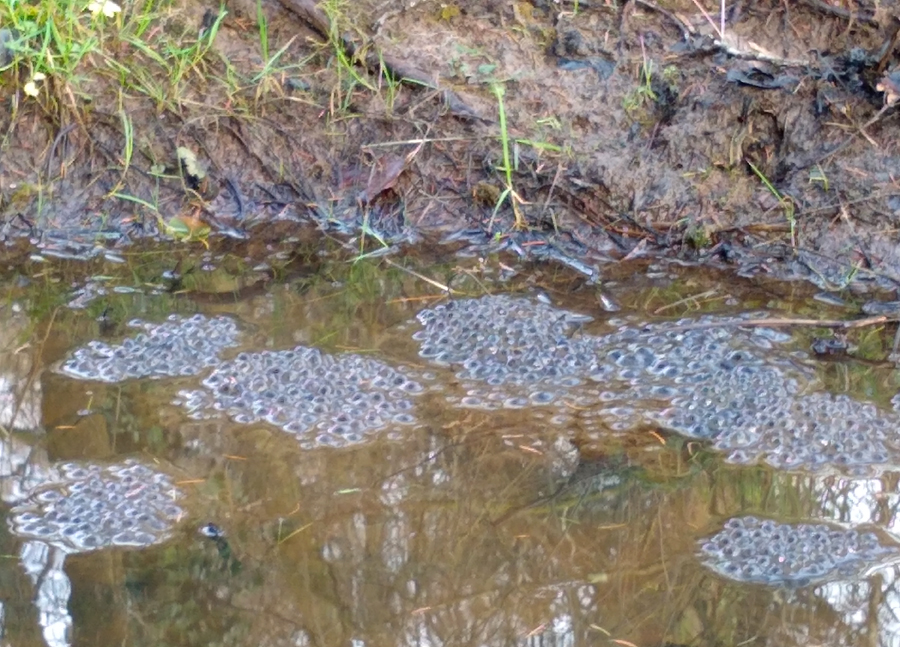
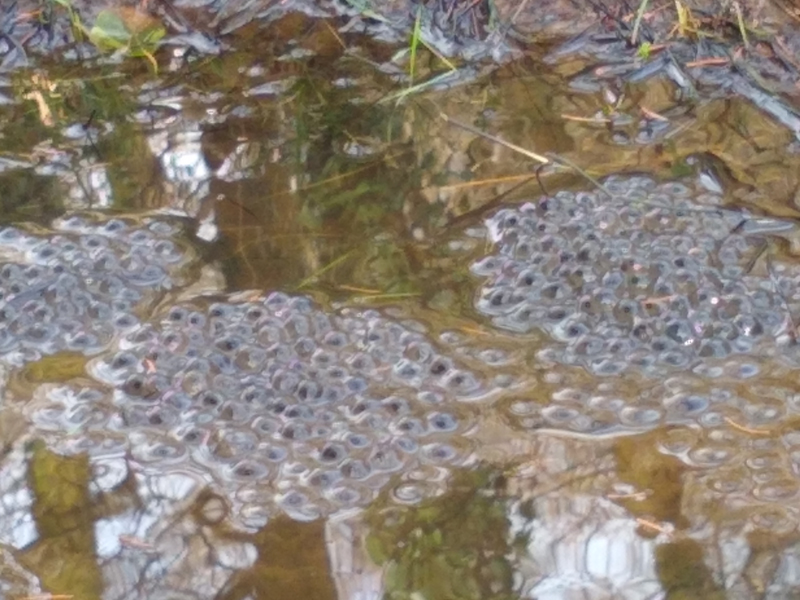
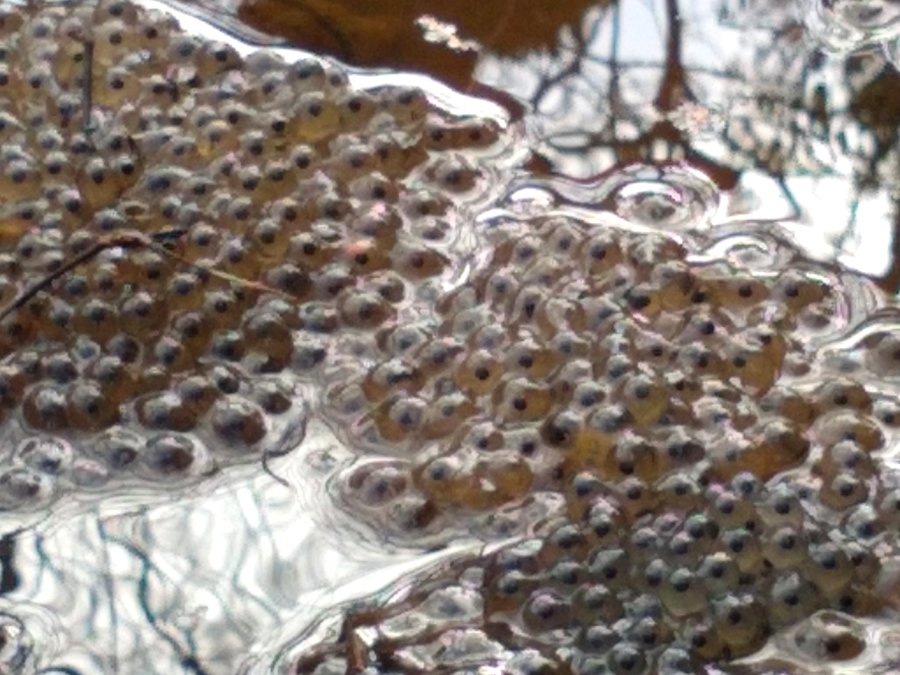
Frogspawn in the woods! I made sure to do a couple of little painting experiments of these later that day, so the memory was still fresh. Reference photos are very helpful, but can never replace something you’ve seen with your own two eyes- a tip from my fantastic uni lecturers!
After a few days, again, it was time for another update. Below are the roughs which I sent to Kate- this time to share with some of her colleagues too!
Colour roughs- a taster of what the colour schemes and compositions for the final artworks could look like. Ready for another share, and another critique- what is working? What needs to be changed for the final paintings?
Finally: Final Artworks, and making some print-ready files!
With the final deadline looming, after one more flurry of discussing possible alterations/improvements, it was time to get started on the final artworks.
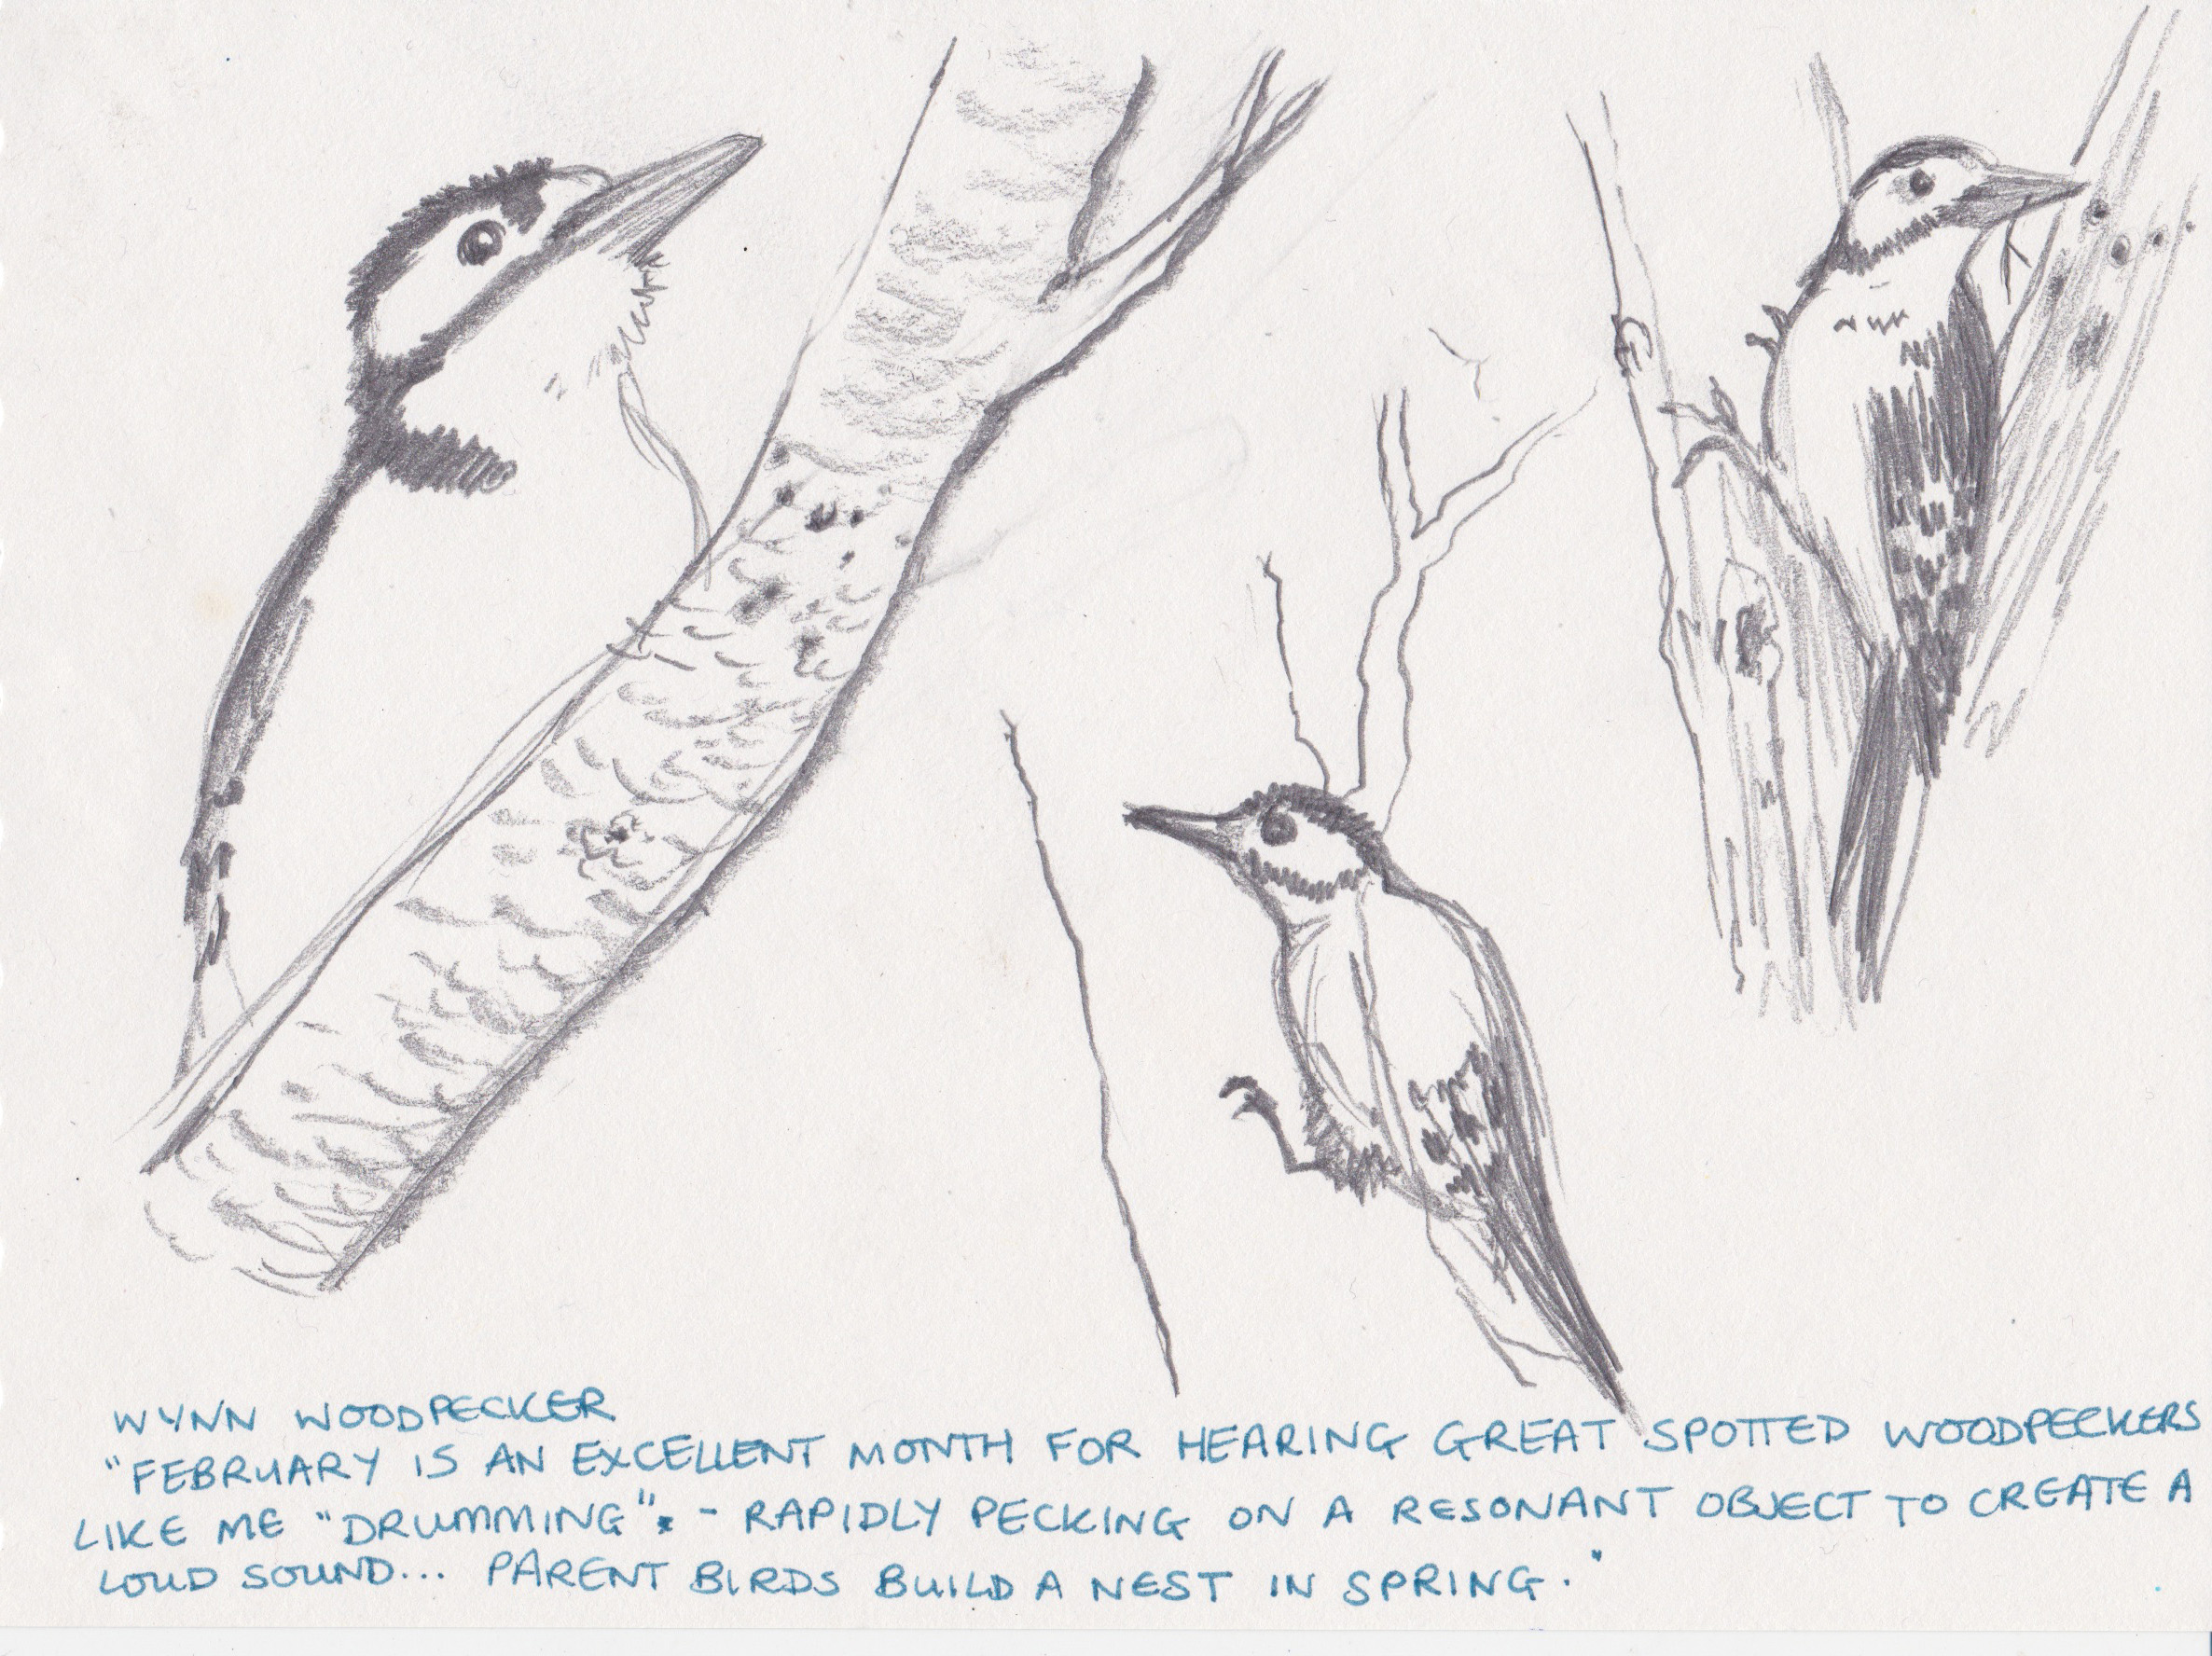
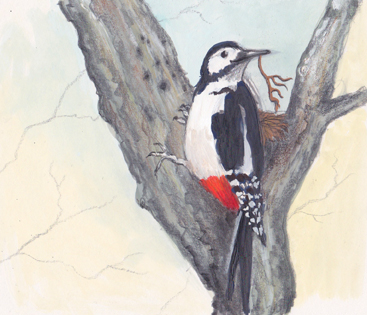
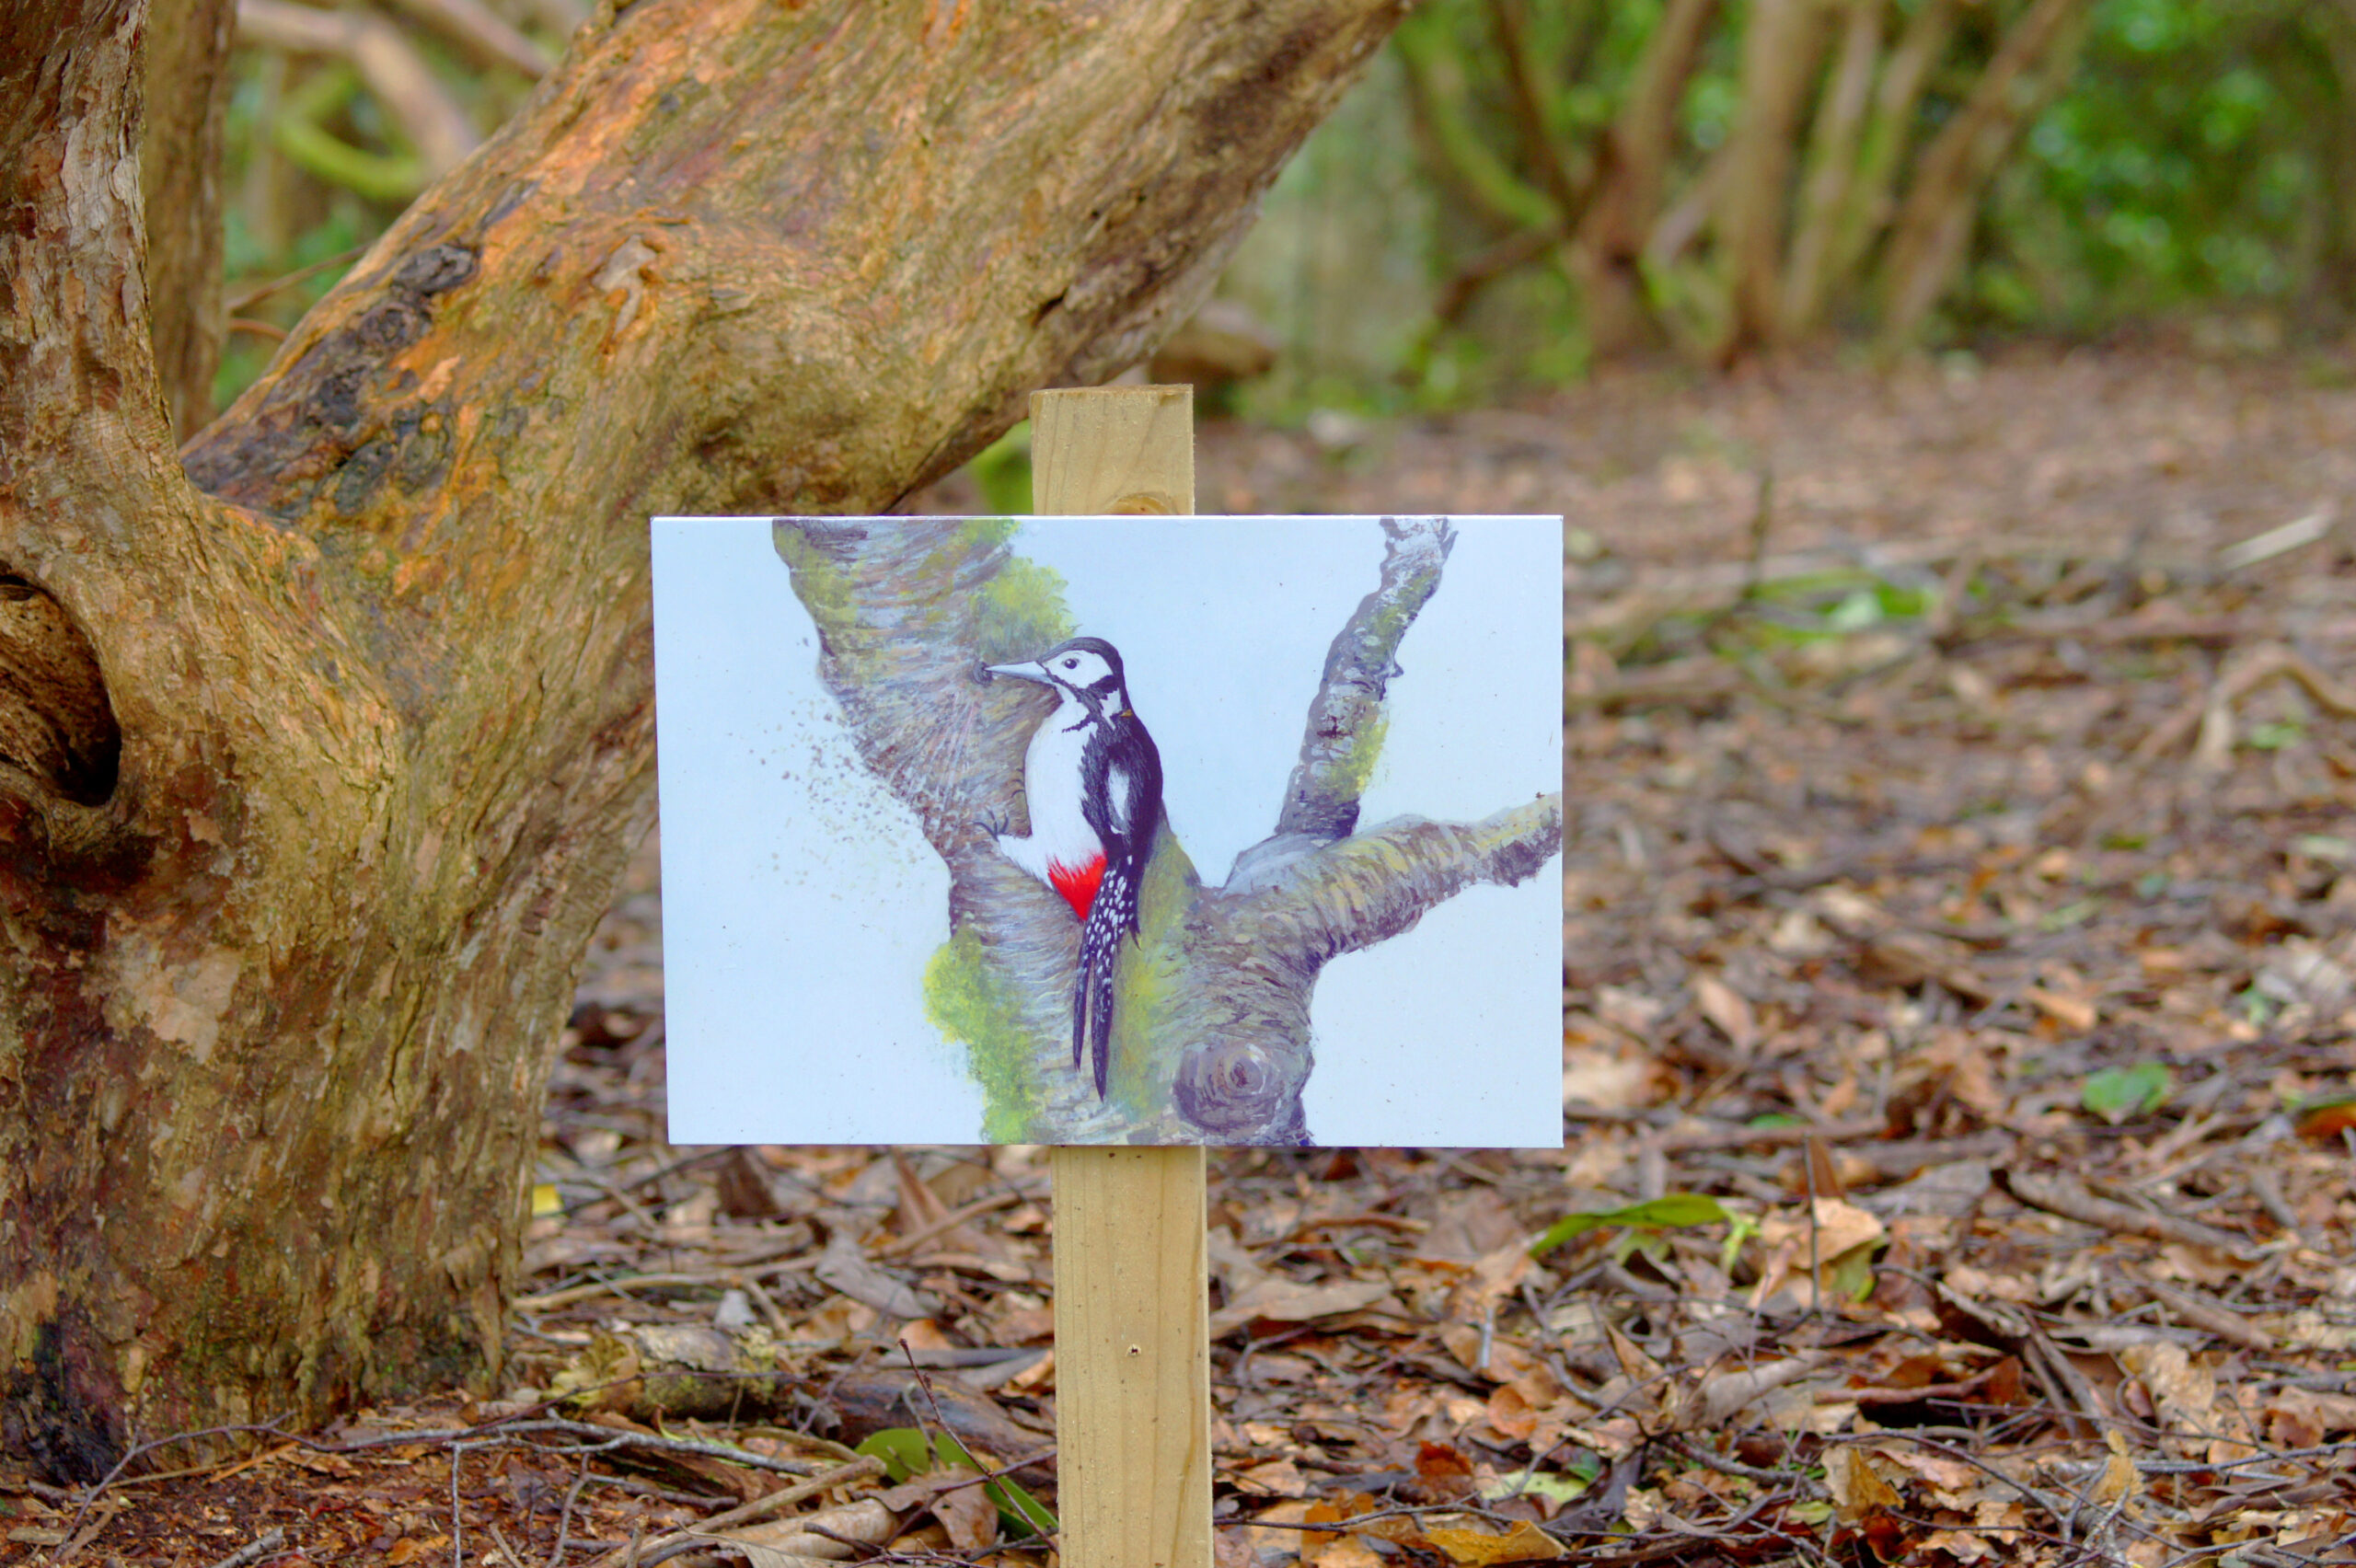
As with any project I complete, the majority of the work is done traditionally using paint and pencils before scanning it all in to make any last adjustments on the computer. At this point, as I started to sketch out the rough outlines of each of the final pieces, making little drawings on paper placed around what would become the final painting (on thin board) to work out any niggles or problems I still had. While drawing out the ultimate version of the woodpecker (Wynn!) for example, K and I both agreed that he looked a little too restful for a bird who is known for “drumming” on trees (making a loud noise and a spray of wood shavings!) I worked at repositioning him, and reworking his composition to be altogether slightly more chaotic.
Of course, with this particular project, things didn’t end with the finished paintings. They had to be made into files that the printing company could translate from the computer onto foam boards, ready to be arranged around Colby for the final trail! I’ll try to keep it brief as talking about file types and bleeds can get a little dry, but here are some of the final steps I took to make things print-ready! (More info on mistakes to avoid when it comes to print can be found all over the web, but these two articles are particularly good: https://www.justdigitalprint.co.uk/tips-guidance-setting-artwork-print/ https://99designs.co.uk/blog/tips/print-file-mistakes-to-avoid/)
I was lucky enough to go to a one-day “Professional Development for Children’s Book Illustrators” event run by the lovely ladies of Orange Beak (a studio who offer portfolio surgeries, workshops and more to support illustrators) back at the very beginning of February. One of the speakers, an illustrator called Maisie Paradise-Shearring, gave some absolutely stellar advice when it came to setting up files and documents in preparation for final artwork, from someone who is “terrible at maths” (me too, Maisie, me too!) Before even scanning the artworks, I set up five documents, or “templates” according to the printing requirements I’d received, all properly sized including bleeds, and set up with lines to mark off these bleeds. As Maisie had pointed out, the last thing you want to be doing in the last stretch of a deadline is setting up these files when you’re likely to be stressed and more likely to make a mistake- so by doing this early you can throw yourself into the final editing stage confident that everything is the right size and isn’t going to give you any nasty surprises!
For this project, this was relatively easy- the final artworks were going to be printed at a4 size, so adding a bleed of 3mm didn’t produce any really odd numbers that were hard to keep in my head!
(N.B. – A bleed is the printing which goes past the trimmed edge of a final product. By adding a bleed of 3mm, you would add 3mm onto each edge of your final artwork. All detailed artwork must be WELL inside the bleed!)
I always find it easiest to doodle this out first, as surprise surprise, I’m a bit of a visual learner- which when it comes to bleeds, usually ends up looking a little something like this:

The middle part with the solid black lines is the size of the final “trimmed” artwork – where the printer will trim the bleed to. The red dotted lines show how much needs to be added onto each edge!
After scanning each painting, I popped each one into the ready-made templates I’d made earlier, and took a quick look at each to note down any last things which still needed doing. Along with these, I made a list of all the other checks to make before sending the artworks off to be taken to the printers: was everything important well within bleed lines? Was each saved as a PDF, in the right colour profile (CMYK) and at the requested PPI (pixels per inch)? Did each artwork have viewable cropmarks? Once the list was ticked off for each image as I worked my way through, the final step was to mark them as “Print Ready” at the bottom of my notes and send them off!
(Another tip from my fabulous uni lecturers of yesteryear- a site that’s particularly helpful for safely sending large files like PDFS for print is https://wetransfer.com/ – your recipient has several days to download the files you send before they’re deleted from the system.)
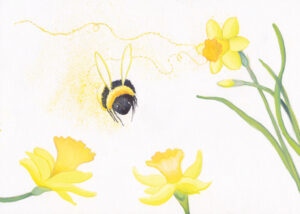

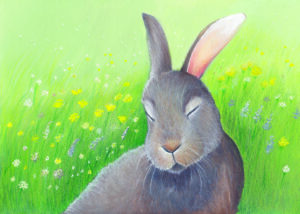
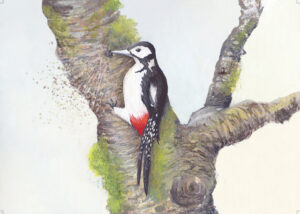
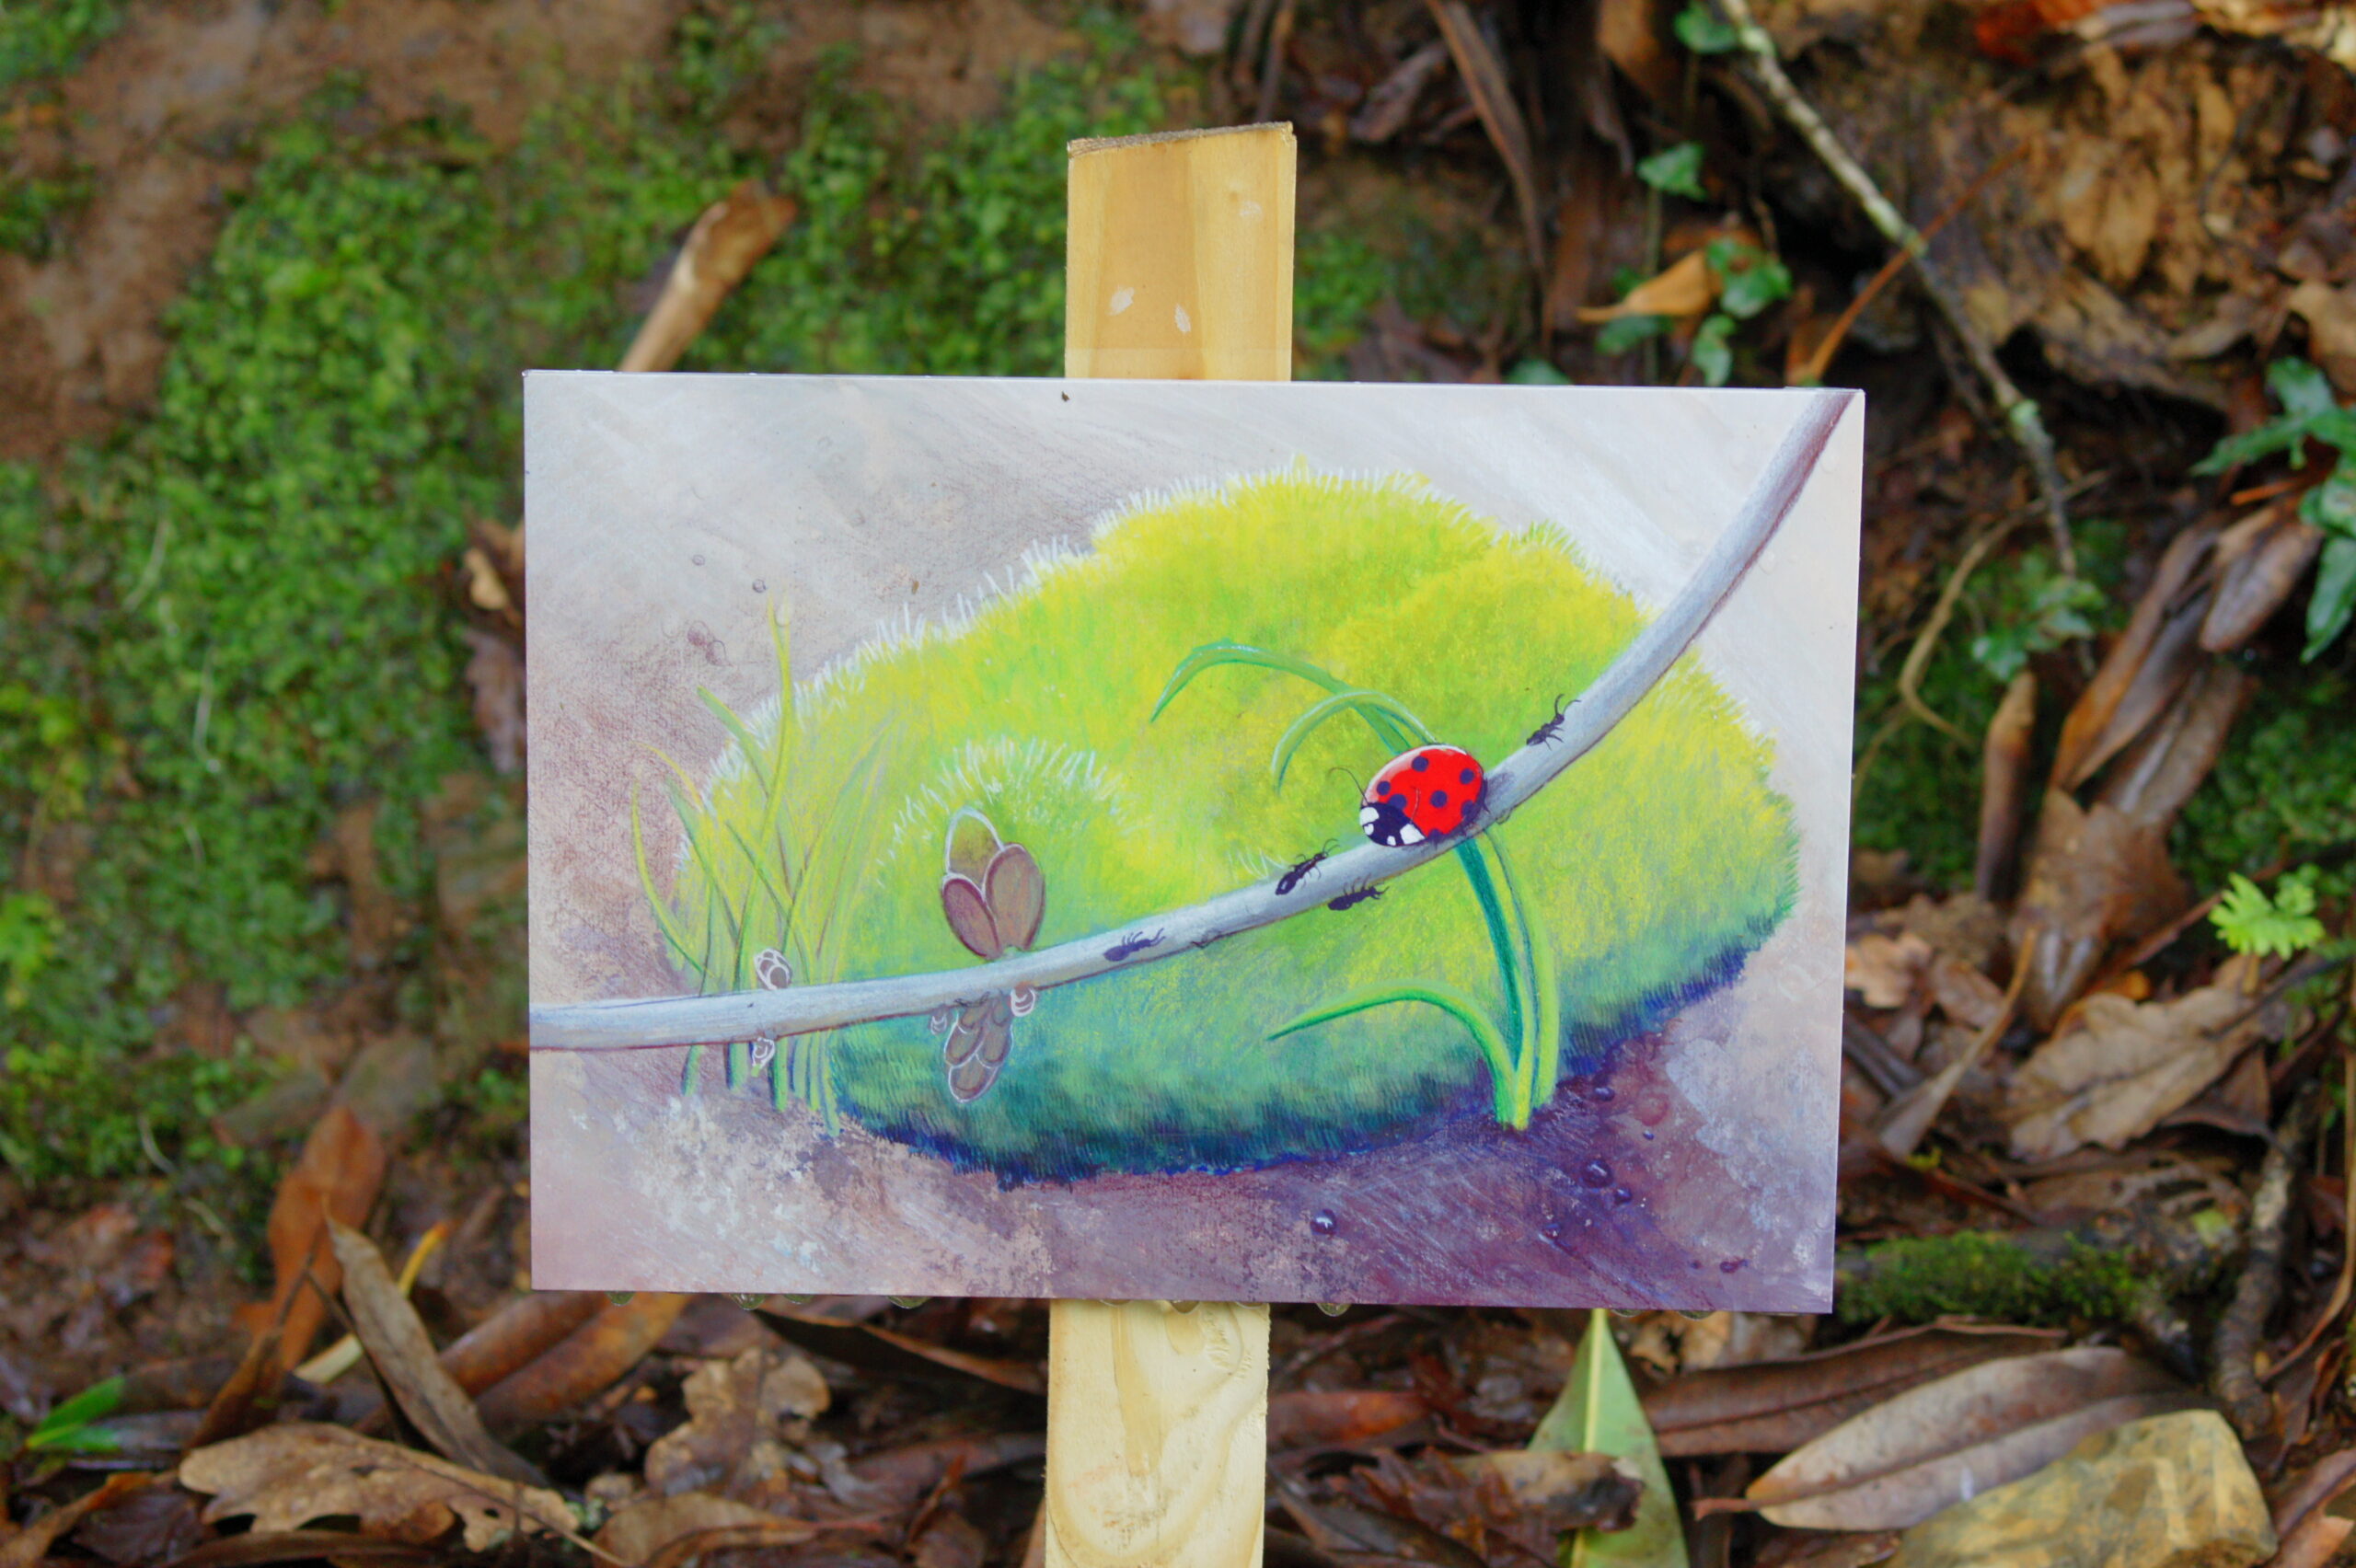
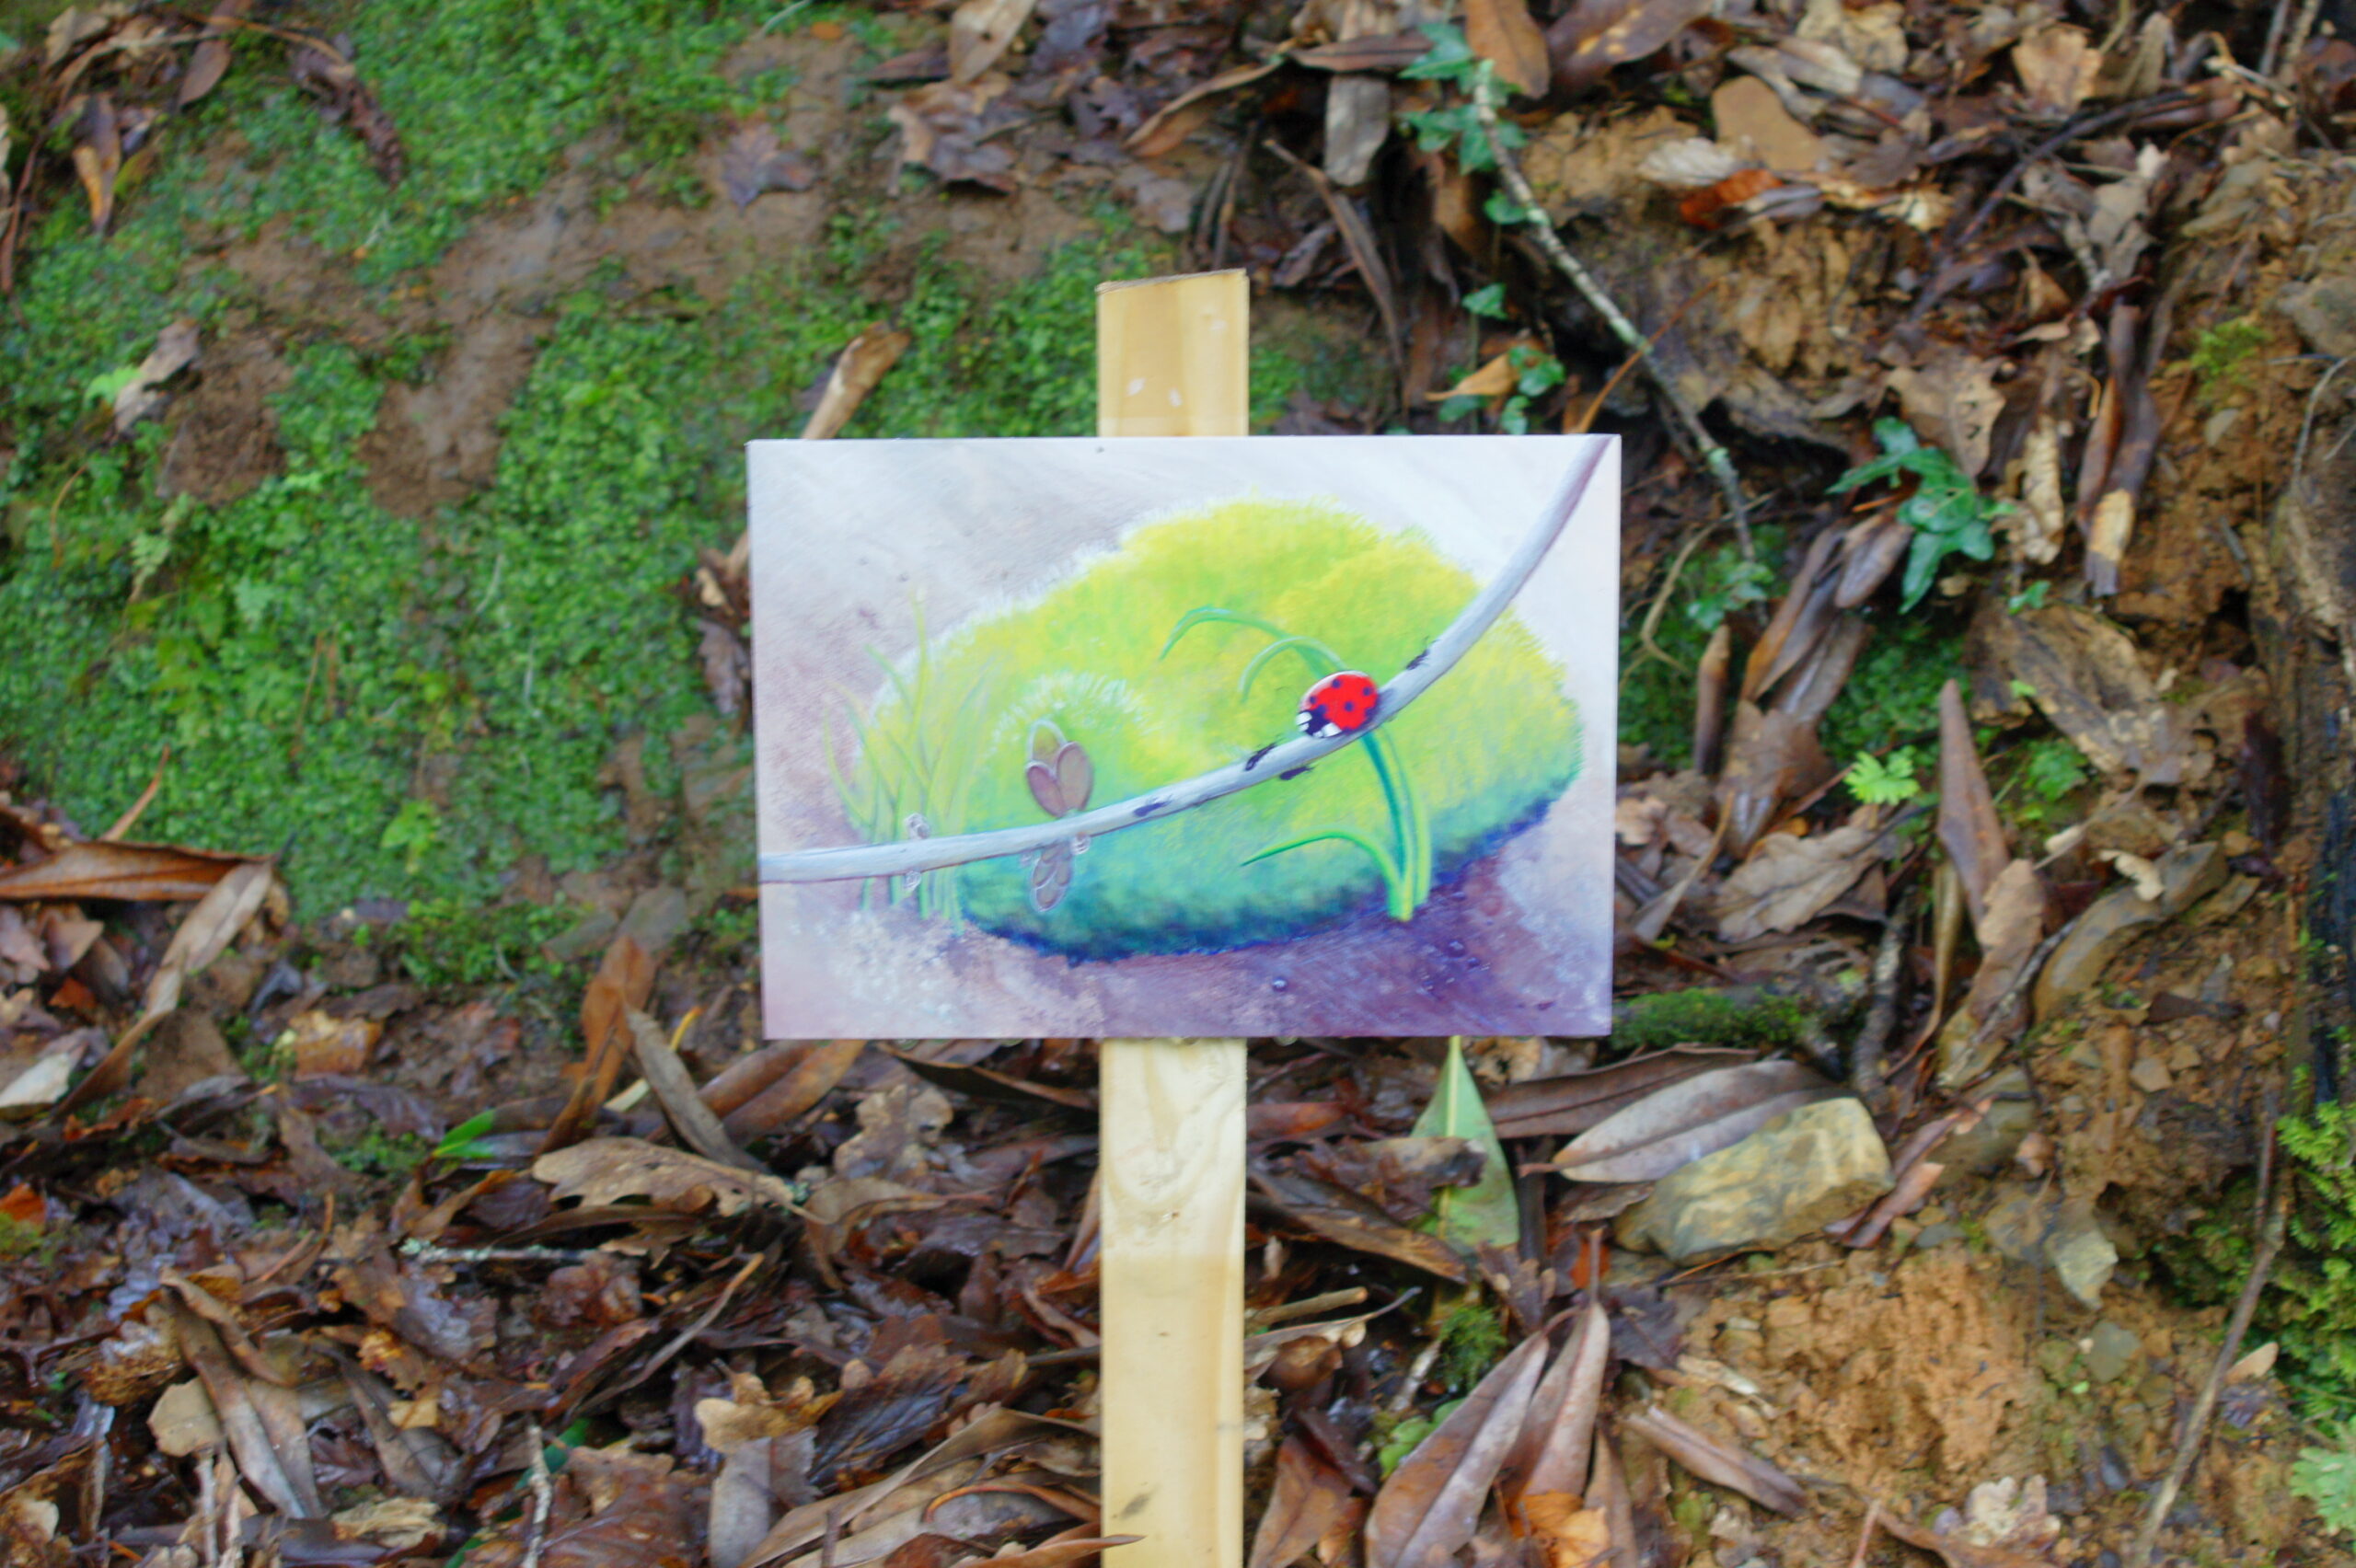
The final artworks, ready for print- if you look closely you may be able to see the tiny cropmarks which the printers would use to trim to the size required!
An added bonus: Going to visit my work in the flesh!
Much as the most exciting, rewarding and nerve-racking part of a book project is seeing the final product in print, the most overwhelmingly cool thing about this project was that it was going to be out in the open for the public to see- I could see families enjoying my artwork as part of a trail designed to celebrate a beautiful place and the curious creatures who live there!
I was really looking forward to sharing this project far and wide for people to get outside, enjoy the Spring sunshine, and support a gem of a National Trust site. Unfortunately, as the lockdown measures got stricter and stricter, and more and more places were being closed off (All NT sites are currently closed until further notice) I had a creeping realisation that this couldn’t be the case this year.
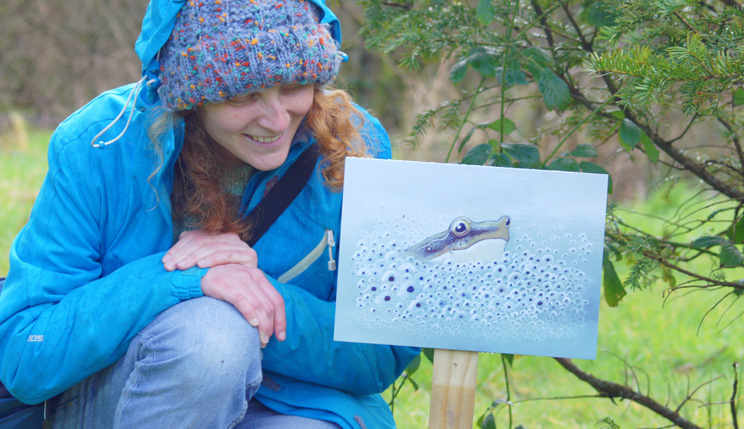
However, as I mentioned at the beginning of this post, I was lucky enough to be able to visit Colby Woodland Garden before any of these measures had come into effect. The trail looked INCREDIBLE- I took lots of photos and revelled for the afternoon in my capacity as visiting artist. I can’t begin to describe to you how fantastic it feels to be able to see something you worked so hard on proudly displayed for all to see!
The gallery below is my attempt at a mini virtual tour of the trail, until we can all go and see it next Spring!
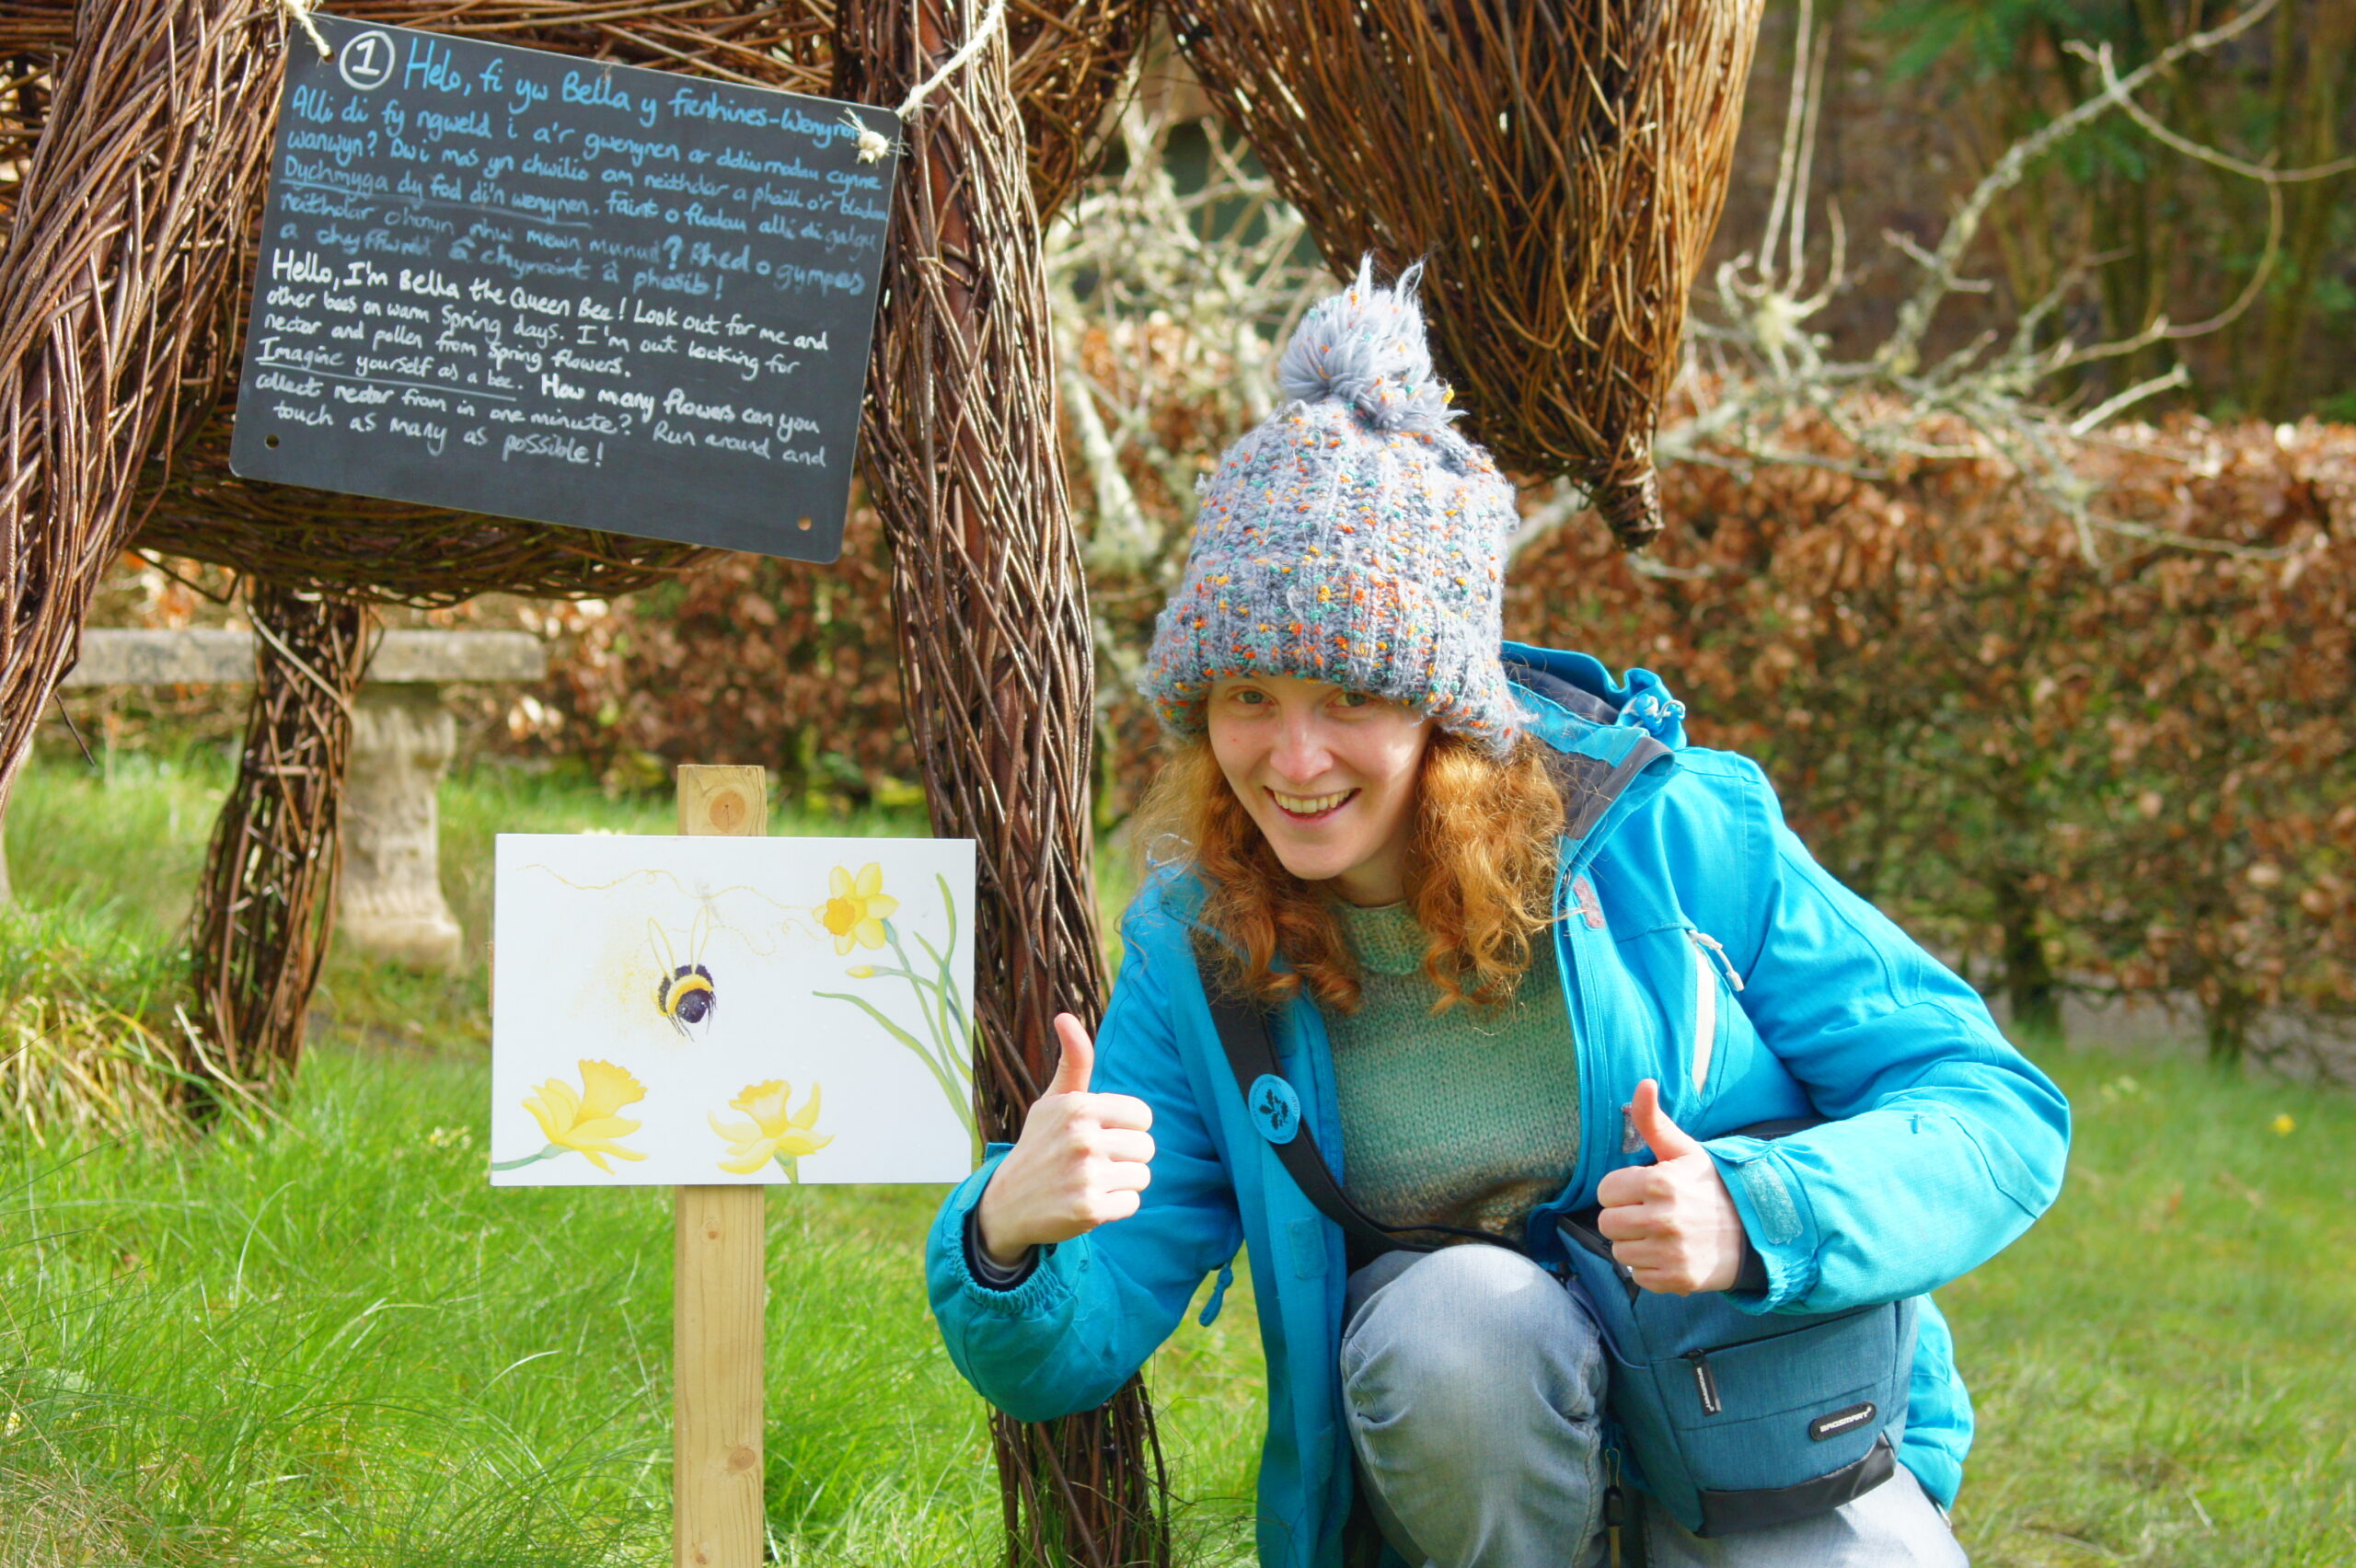
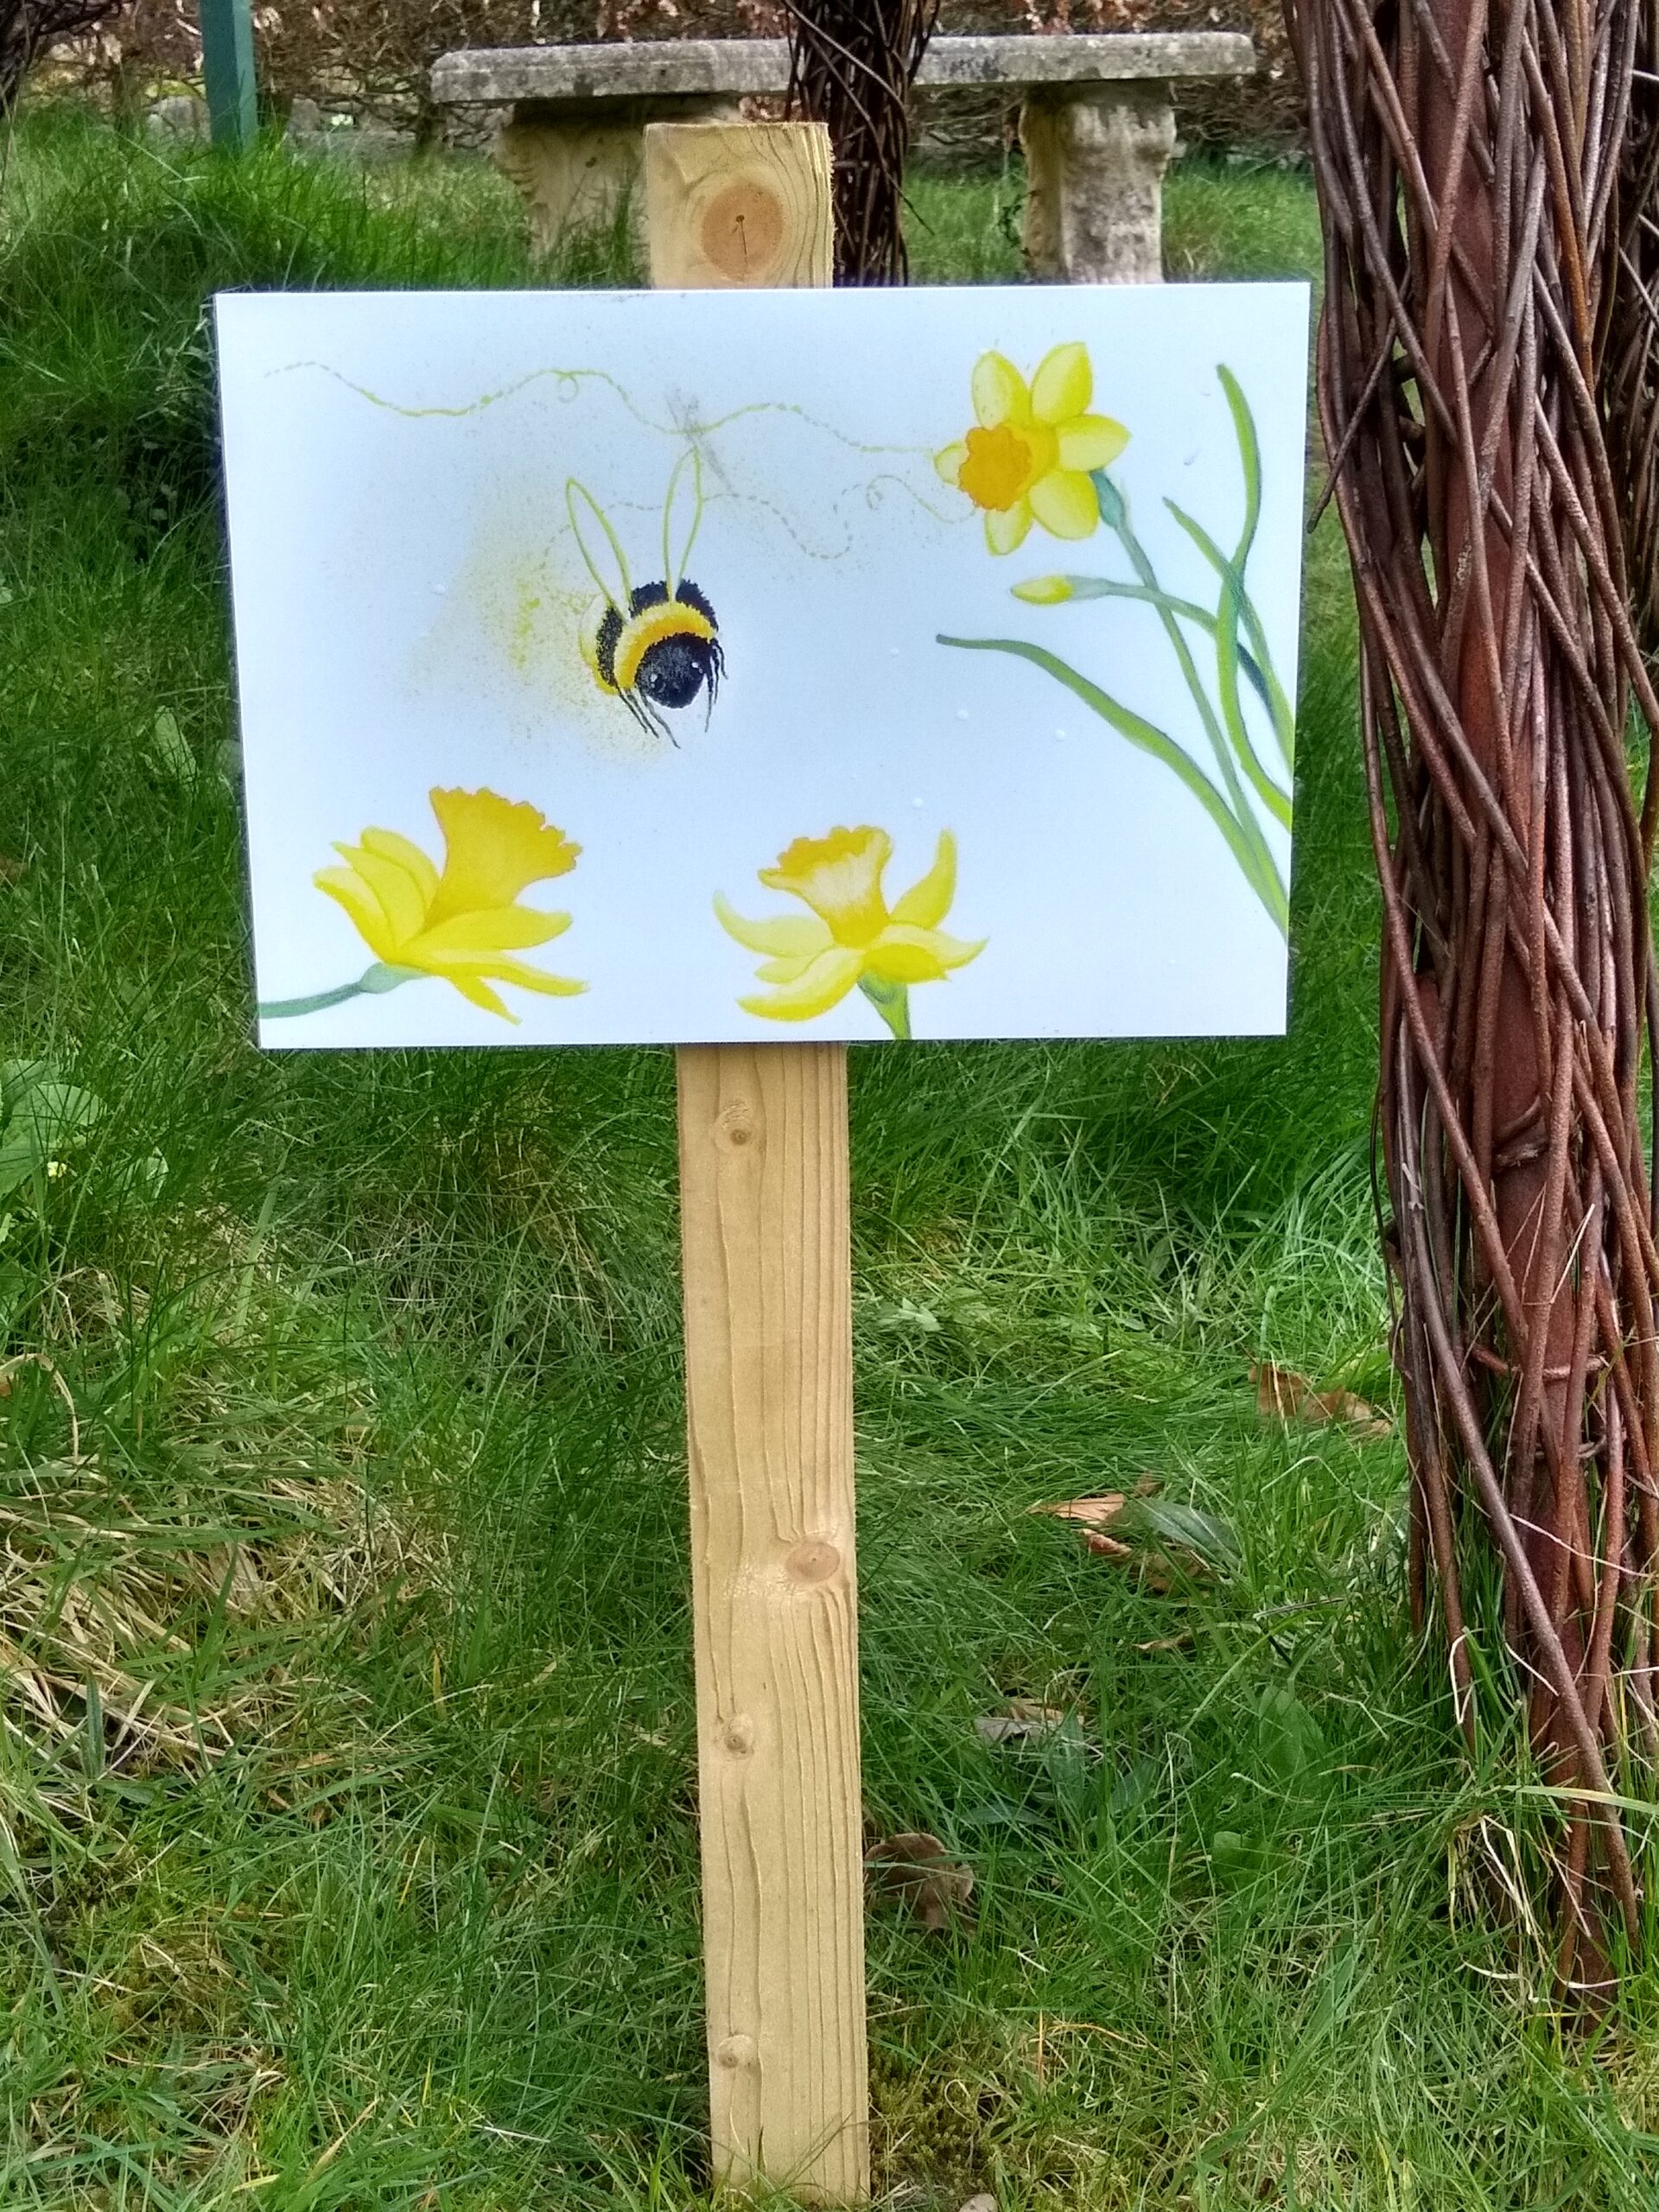
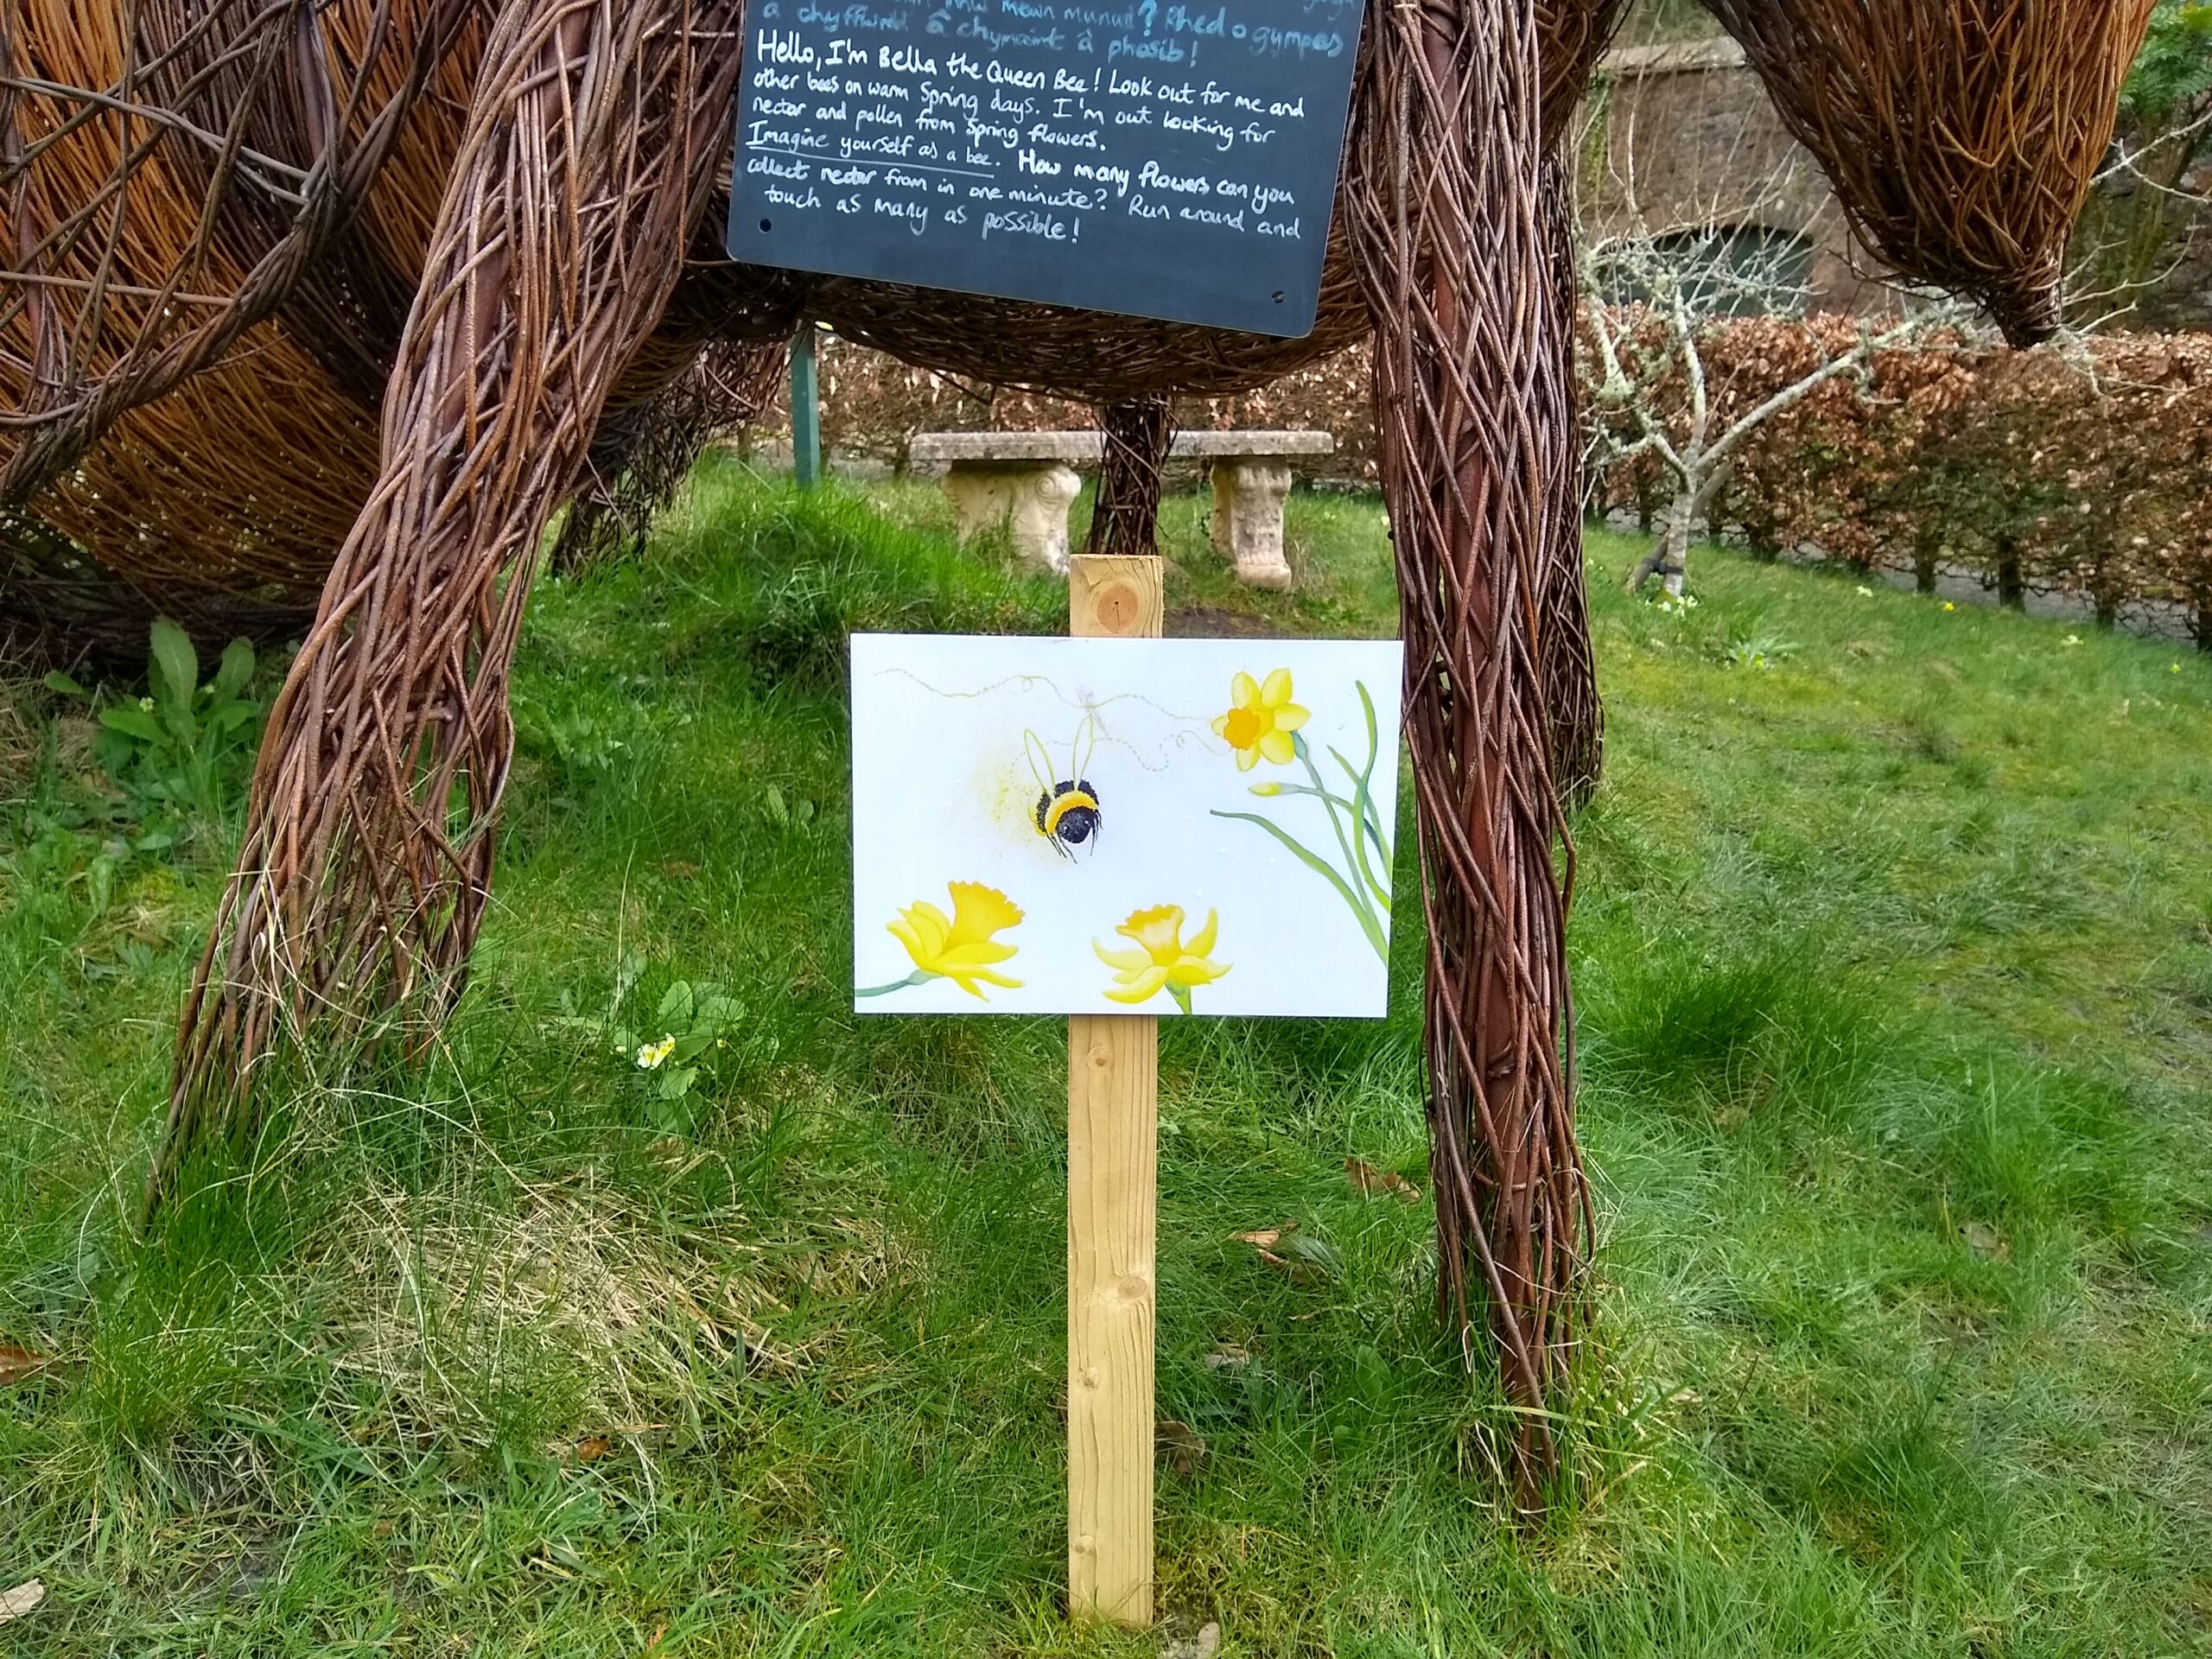

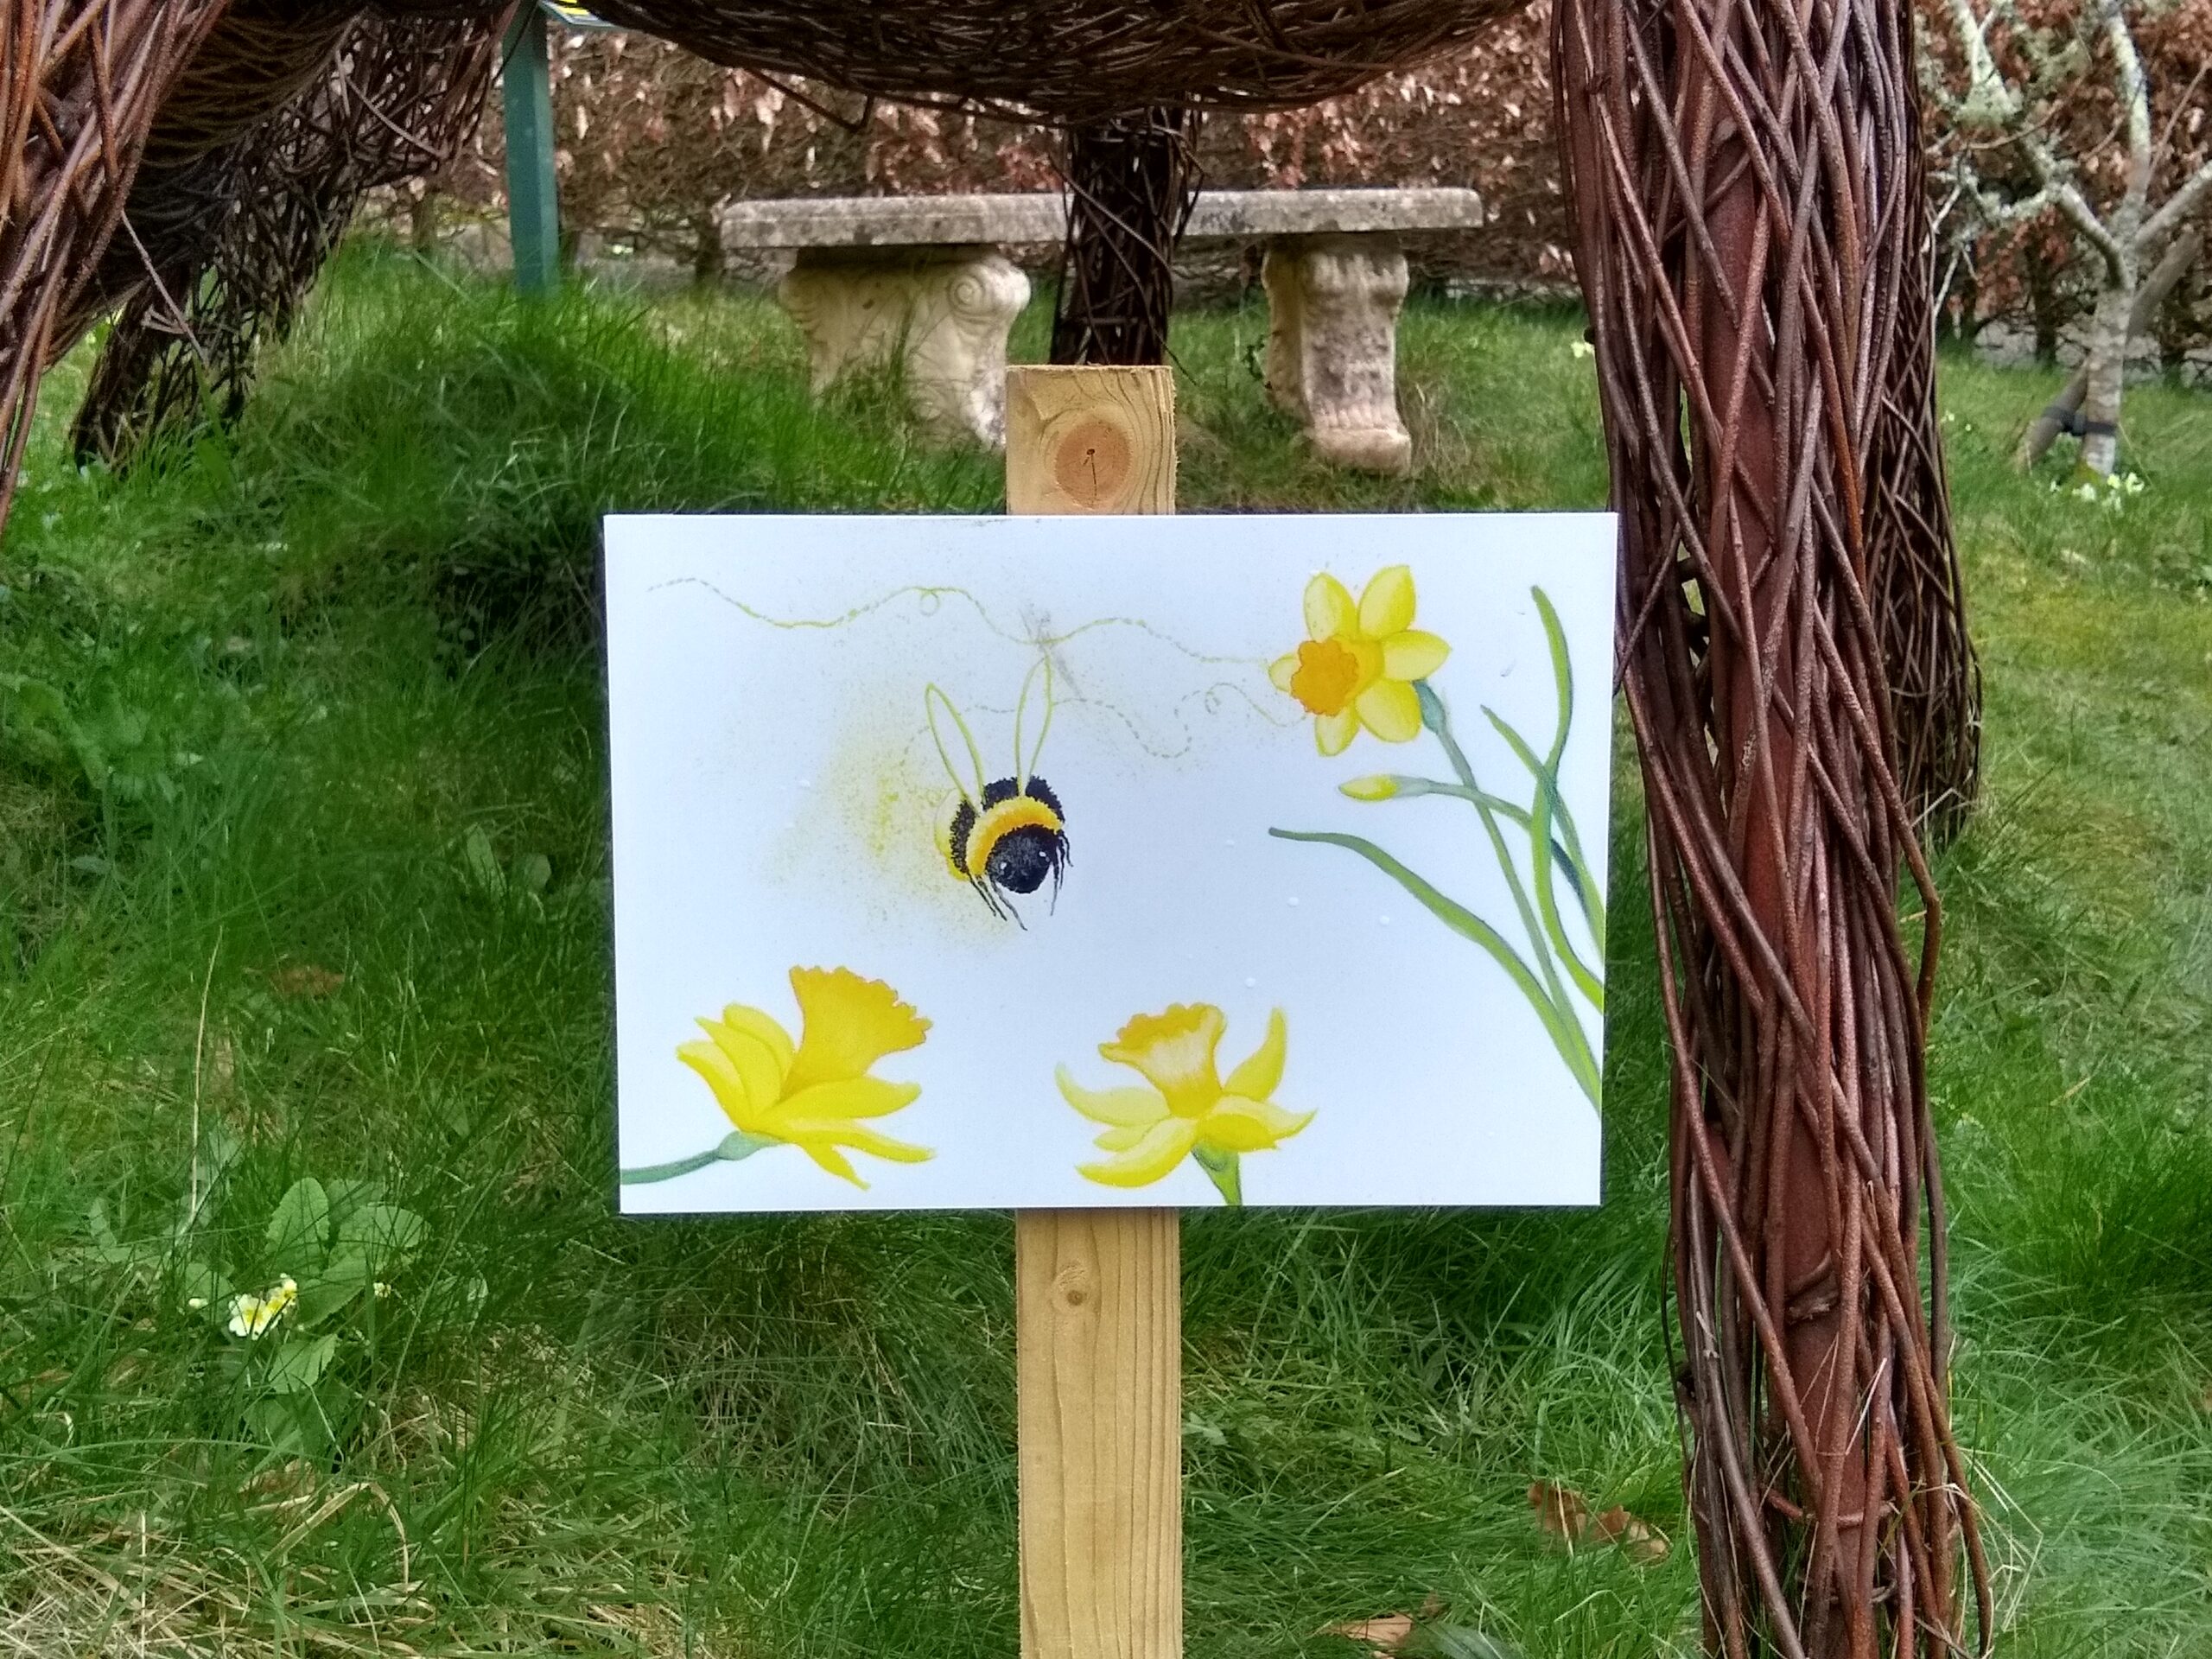
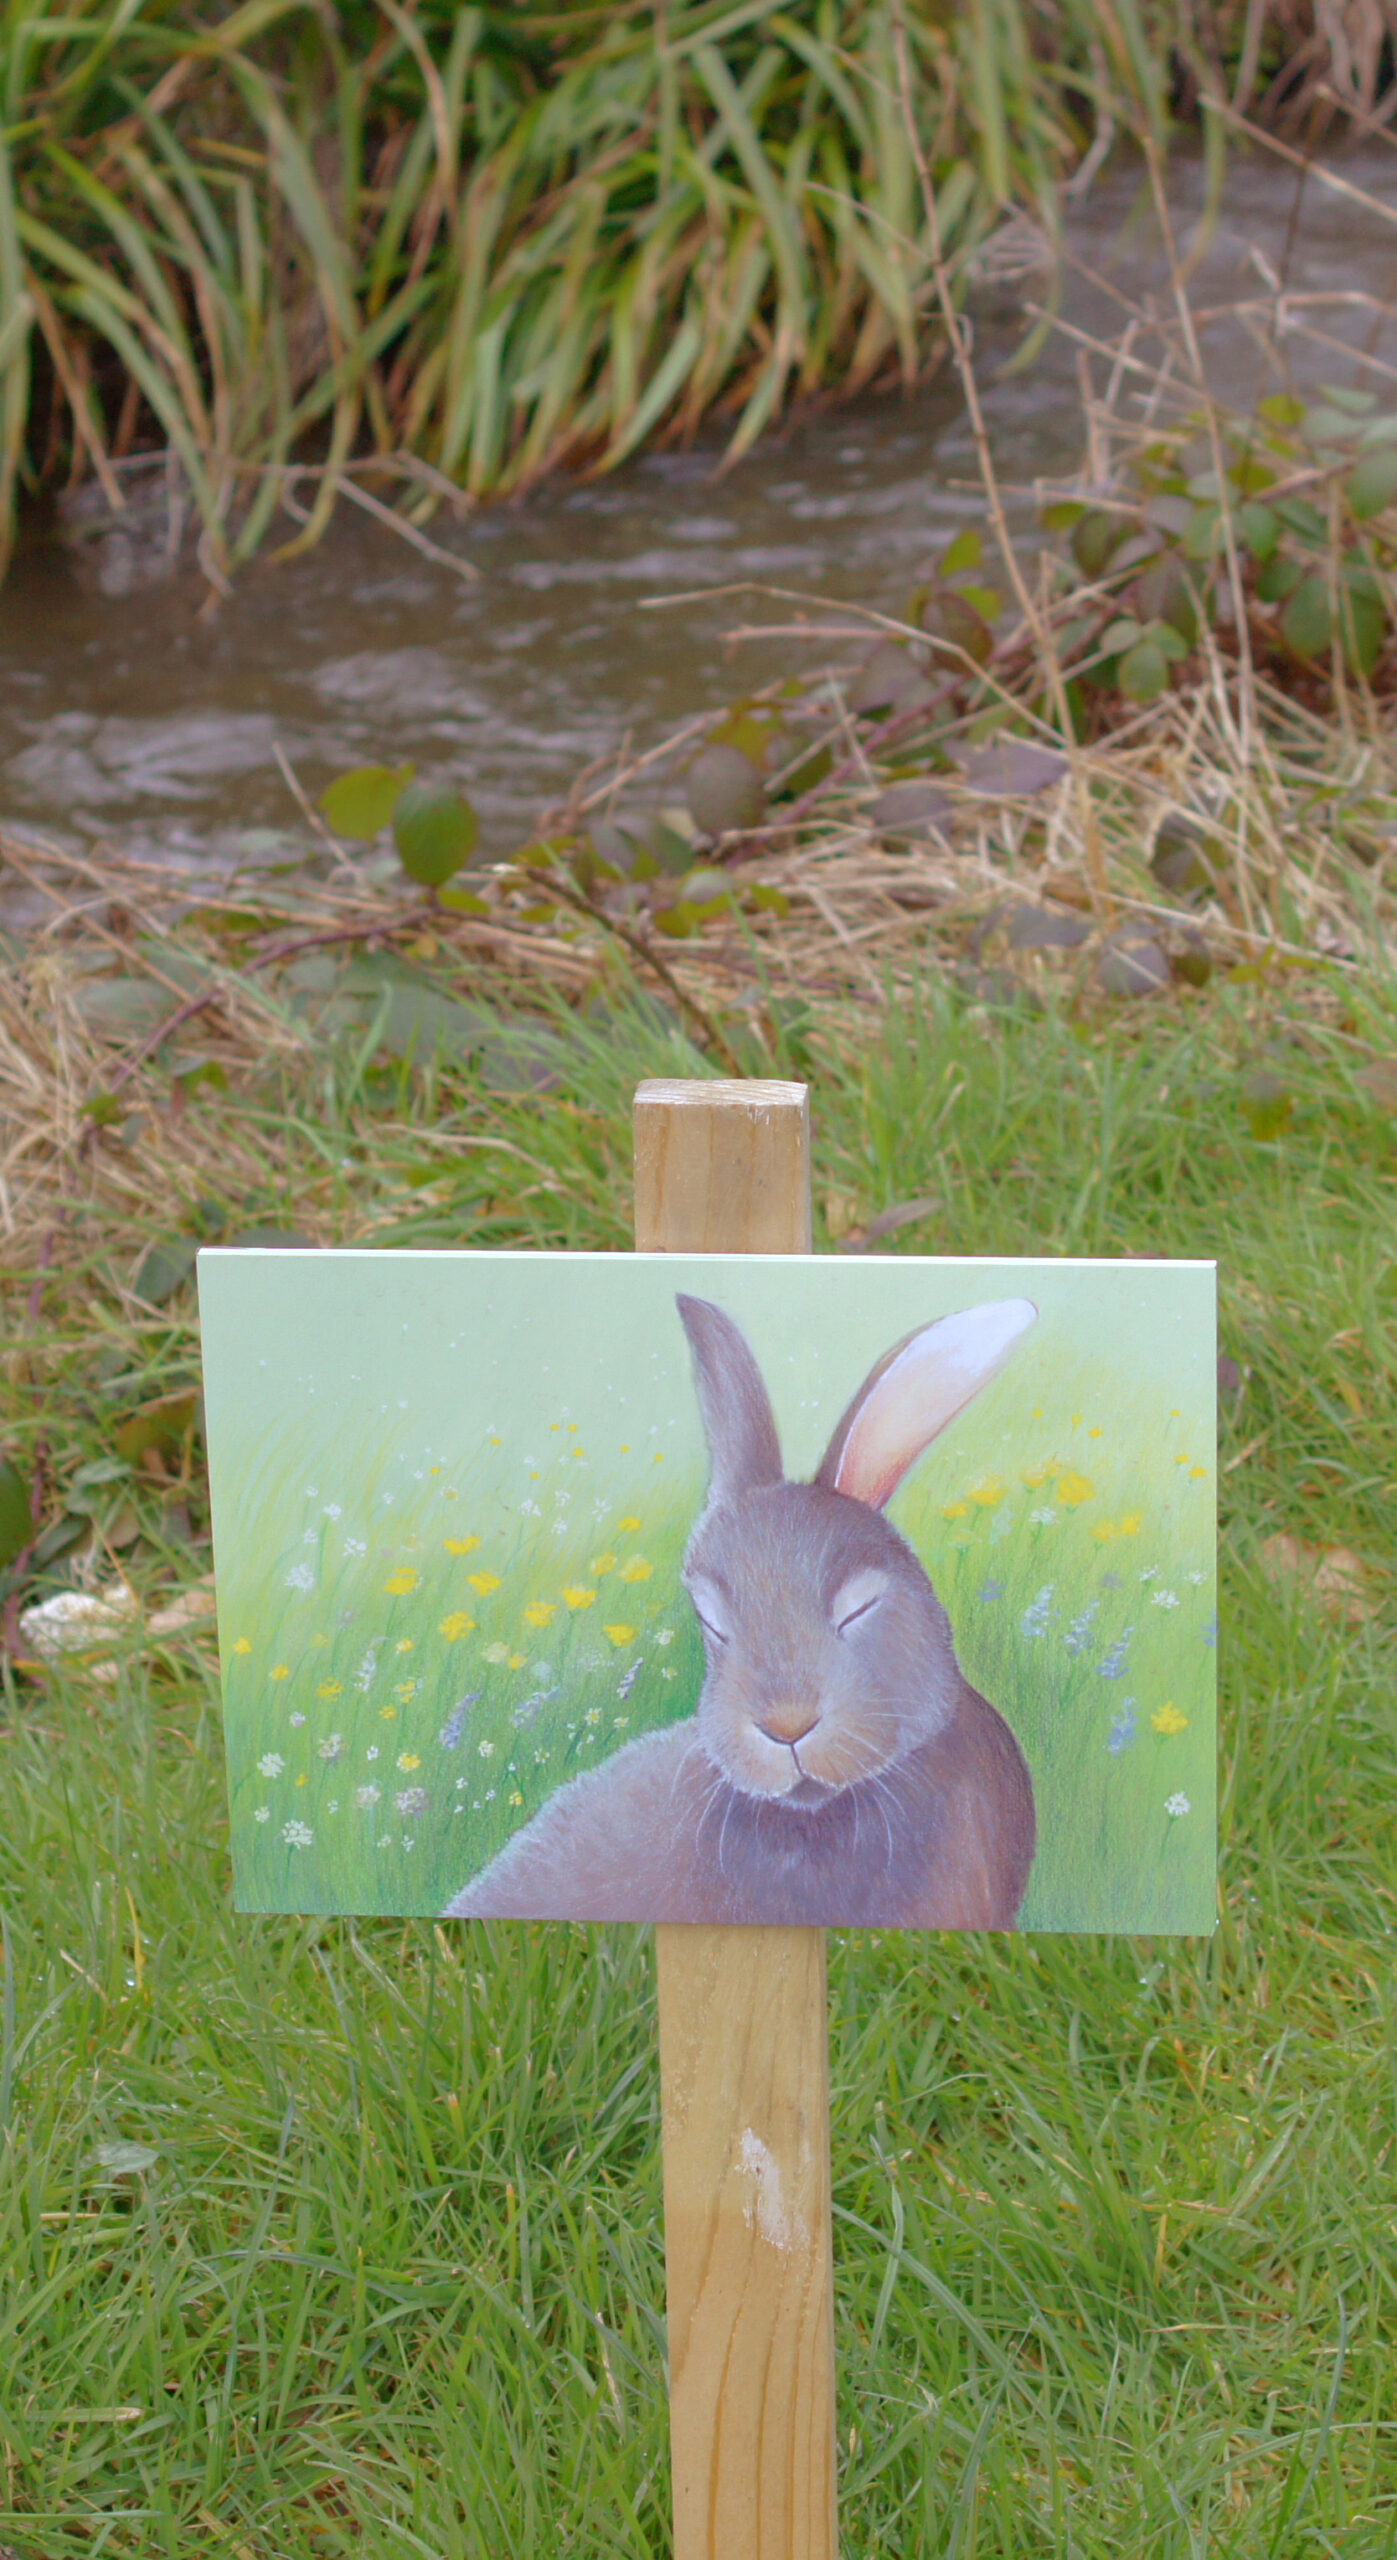
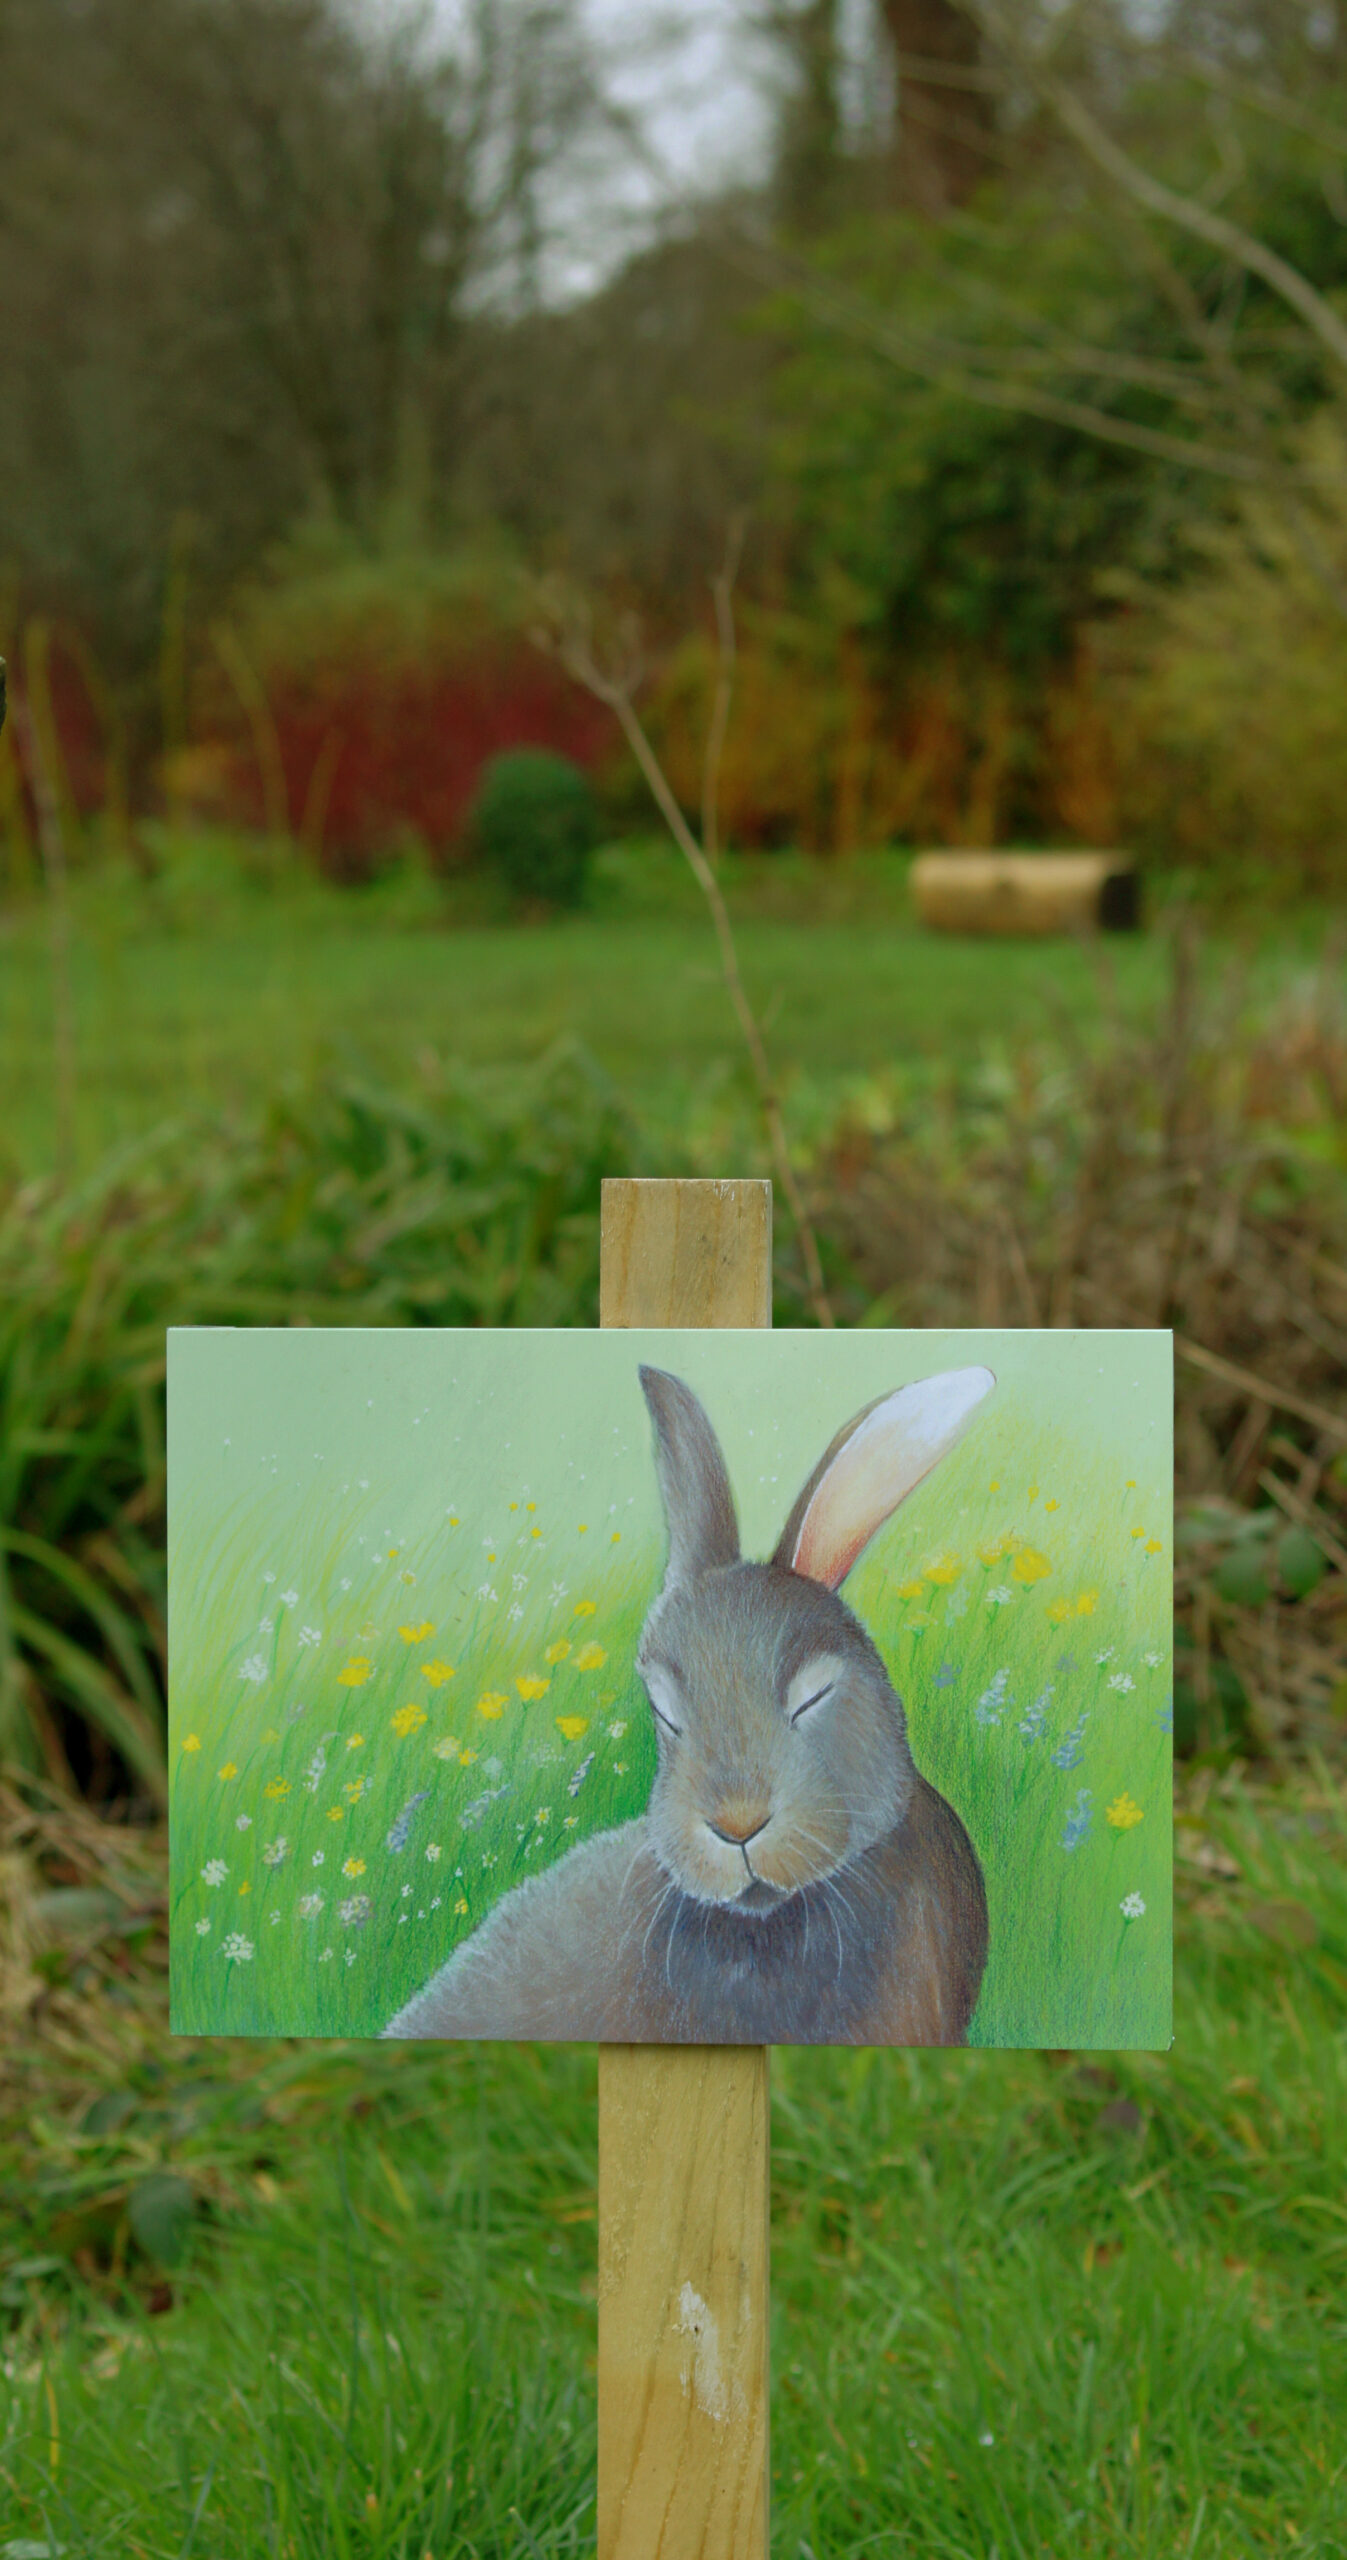
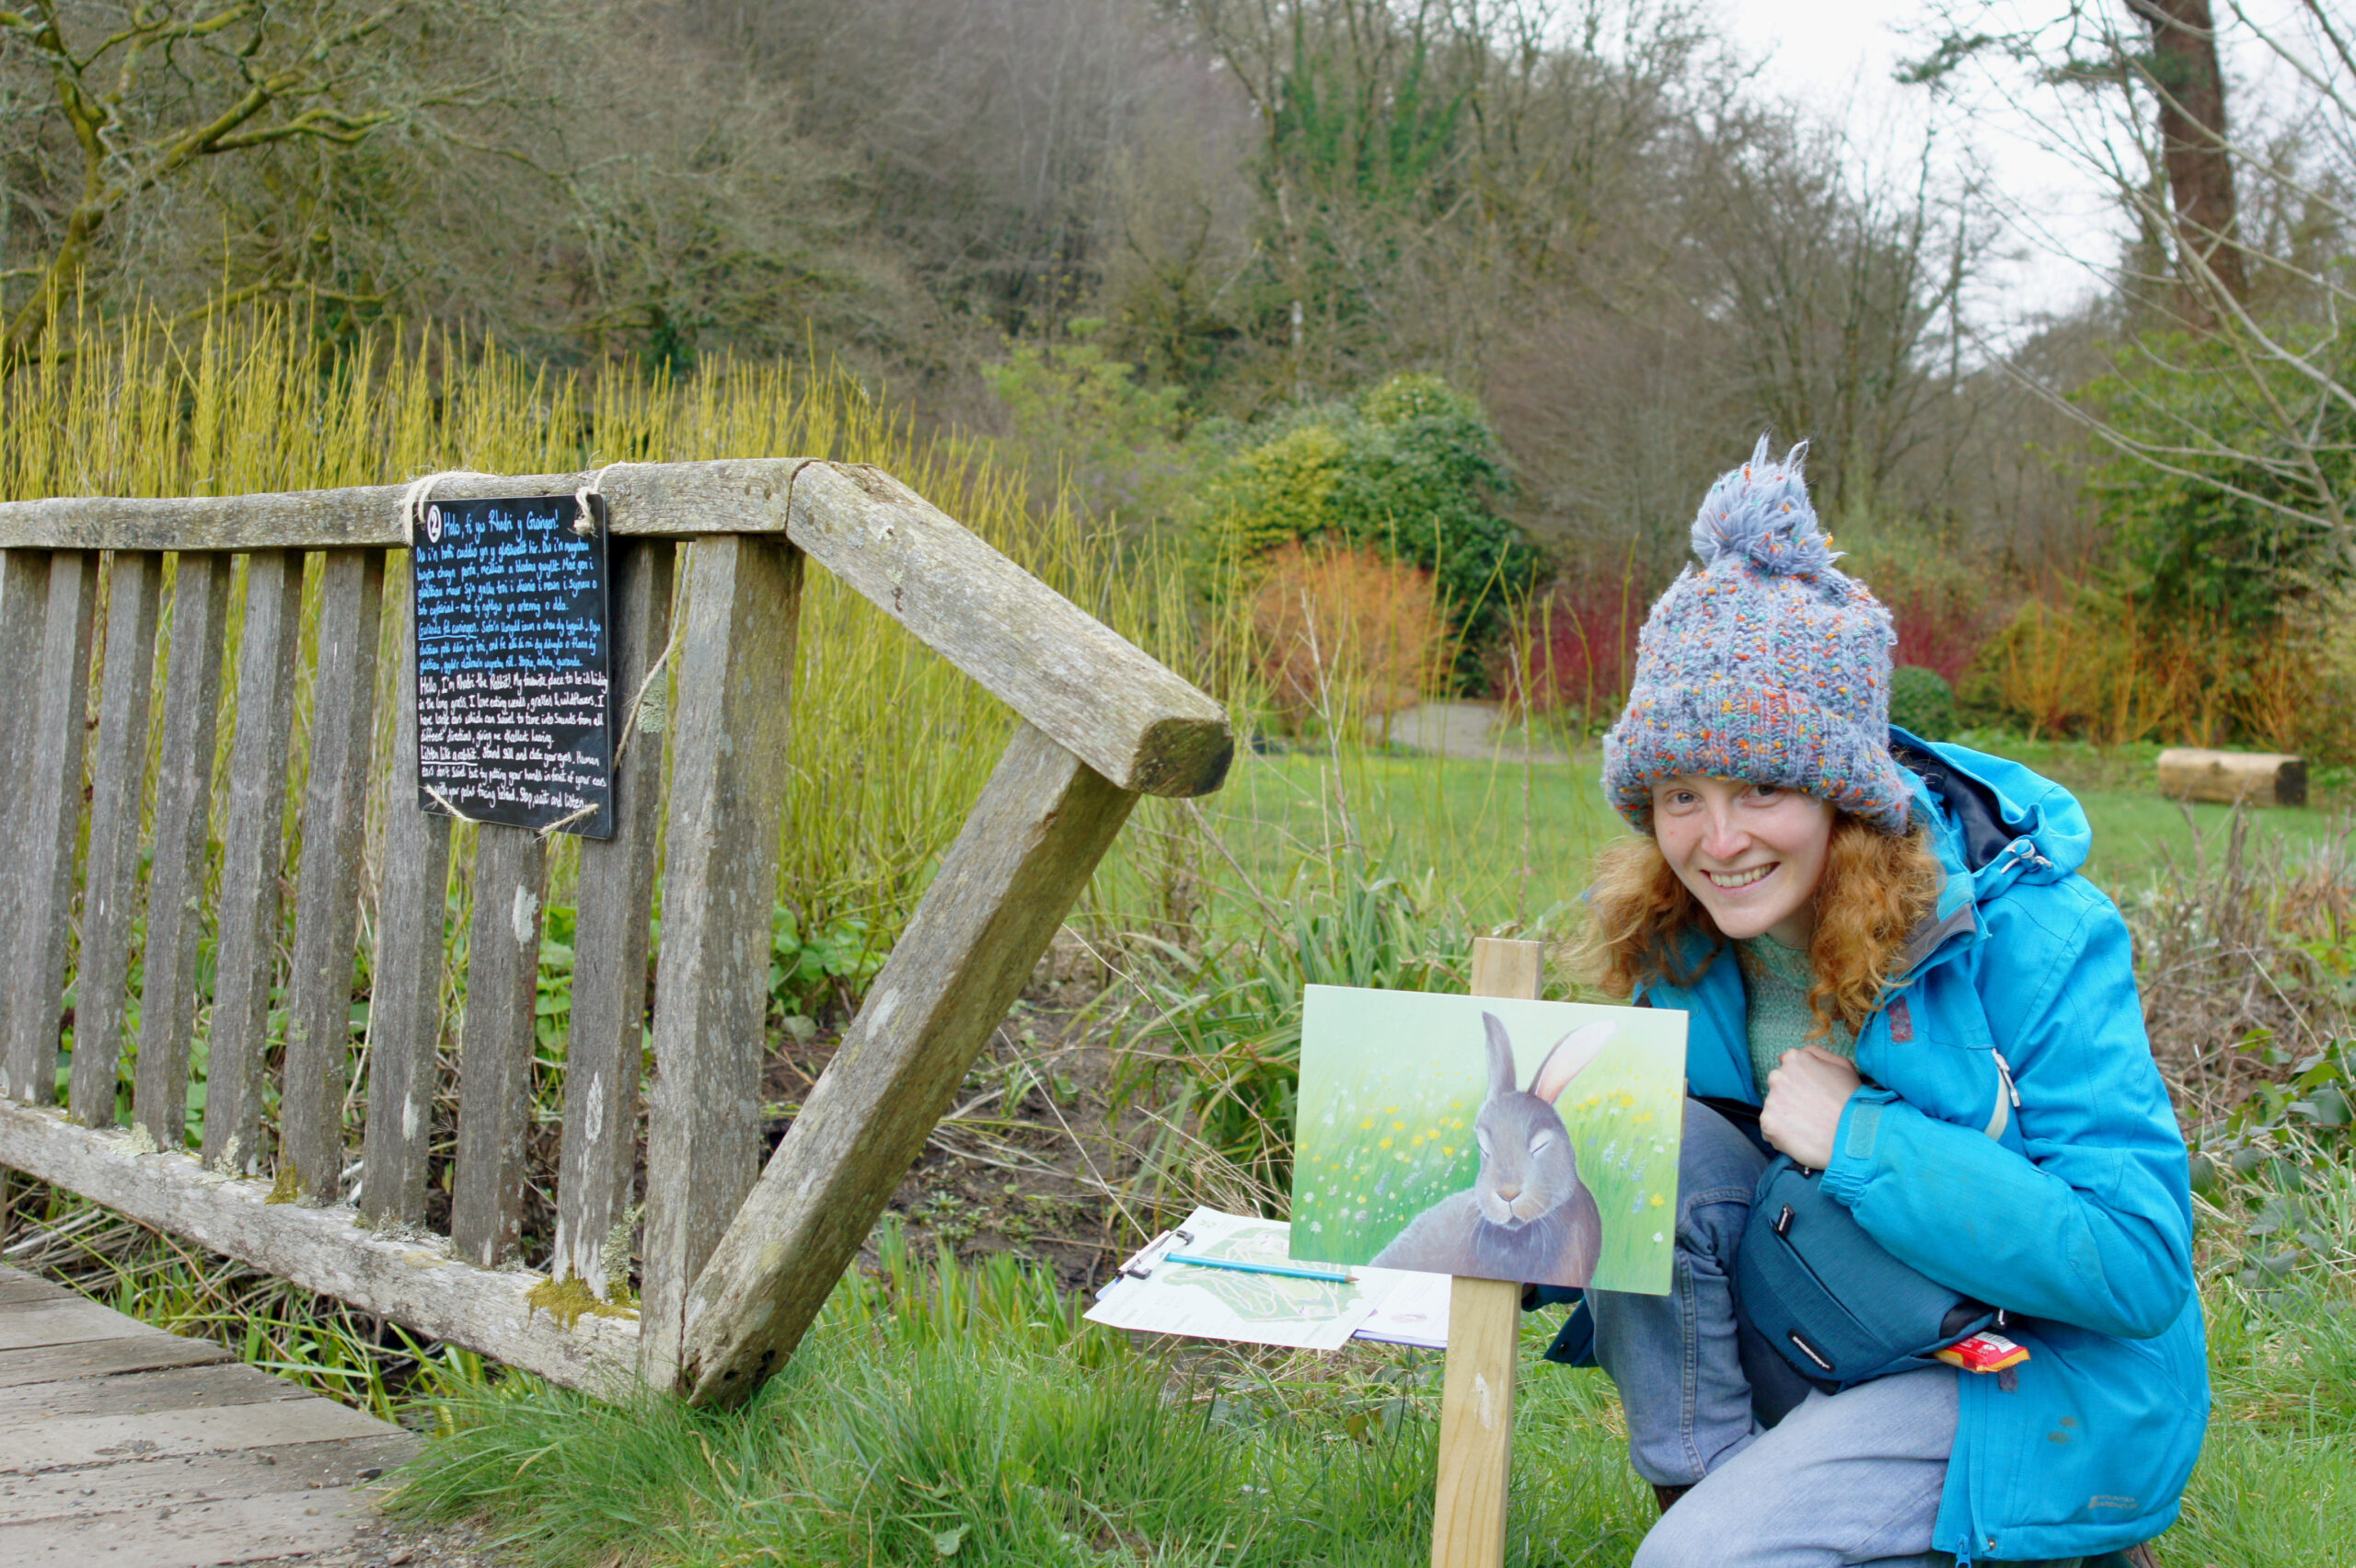
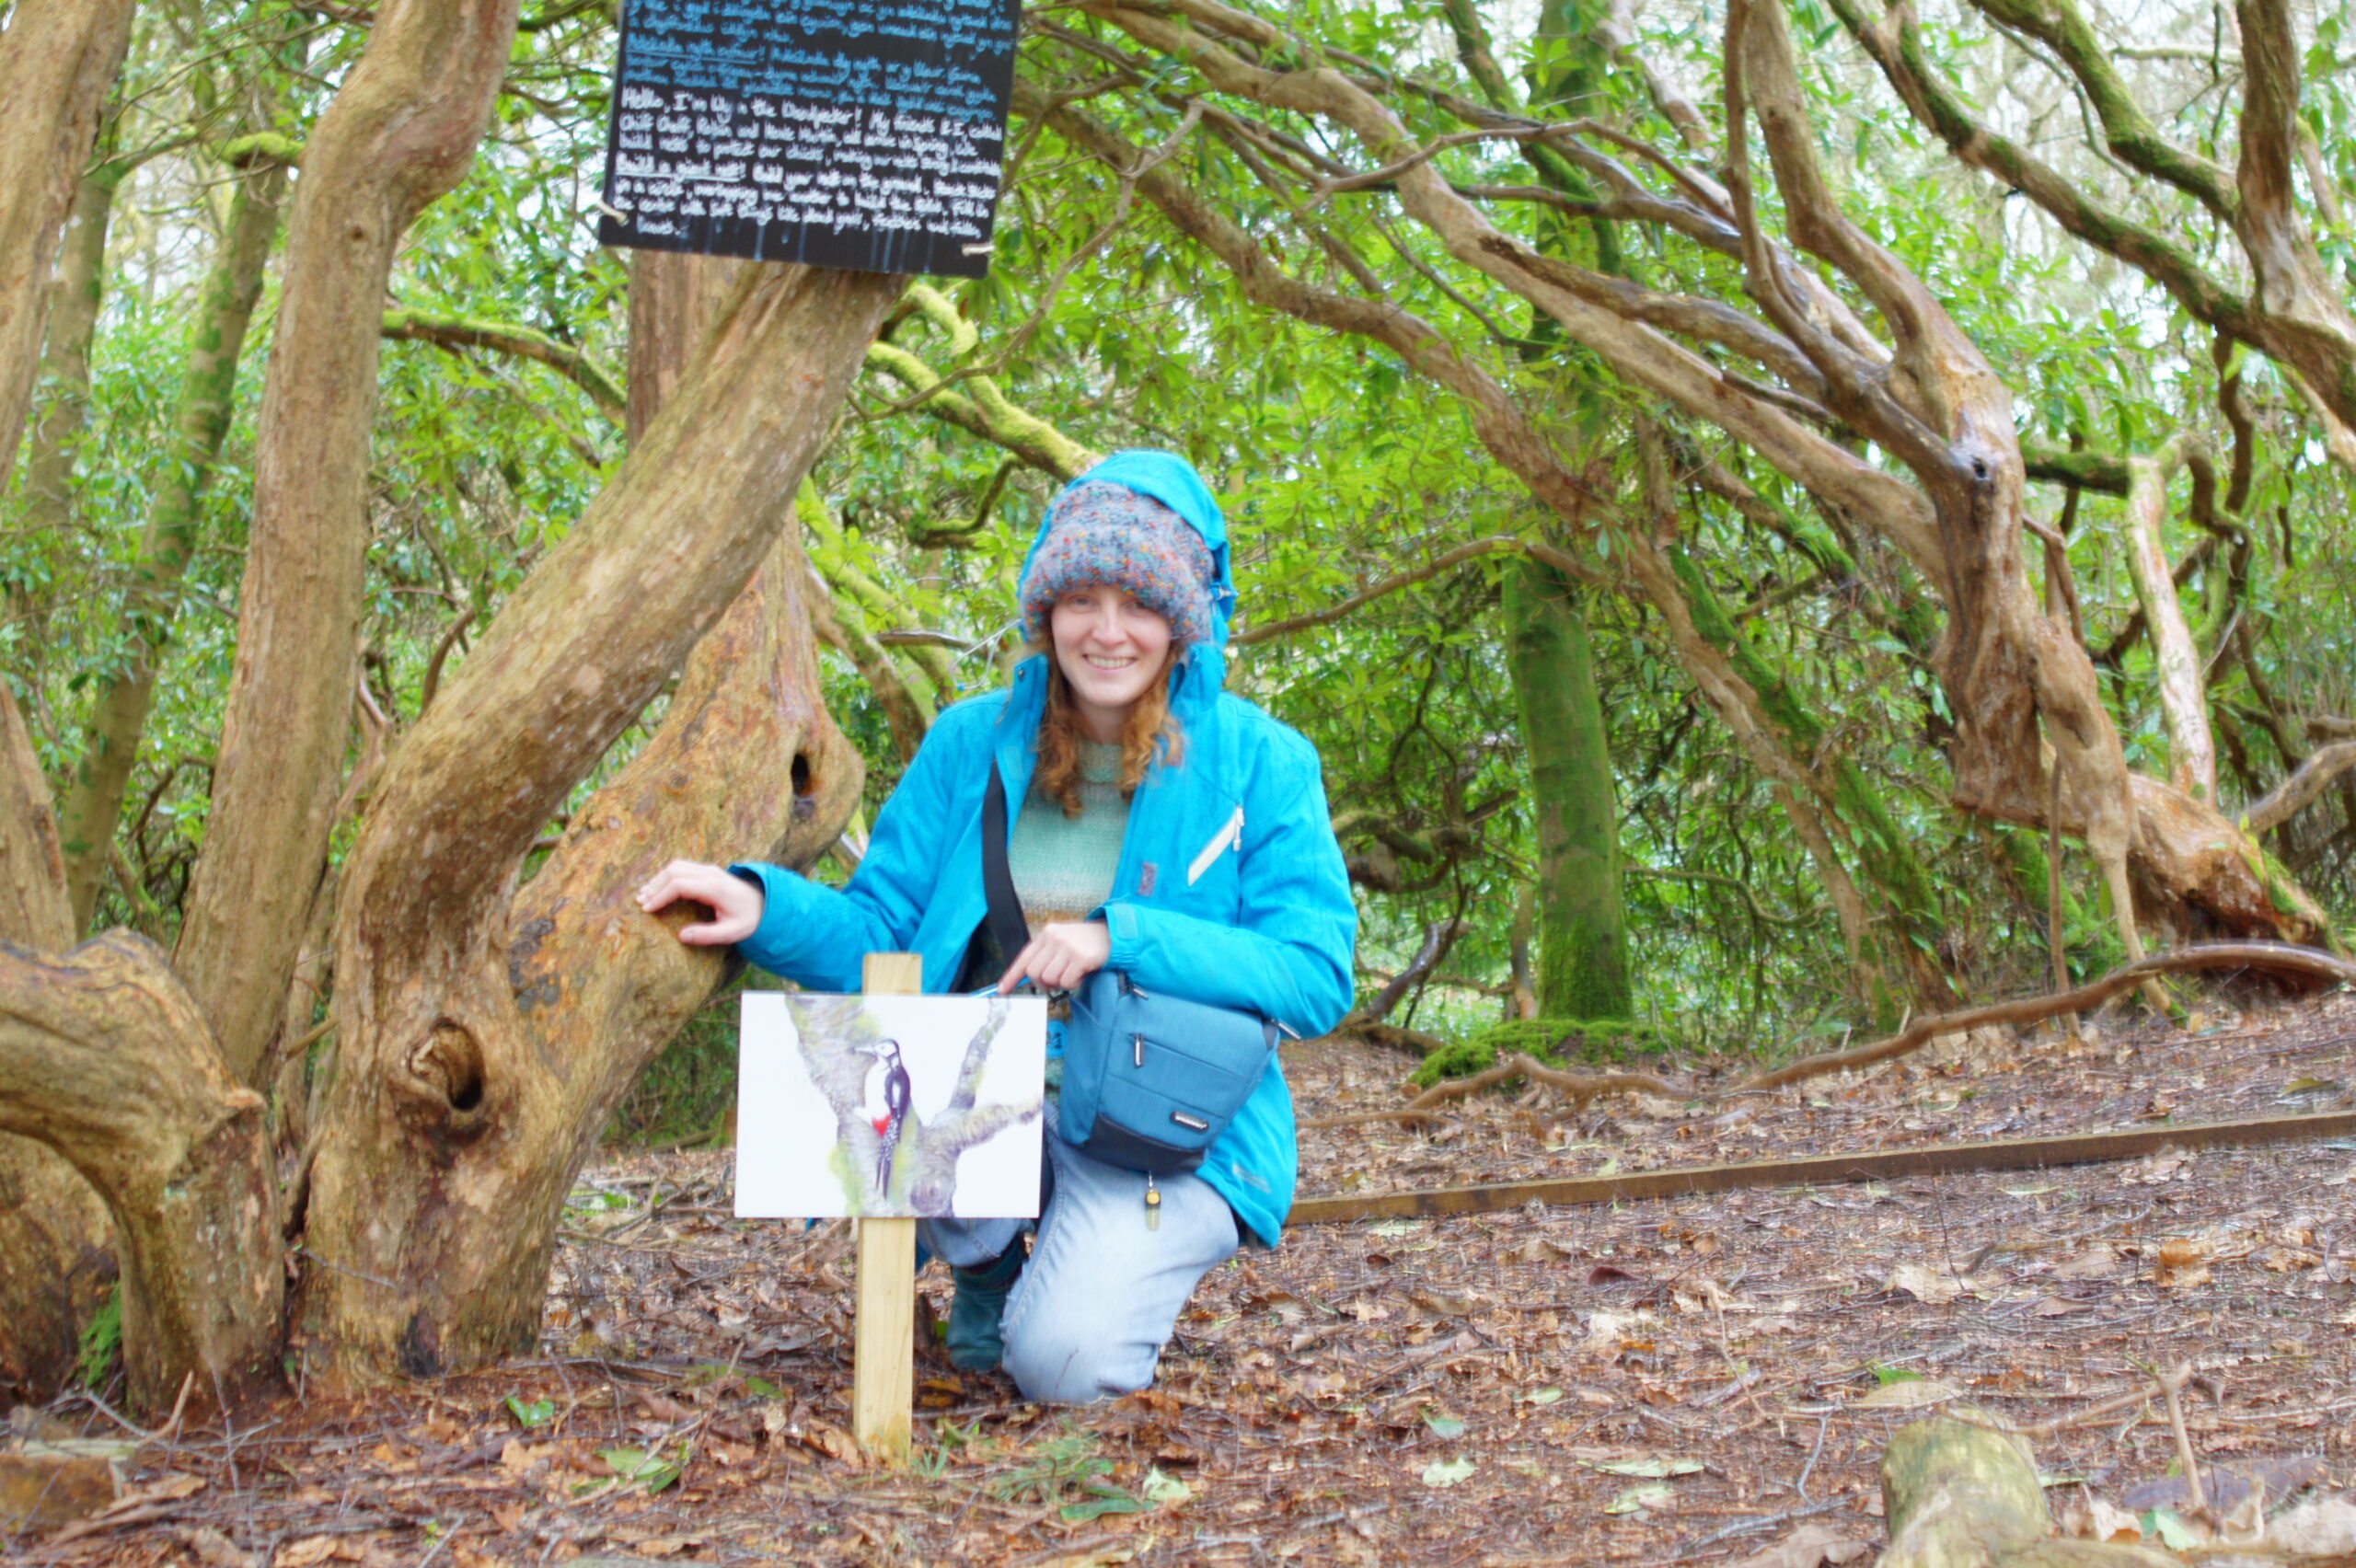
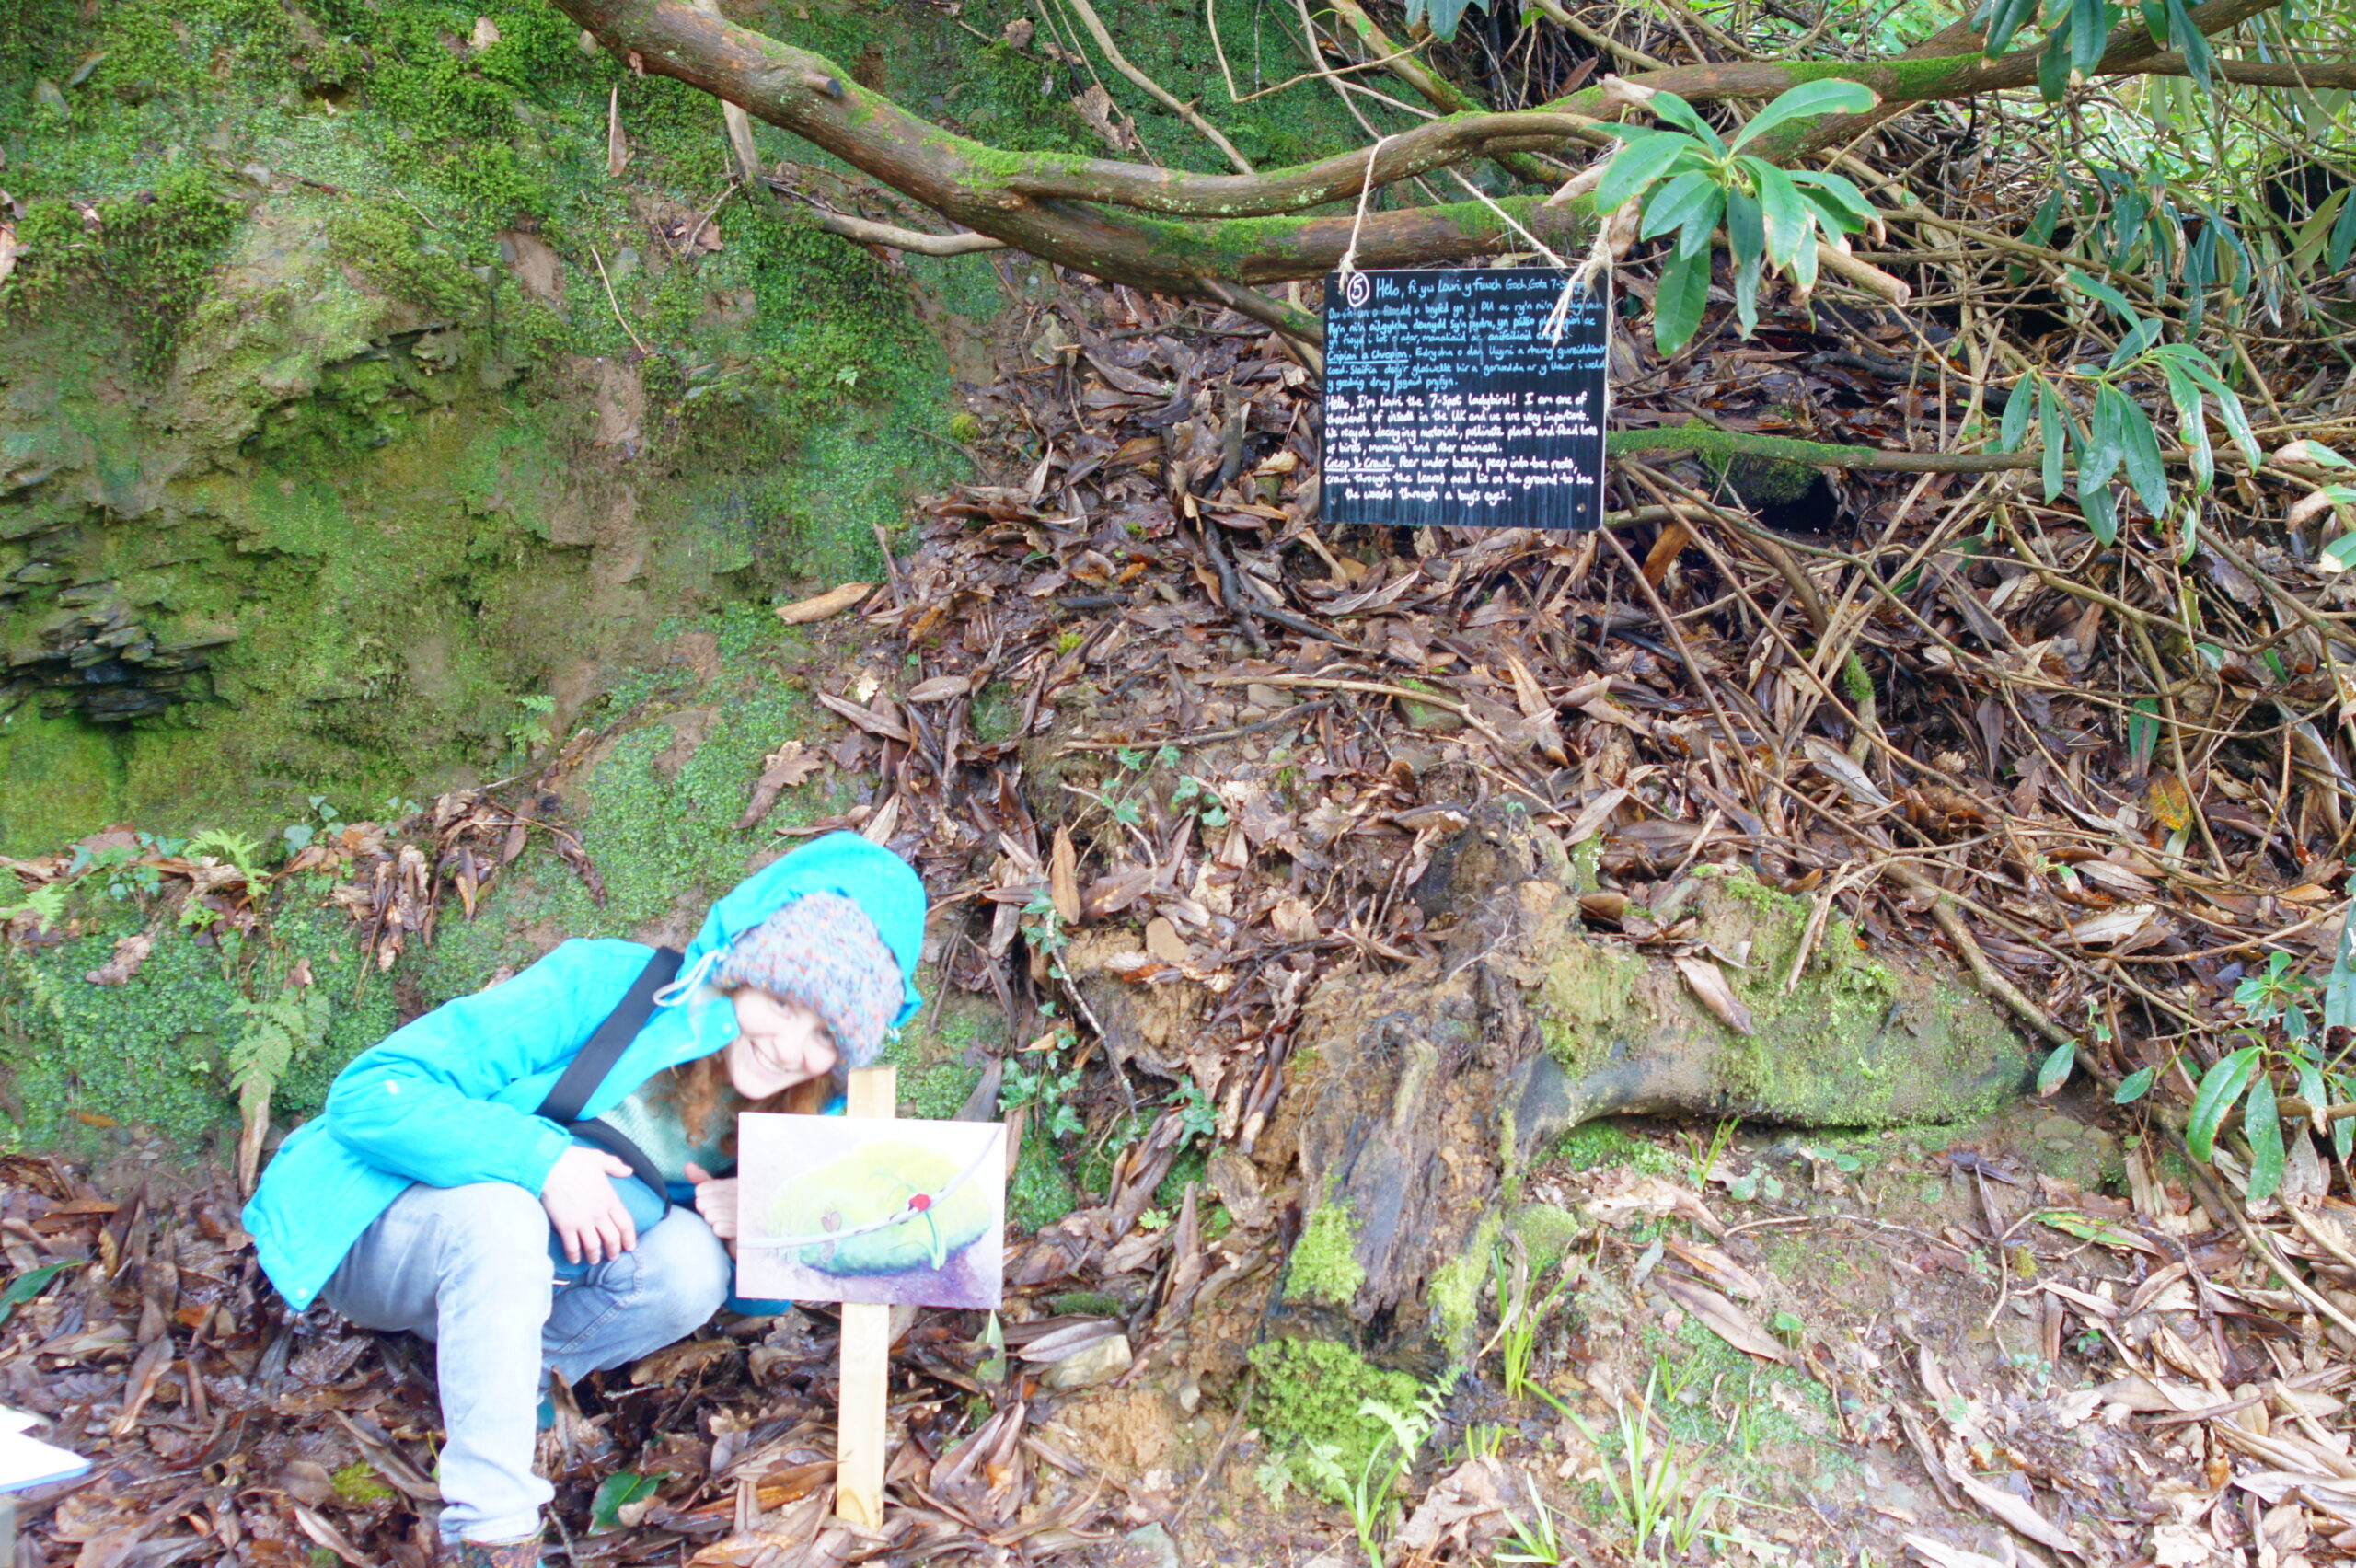

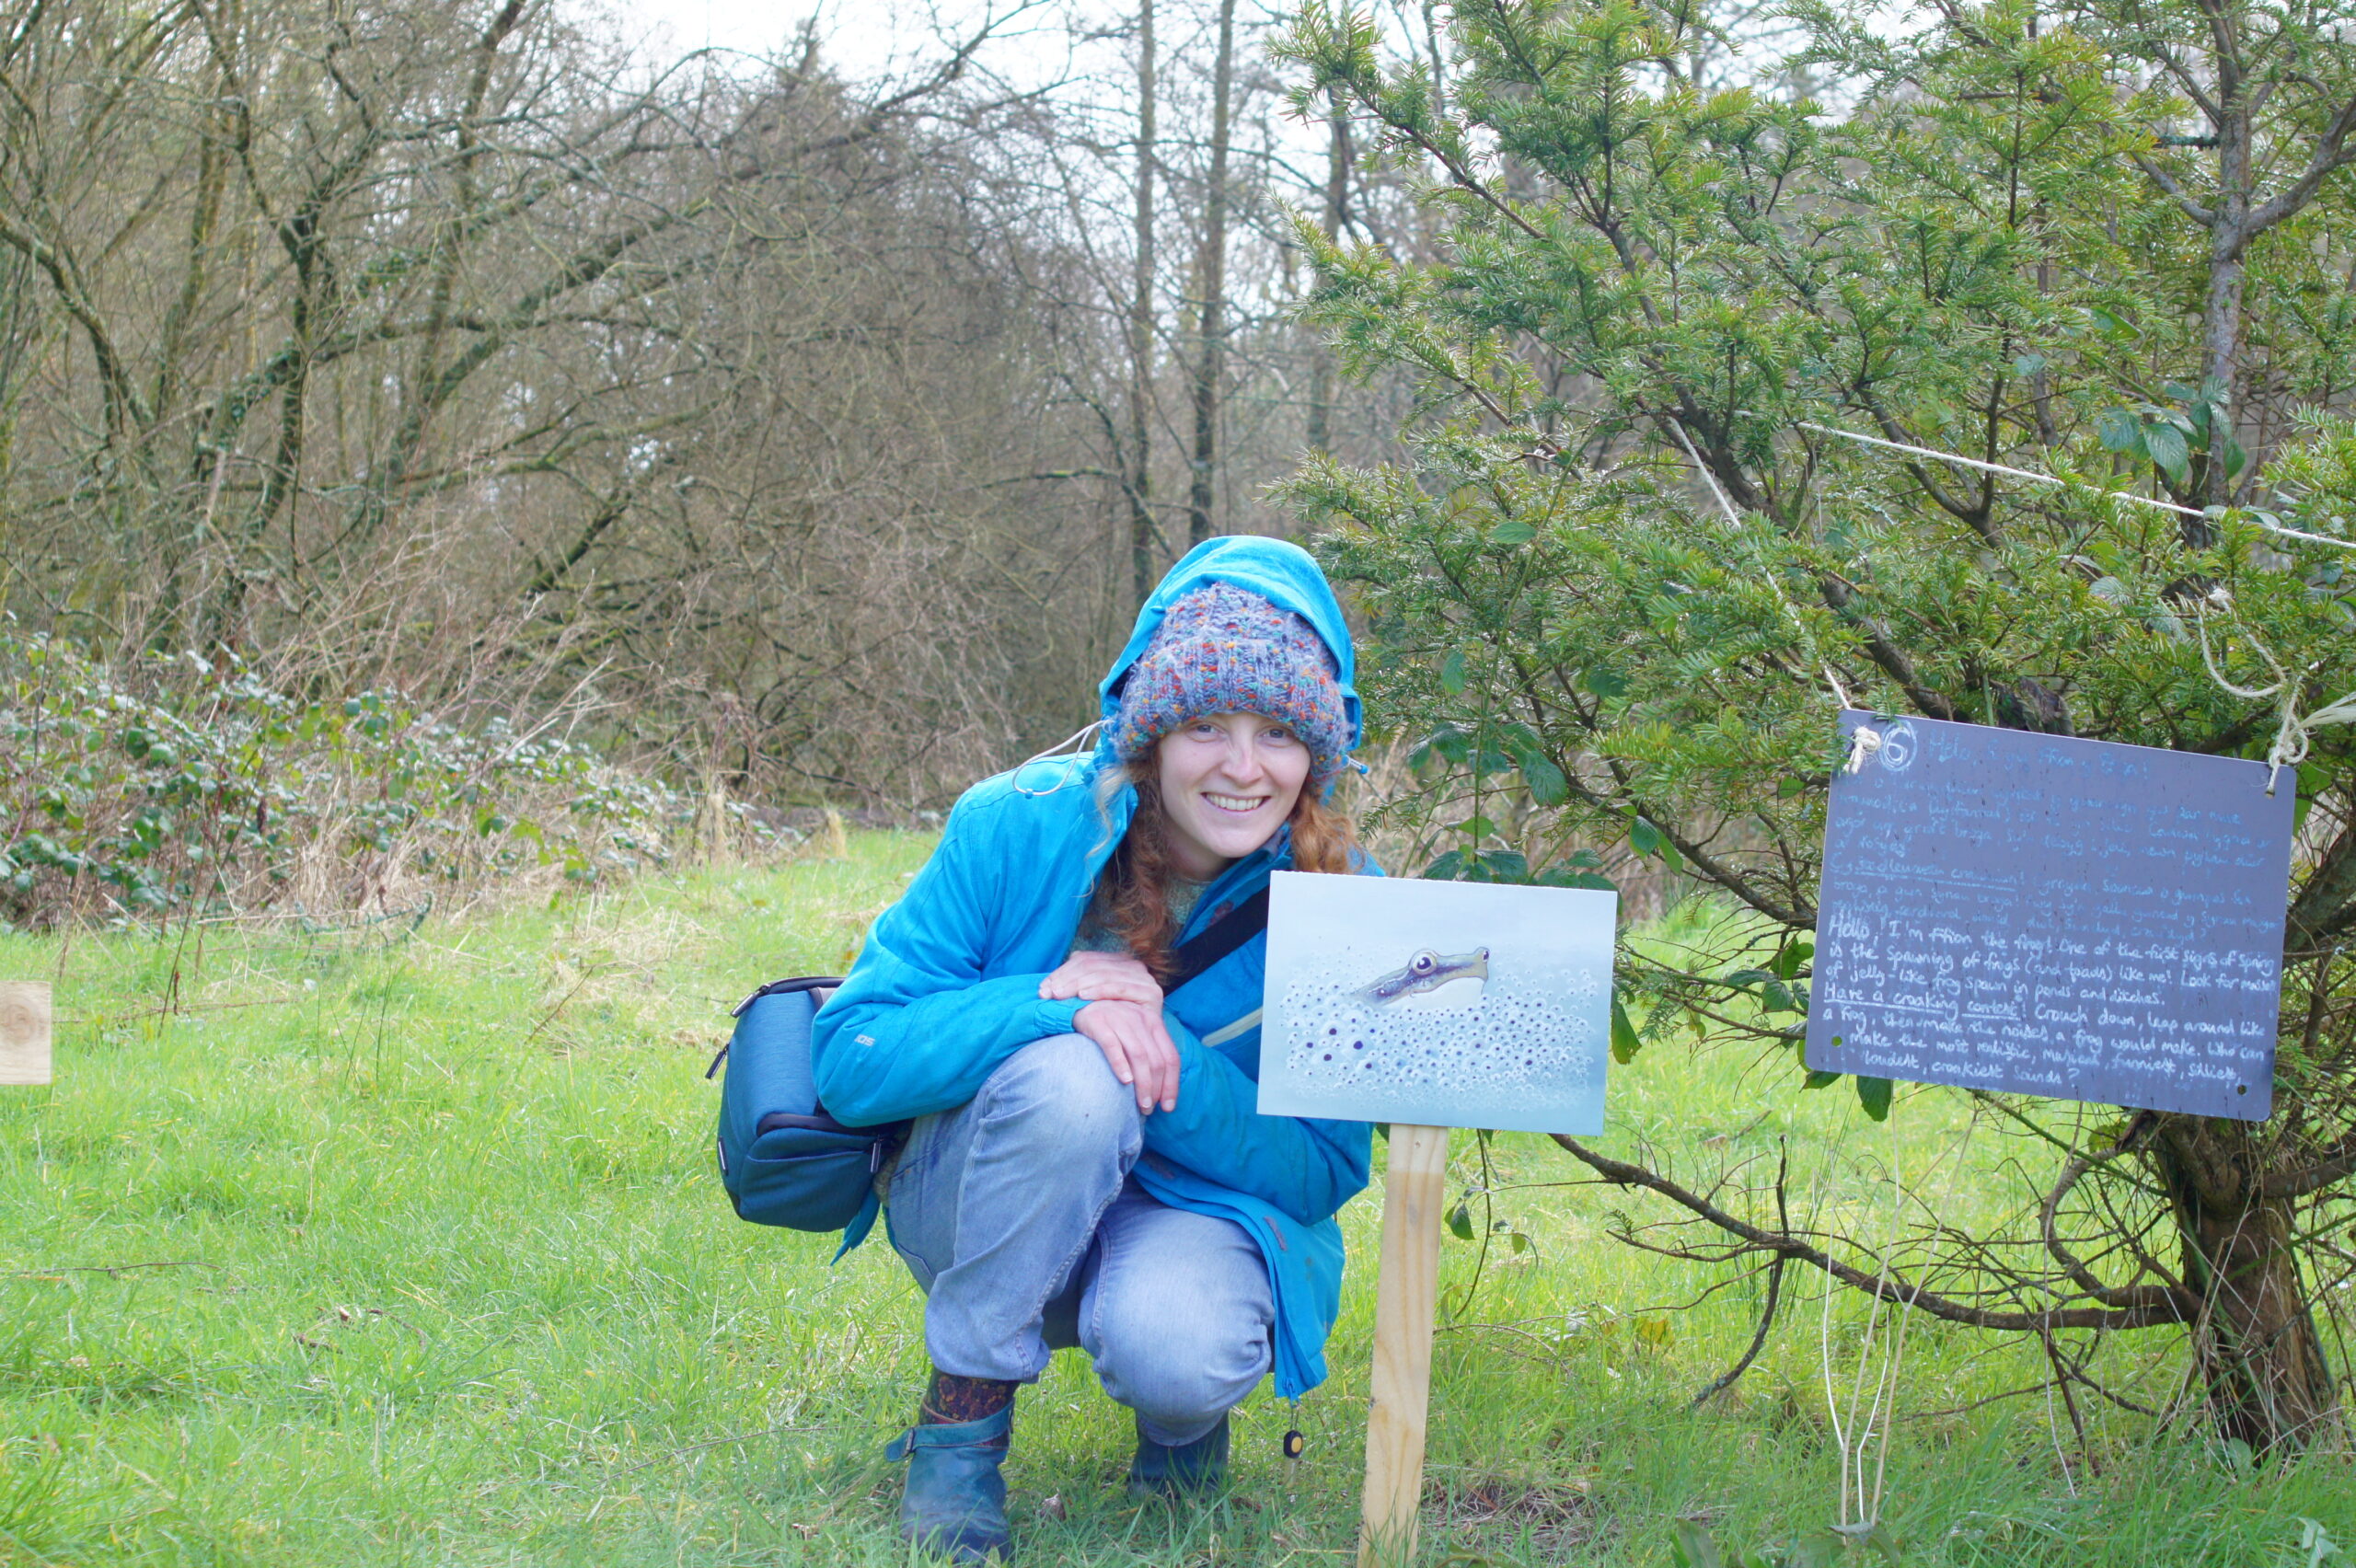
A mini tour of the trail’s artwork- featuring a very excited me!
A final closing word- the biggest thankyou ever to Colby Woodland Garden and Kate Mellor its Membership and Visitor Welcome Supervisor (and the author of this delightful trail) for the most brilliant opportunity, and the National Trust for everything they do to preserve and celebrate special places for us to visit. I think this is the proudest I’ve been of a project to date, and I can’t wait for you all to come and visit next Spring!!
P.S. – We’re all going through a bit of a rough patch at the moment, so here’s a couple of things that I’m working on through the lockdown period which will form the basis for my posts over the next couple of months. Hopefully they will be able to spread a little joy to everyone!
– Plenty of nature themed projects! Having more time to be out in the garden, myself and my partner have been busy planting veg and flowers (the National Botanic Garden of Wales are currently running a project all about wildflowers that we’ve signed up for, which may sound appealing if you like growing things: more info here!) I’ve been working on a couple of nature non-fiction projects – one a personal project called “Notes from Nature” all about UK wildlife, the other a collaboration with the lovely Gemma Tilley who runs Wild Childhood UK and posts some lovely things on (https://www.instagram.com/wildchildhooduk/)
– I’ve started a business course for artists online, which is being offered for free at the moment here. It’s really good fun, and the online community are really supportive! It’s giving me a lot of inspiration and focus for my children’s book work- which I’ll be writing an update about soon (particularly for this project!)
My love to everyone- as always, thankyou for taking the time to read my blog; stay safe, keep as well in mind and body as you can.
The AutumnHobbit
© Carina Roberts and AutumnHobbit. Unauthorized use and/or duplication of this material without express and written permission from this blog’s author and/or owner is strictly prohibited. Excerpts and links may be used, provided that full and clear credit is given to Carina Roberts and AutumnHobbit with appropriate and specific direction to the original content.