A happy sunny Spring morning to all! I want to begin this entry with a big congratulations to a fantastic degree class. The opening of our graduate show was yesterday afternoon, and I cannot describe how proud I am of everyone: people worked to their limits to conjure up a storm, and we certainly managed it. Some beautiful words were said by students and tutors alike, and there was a wonderful sense of companionship, of FAMILY in those hours: I could not have asked for a more exciting, inspiring, kind and wonderful group of people to spend the past three years of my life with. Thankyou. Think of this time not as the end, but the beginning- of exciting new adventures into the unknown!
Incidentally, if any of you lovely readers are in the Swansea area from the 12th – 17th of May, please drop by and have a peek at the public view of the show, there will be a huge variety of different illustrative subjects and styles, something for everyone! The details are on the flyer below.
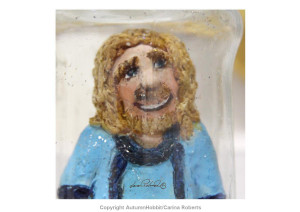
For this post, in aftermath of the frenzy of the past few weeks, I thought I would share a sneak peek of my own preparations for this exciting event: not too much, as I wouldn’t want to spoil anything for those who are already planning a trip to see the show, but a little something that will be starring in my ‘exhibit.’ This, contrary to my usual aversion to anything involving 3D materials, is a small snow/glitter globe containing our good friend, Mr. Erik Norovegr the Viking! I worked with Super Sculpey, a light and bakeable modelling clay-like substance: it does not dry in air, which makes it perfect for delicate projects like this one.
Sculpey requires around 15 minutes on 130 degrees for every quarter of an inch of thickness, so any fairly hefty projects would take forever to bake. An easy way round this is to construct a wire armature (for added support during baking as well!) and pad it out with foil, as shown in the image above.
A complete padded ‘skeleton’ of Erik stood up all on his own, with a rough idea of where the muscles, hands etc would go. Small details are easier to make up in sculpey: for example in this 10cm model, the nose, fingers, lip and hair detail.
Before adding these details, I covered the foil with sculpey (any holes showing foil might burn or singe the surrounding sculpey) – with flattened sheets of sculpey, like sheets of ‘skin’.
Next come the details- hollows for eyes to be painted in, the shaping of the nose, and the HAIR. For Erik, the hair is a very important detail- he is quite hairy! By ‘snaking’ little rolls of Sculpey (rolling them longways into little snakes) and laying them in the correct places, I begun to build up the hair.
I use a set of cake-decorating tools for delicate work on the sculpey, which is perfect for the next job- “fluffing” up the snakes to give that tousled, windswept Erik look. 


